


Learn how to trim chicken the right way by removing excess fat and connective tissue before cooking for better texture, even cooking, and easier meal prep.
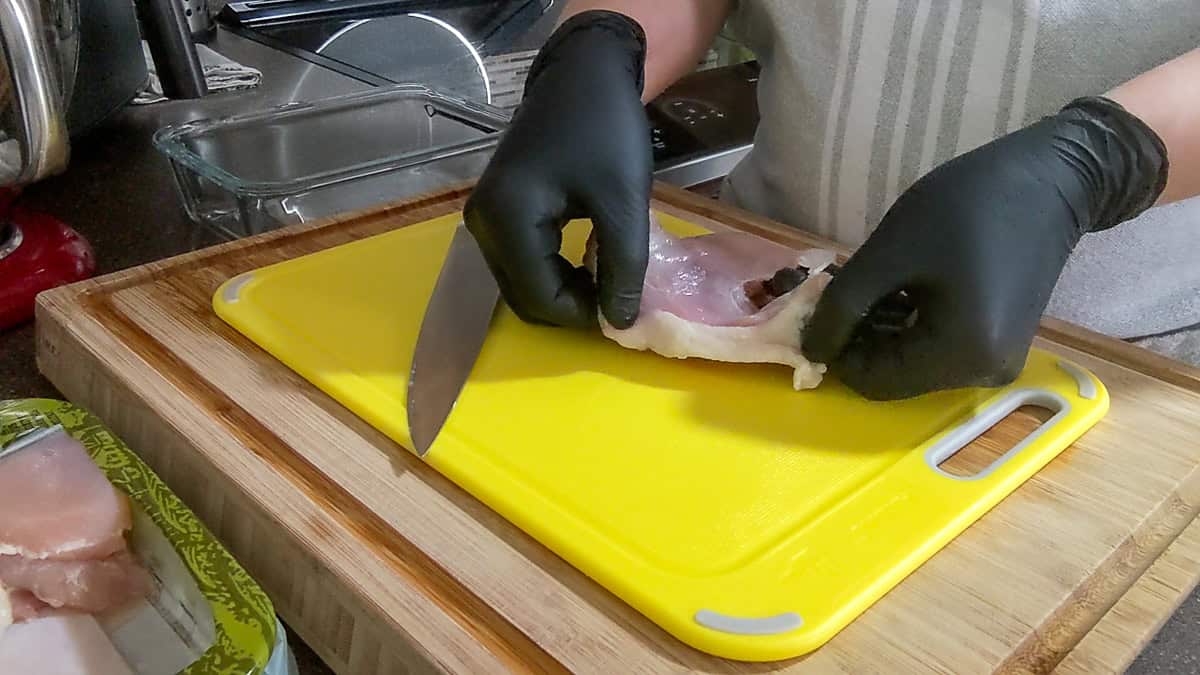
Table of Contents
Jump to:
- Why Learning to Trim Chicken Is an Essential Cooking Skill
- Quick Answer: How do you trim chicken?
- Note From Chef Maika
- Why You Should Trim Chicken Before Cooking
- What You'll Need to Trim Chicken
- Kitchen Tools I Use and Recommend
- Before You Start
- How to Trim Boneless Skinless Chicken Thighs
- How to Trim Other Cuts of Chicken
- Common Mistakes When Trimming Chicken
- Food Safety Tips for Trimming Raw Chicken
- Culinary Glossary
- Frequently Asked Questions
- Chicken Recipes
- More Cooking Tips and Tutorials
- Have a Comment or Question?
Why Learning to Trim Chicken Is an Essential Cooking Skill
When preparing boneless chicken breasts, leg quarters, or pieces of a whole chicken, removing excess fat, connective tissue, and other unwanted bits helps improve texture, promotes more even cooking, and creates a cleaner final dish.
Hence, knowing how to trim chicken is one of those simple kitchen skills that can make a noticeable difference in your cooking. Keep reading to learn the basic techniques, the tools you'll need, and practical food safety tips so you can confidently prep raw chicken.
Quick Answer: How do you trim chicken?
To trim chicken, place the raw chicken on a stable cutting board and use a sharp chef's knife to remove excess fat, connective tissue, loose skin, or cartilage while leaving as much meat intact as possible.
Then pat the chicken dry for a better grip, trim only what won't cook well, and always use safe food-handling practices by cleaning your knife, cutting board, and hands after handling raw poultry.
| Chicken Cut | What to Trim |
|---|---|
| Boneless chicken breasts | Excess fat, connective tissue, and tendons are near the center of the breast. |
| Boneless chicken thighs | Excess fat and connective tissue. |
| Bone-in chicken thighs | Excess fat and loose skin, if desired. |
| Chicken tenderloins | White tendon and excess fat. |
| Chicken wings | Wing tip (optional), loose skin, and excess fat. |
| Leg quarters | Excess fat and loose skin around the hip joint. |
| Whole chicken | Fat deposits, loose skin, and excess tissue around the cavity and joints. |
Note From Chef Maika
This guide is designed to grow over time. I'm continually adding new trimming techniques for different cuts of chicken, so check back for updated tutorials, step-by-step photos, and cooking tips.
One of the best habits you can build as a home cook is learning to recognize what should and shouldn't stay on a piece of chicken. Taking a few extra minutes to trim away excess fat, connective tissue, gristle, and other unwanted pieces means you won't end up biting into chewy, rubbery, or slimy-textured bits after cooking.

It's a small prep step that makes a big difference in the quality of your meals and helps every piece of chicken look and taste the way you want.
Why You Should Trim Chicken Before Cooking
Trimming chicken isn't about making it look perfect; it's about improving the quality of the finished dish. While some fat adds flavor and helps keep the meat moist, large pockets of fat, tough connective tissue, cartilage, and loose skin can create unpleasant bites and affect how evenly the chicken cooks.
Properly trimmed pieces of chicken, whether grilled, roasted, pan-seared, air-fried, or braised, cook more consistently and are easier to slice and serve. Taking a few minutes to prep raw chicken before seasoning or marinating also makes handling easier and gives you more control over portion sizes.
Benefits of Trimming Chicken
- Creates a better texture with fewer chewy or rubbery bites.
- Removes excess fat that won't fully render during cooking.
- Helps chicken cook more evenly.
- Makes seasoning and marinades adhere more evenly.
- Produces cleaner-looking portions for serving.
- Makes slicing cooked chicken easier.
- Helps identify bones, cartilage, or connective tissue before cooking.
- Builds confidence with basic knife skills and chicken preparation.
Recommended Reads
- How to Cut Up a Whole Chicken | Step-by-Step Guide
- How to Prep Collard Greens: Complete Beginner's Guide
- How to Prevent Cross-Contamination in Your Kitchen
- How to Marinate Chicken: Tips, Quick Methods & Flavorful Shortcuts
What You'll Need to Trim Chicken
You don't need specialized butcher equipment to trim chicken at home. A few basic kitchen tools and good food safety habits are all it takes to prep chicken safely and efficiently. Before you begin, make sure your work surface is clean, your cutting board is stable, and your knife is sharp.
Essential Equipment
- Sharp chef's knife
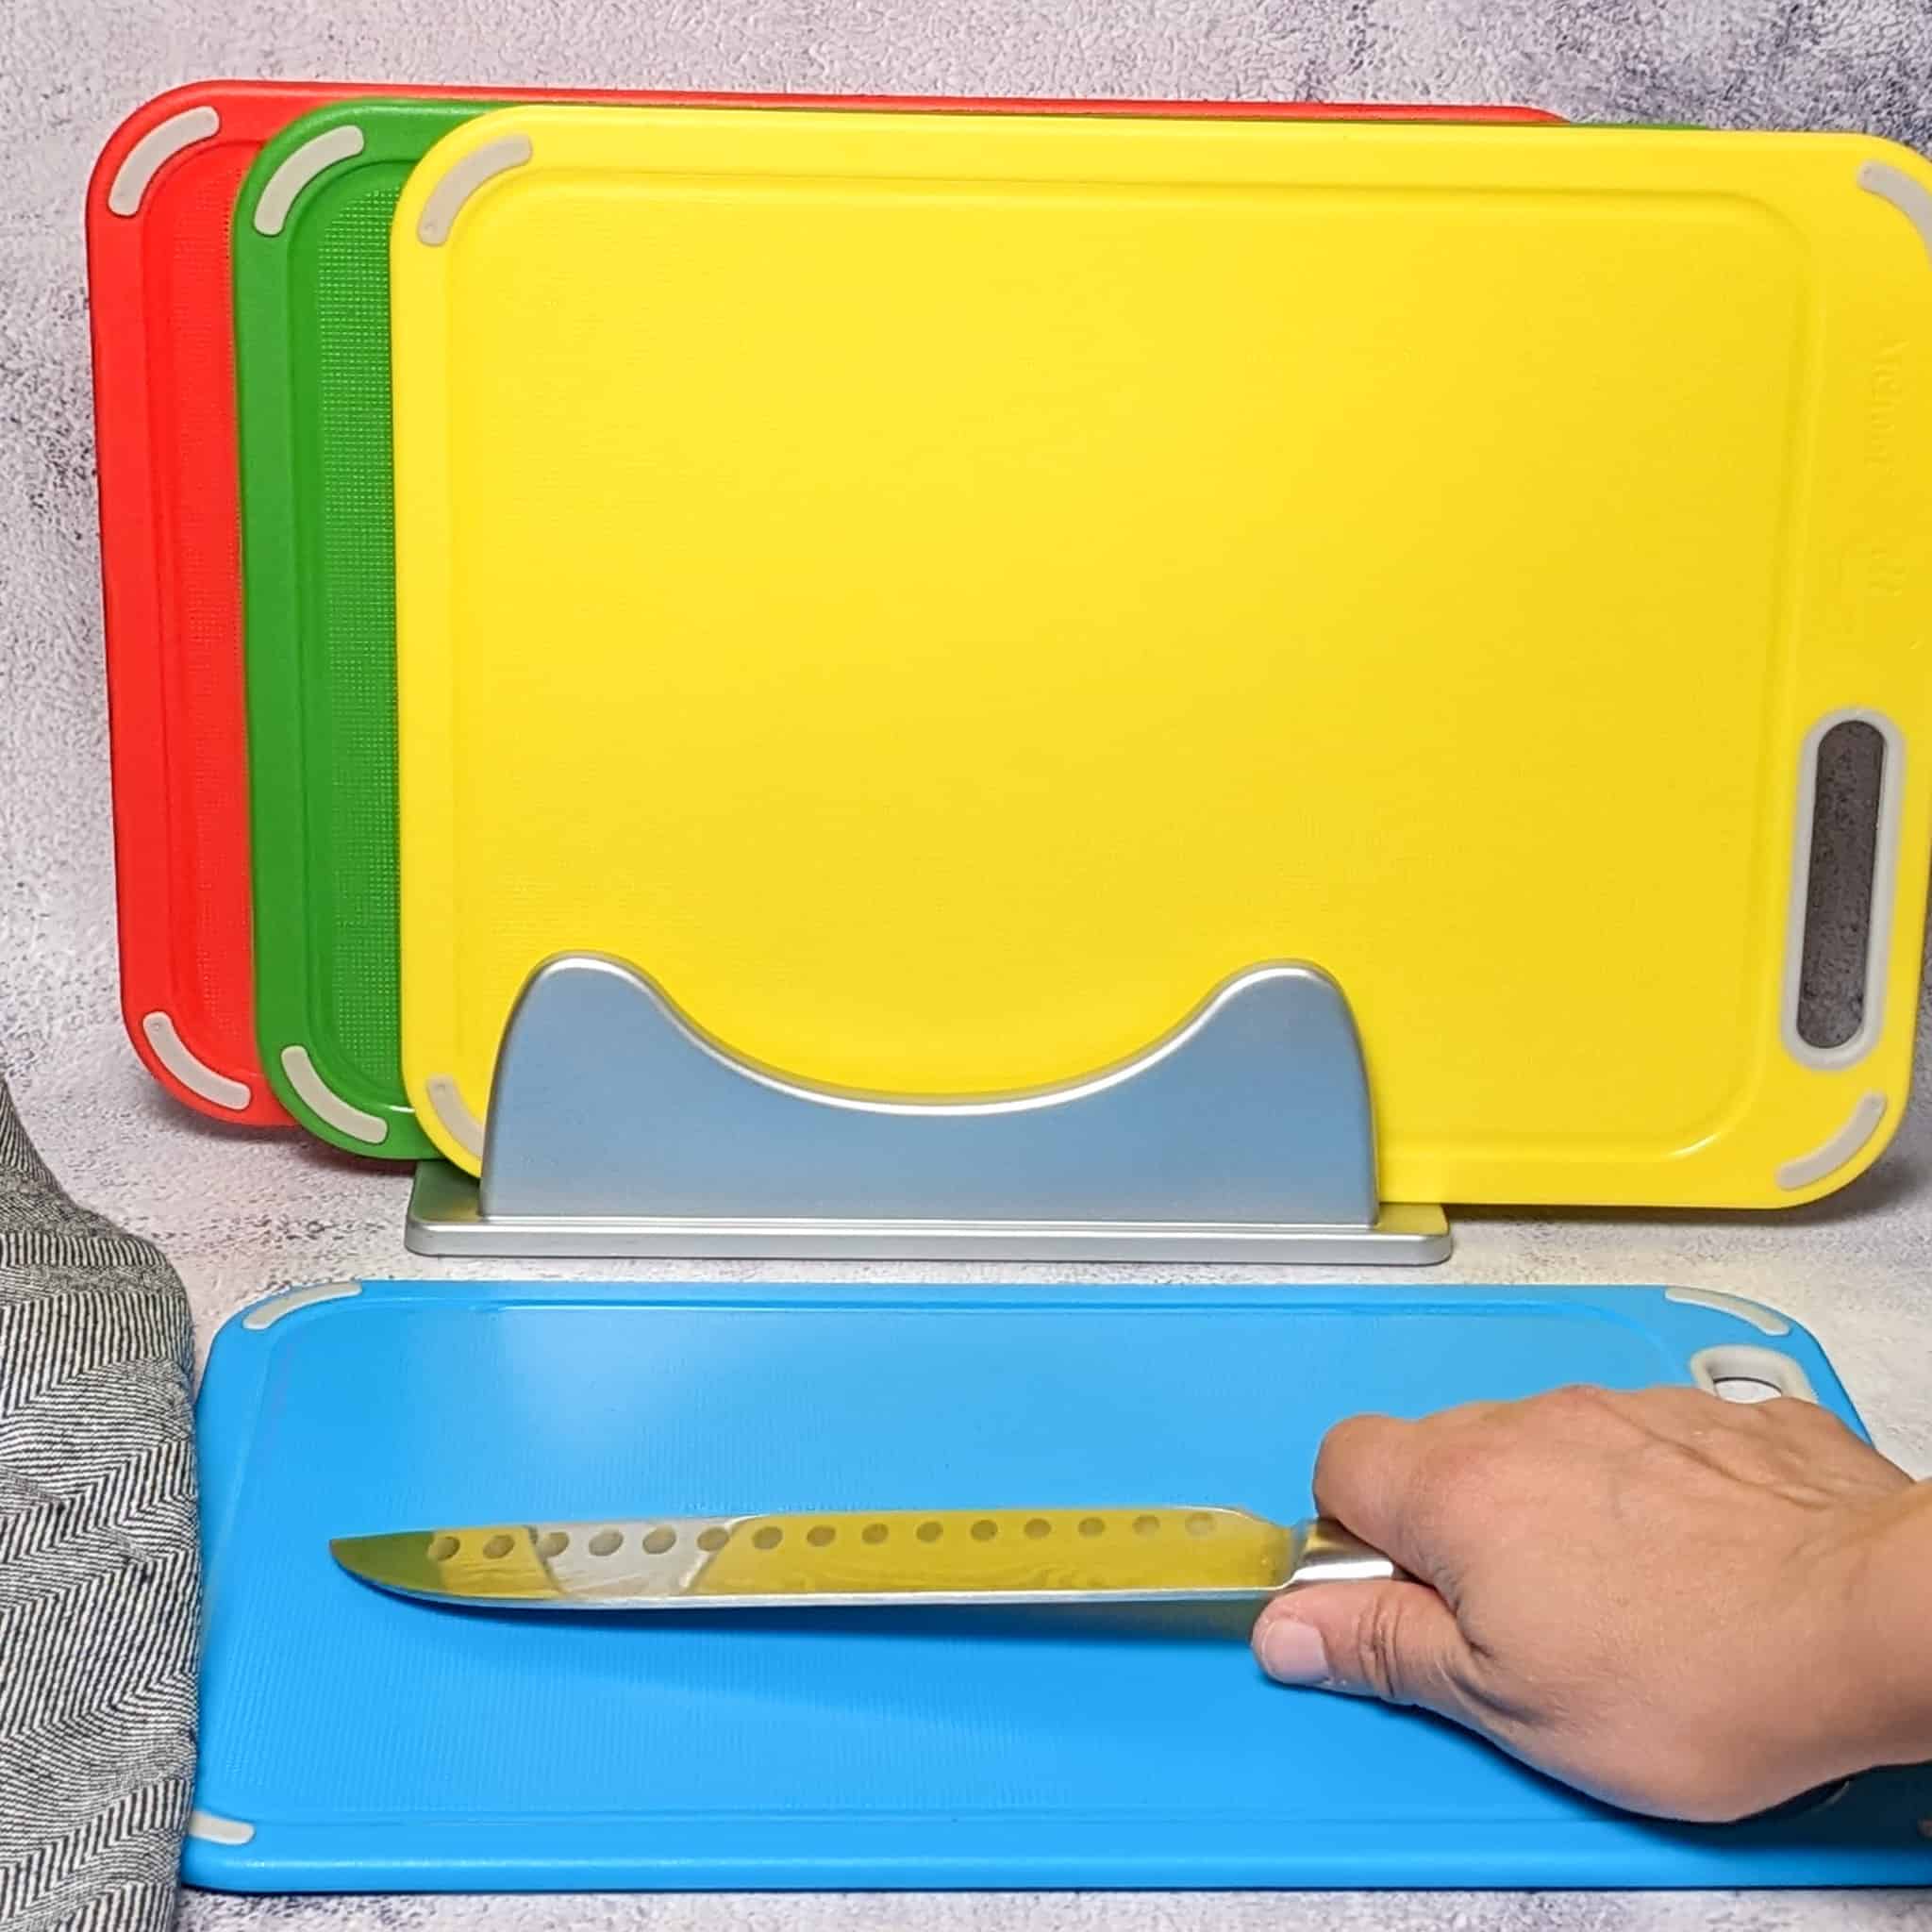
- Stable cutting board (preferably color-coded for raw poultry)
- Paper towels for drying the chicken
- Disposable gloves (optional)
- Damp towel or non-slip mat under the cutting board
- Small bowl or plate for trimmed scraps
- Sanitizing cleaner for your work surface
Kitchen Tools I Use and Recommend
These are some of the kitchen tools I use. If you're building your kitchen setup or upgrading your tools, these are great places to start. More Kitchen Must-Haves - Find other tools I use here.
My Review: The PAUDIN 8-inch Chef's Knife is an absolute standout in both sharpness and craftsmanship. It stays incredibly sharp through regular use, making prep work effortless. The high-carbon stainless steel blade showcases PAUDIN’s attention to detail, while the ergonomic handle provides a comfortable grip for extended use. Despite its premium feel, this knife is impressively affordable, offering exceptional quality without the high price tag. That’s why I’ve recently switched all my knives to PAUDIN—they truly deliver on durability, beauty, and performance. If you want a reliable, well-crafted knife at a great value, this is the one to get!

My Review: I absolutely love this Plastic Cutting Board Set of 4 with a Storage Stand! The color-coded boards are a lifesaver for preventing cross-contamination, especially when I’m switching between meats and veggies. The plastic is super sturdy, so I don’t have to worry about it flexing while I’m chopping. What really stands out for me is how easy they are to use after chopping. I slide everything straight into the pot, which keeps my kitchen clean and saves time. Cleanup is such a breeze, too; they go right into the dishwasher without any warping. Plus, the storage stand keeps everything neat and organized. These boards have made cooking so much easier and more enjoyable!
My Review: I highly recommend the ForPro Professional Collection Disposable Nitrile Gloves. They’re food-safe, powder-free, and latex-free, making them perfect for cooking. I’ve ordered these several times and use them both personally and for my videos. The gloves are durable and chemically resistant, offering excellent protection when handling raw ingredients. When pressed for time, they’re my go-to for preventing cross-contamination without needing to wash my hands constantly. A must-have for any busy kitchen!

Before You Start
- Wash your hands thoroughly or put on a clean pair of disposable gloves.
- Set up a dedicated cutting board for raw chicken.
- Pat the chicken dry with paper towels for a better grip while trimming.
- Inspect each piece for excess fat, connective tissue, cartilage, and loose skin.
- Keep a bowl nearby for scraps to keep your workspace organized.
- Clean and sanitize your knife, cutting board, and countertop immediately after handling raw chicken.
How to Trim Boneless Skinless Chicken Thighs
Boneless, skinless chicken thighs are among the easiest cuts to trim because there are no bones or skin to work around. Most of the trimming involves removing excess fat and tough connective tissue while keeping as much flavorful meat as possible. The goal isn't to make the thigh perfectly smooth; it's simply to remove the parts that won't have a pleasant texture after cooking.
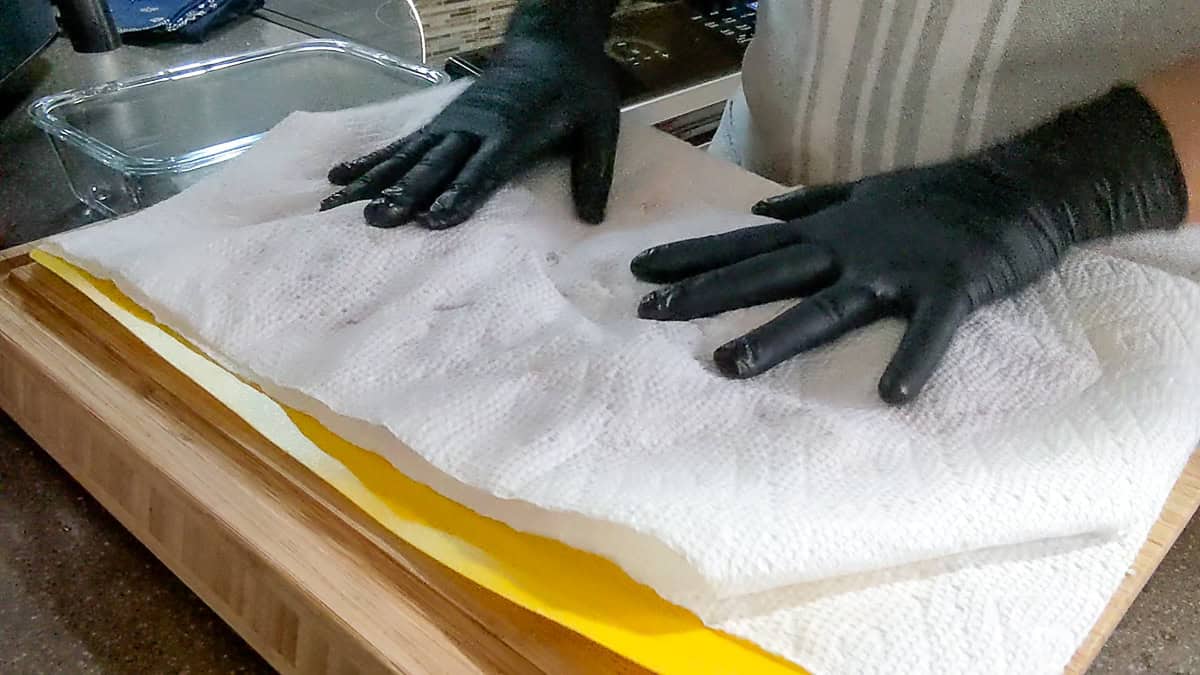
Step 1: Pat the Chicken Dry
Use paper towels to pat both sides of the chicken dry gently. Removing excess moisture gives you a better grip, helps prevent the chicken from sliding on the cutting board, and makes it easier to see where the fat and connective tissue are located.
Step 2: Identify What Needs Trimming
Lay the chicken flat on the cutting board and look for:
- Thick white or yellow fat deposits
- Tough white connective tissue
- Loose flaps of fat hanging from the edges
- Small pieces of cartilage, if present
Leave thin streaks of fat that are embedded in the meat, as they'll help keep the chicken juicy during cooking.
Step 3: Pull Before You Cut
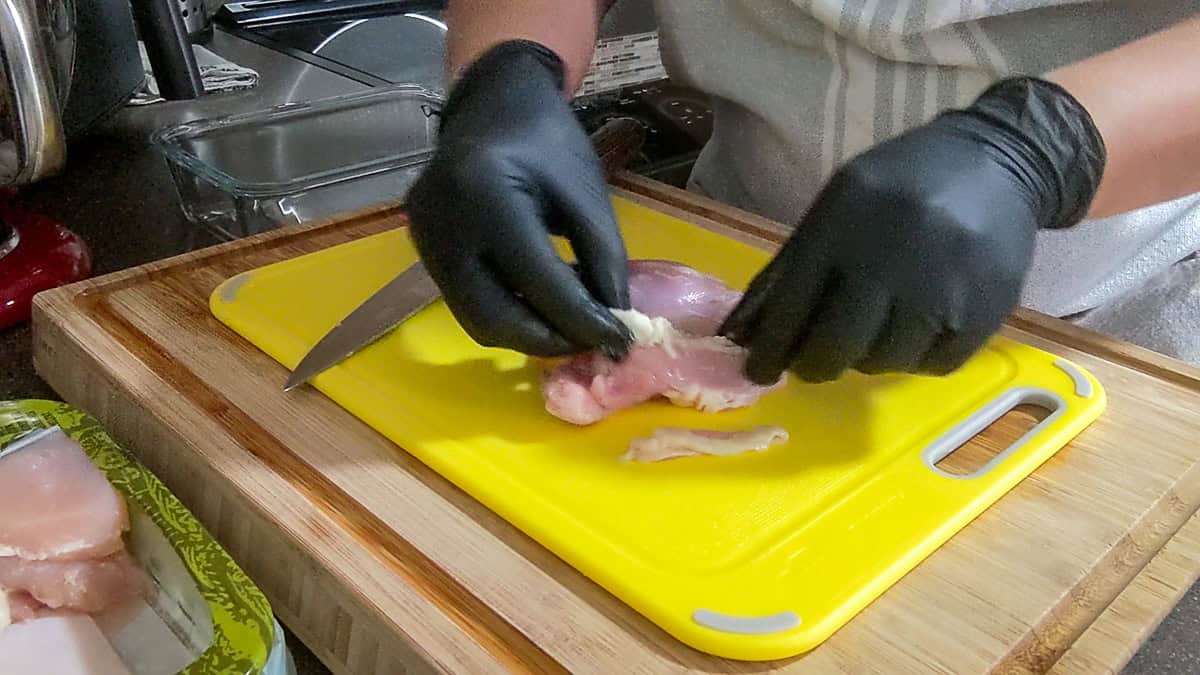
If a piece of fat is loose, gently pull it away from the meat with your fingers. This often removes it cleanly, requiring little cutting. However, if the fat won't separate easily, use the tip of your sharp chef's knife to trim it away with short, controlled cuts.
Step 4a: Trim Conservatively
Remove only the excess fat and connective tissue that won't cook pleasantly. Avoid shaving large portions of meat to make the chicken look uniform, as this reduces yield without improving the final dish.
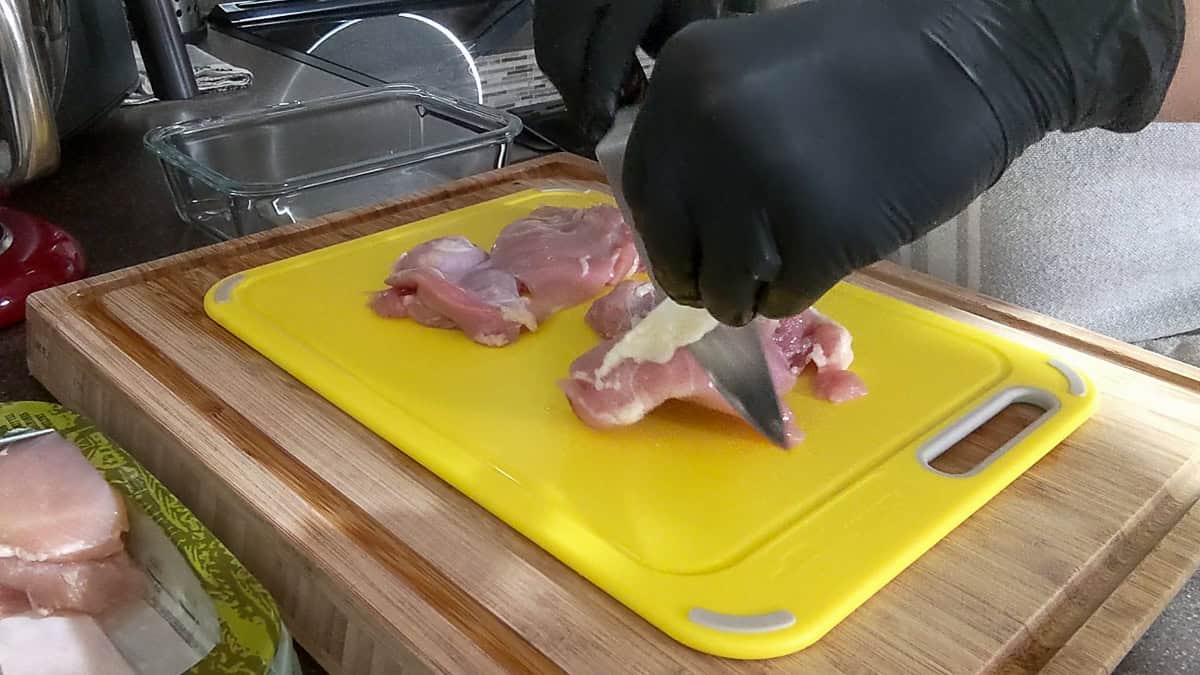
Step 4b: Alternative Trim Technique
On the smooth side of the chicken thigh, look for the thick white fat line that won't pull off, then flip it outward and gently scrape it flat with your knife to expose the seam. Hold your sharp knife at about a 40-degree angle and use short, controlled cuts to slice the fat away while keeping as much meat intact as possible.
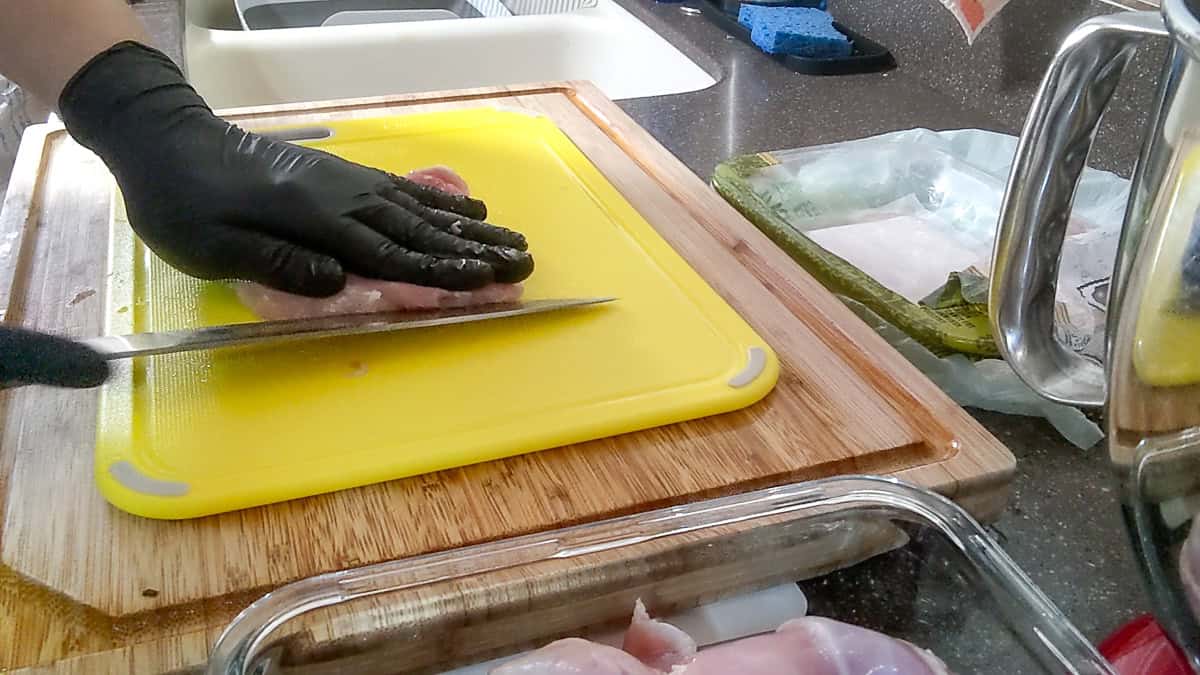
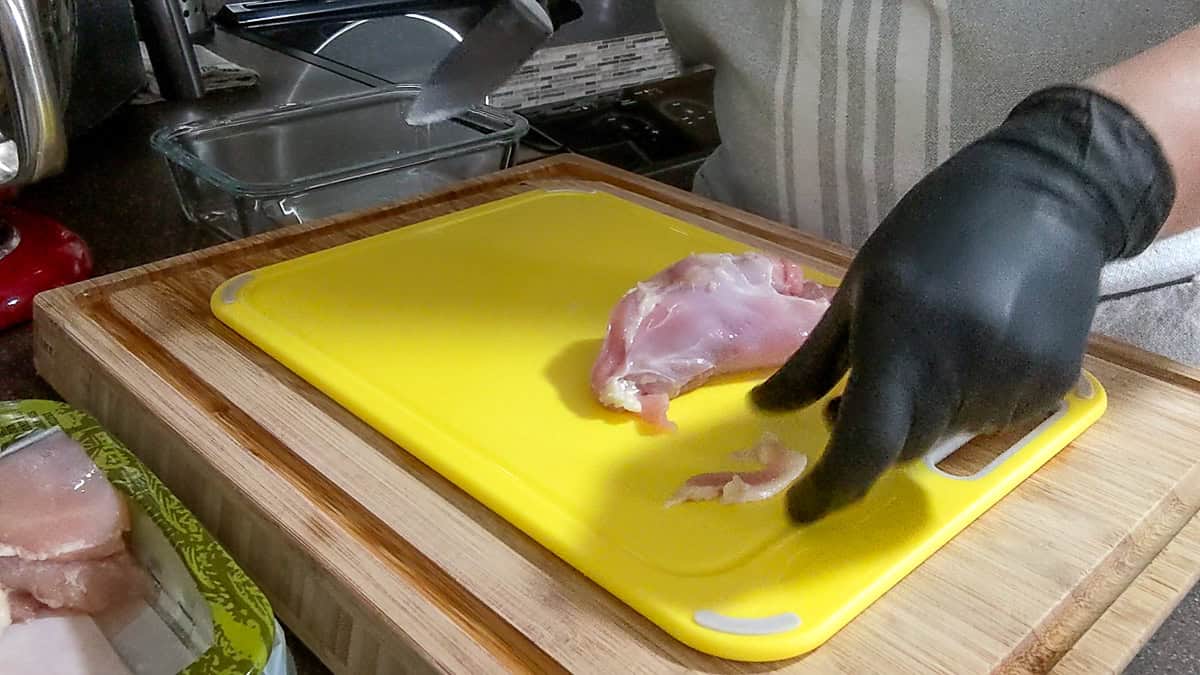
Step 5: Inspect Before Cooking
Once trimmed, give the chicken one final look for any remaining tough tissue or loose fat. Pat it dry again if needed before seasoning, marinating, or cooking. The chicken is now ready for your favorite recipe.
How to Trim Other Cuts of Chicken
Once you're comfortable trimming boneless skinless chicken thighs, the same basic techniques apply to other cuts. The main difference is knowing where fat, connective tissue, bones, and cartilage are commonly found.
As you gain experience, you'll become faster at identifying what should stay for flavor and what should be removed to improve the eating experience.
Plus, since this is a live blog, the bottom section will be updated with tutorials. So bookmark and subscribe for updates.
Chicken Breasts
Trim excess fat around the edges and remove any visible connective tissue. If the tenderloin is attached, you can leave it on or remove it for even cooking. Occasionally, you'll find a tough white tendon near the center of the breast or attached to the tenderloin that can be removed if desired.
Chicken Tenderloins
The most common trimming task is removing the long white tendon. It won't fully break down during cooking and can remain chewy, so many cooks prefer to remove it before seasoning.
Chicken Wings
Trim the wing tips if your recipe doesn't call for them in the stock. Remove any loose skin or large pieces of excess fat while leaving the rest of the wing intact for the best flavor.
Leg Quarters
Trim excess fat around the hip joint and remove any loose skin or tissue that extends beyond the meat. Leave the rest intact for roasting, grilling, or braising.
Whole Chicken
When preparing a whole chicken, remove excess fat from the body cavity, around the tail, and near the neck opening. If you're breaking the chicken into pieces, trim each cut individually as you work through the bird. Read more on How to Cut Up a Whole Chicken | Step-by-Step Guide.
Common Mistakes When Trimming Chicken
Trimming chicken is a simple skill, but a few common mistakes can make prep more difficult or affect the quality of your finished dish. Focus on removing only what won't cook pleasantly while handling raw chicken safely.
Removing Too Much Meat
It's easy to mistake meat for fat when you're just starting. Trim conservatively and remove only thick fat deposits, tough connective tissue, and cartilage. Leaving a small amount of fat on the chicken helps keep it flavorful and juicy.
Using a Dull Knife
A dull knife requires more pressure and is more likely to slip. A sharp chef's knife makes cleaner cuts, improves control, and helps you trim meat precisely without waste.
Skipping the Paper Towels
Patting the chicken dry before trimming gives you a better grip and makes the fat and connective tissue easier to see. It also prepares the chicken for better browning when it's time to cook.
Trying to Make Every Piece Perfect
Every piece of chicken looks different. There's no need to remove every tiny streak of fat or create perfectly uniform pieces. Focus on trimming only the parts that will have an unpleasant texture after cooking.
Forgetting Food Safety
Always use a dedicated cutting board for raw chicken, avoid cross-contamination, and thoroughly wash your hands, knife, cutting board, and work surface after trimming. Safe preparation is just as important as proper trimming.
Food Safety Tips for Trimming Raw Chicken
Handling raw chicken safely is just as important as trimming it correctly. Following a few simple food safety practices helps reduce the risk of cross-contamination and keeps your kitchen clean while you prepare your meal.
Use a Separate Cutting Board
Dedicate a cutting board to raw poultry whenever possible. A color-coded cutting board makes it easy to identify which board is used for raw chicken and helps prevent cross-contamination with ready-to-eat foods.
Wash Your Hands Often
Wash your hands with soap and warm water before and after handling raw chicken. If you choose to wear disposable gloves, change them whenever they become contaminated or before touching other kitchen surfaces.
Don't Wash Raw Chicken
The USDA recommends not rinsing raw chicken because water can spread bacteria around your sink, countertops, and nearby utensils. Instead, pat the chicken dry with paper towels if needed, then discard the towels immediately.
Clean and Sanitize Your Workspace
After trimming, wash your knife, cutting board, bowls, and any surfaces that came into contact with raw chicken using hot, soapy water. Follow up with a food-safe sanitizer if appropriate for your kitchen.
Cook Chicken to a Safe Temperature
Once your chicken is trimmed and cooked, use an instant-read thermometer ↗ to verify it has reached a safe internal temperature of 165°F (74°C) in the thickest part of the meat before serving. This is the most reliable way to know your chicken is fully cooked.
Culinary Glossary
This section provides concise definitions of key ingredients and techniques to enhance understanding and improve cooking skills related to this recipe.
Chicken Parts
- Cartilage: A smooth, flexible tissue found near joints that doesn't soften much during cooking and is often trimmed away.
- Connective Tissue: Strong fibers that hold muscles together. Some connective tissue becomes tender during long cooking, while tougher pieces are best removed before cooking.
- Excess Fat: Large pockets or flaps of fat attached to the chicken that can be trimmed to improve texture while leaving enough fat for flavor.
- Gristle: A chewy combination of cartilage and connective tissue that many cooks remove before cooking because it remains tough.
- Loose Skin: Skin that hangs beyond the meat can be trimmed if it won't contribute to the final dish.
- Silver Skin: A thin, shiny membrane of connective tissue that can become tough when cooked and is commonly removed from poultry and meat.
- Tendon: A tough band of connective tissue that attaches muscle to bone. Chicken tenderloins often contain a noticeable white tendon.
Techniques & Food Safety
- Cross-Contamination: The spread of harmful bacteria from raw chicken to other foods, surfaces, or utensils. Read more, How to Prevent Cross-Contamination in Your Kitchen.
- Pat Dry: Removing surface moisture with paper towels before trimming or cooking to improve grip and help the chicken brown more evenly.
- Trim: To remove excess fat, connective tissue, cartilage, or other unwanted parts while keeping as much meat as possible.
Frequently Asked Questions
Here is a list of common questions I have answered. If you have any questions, please write them in the comments below.
No. Leave small amounts of fat attached to the meat, as they help keep the chicken moist and flavorful during cooking. Remove only large pockets of fat, tough connective tissue, cartilage, and loose pieces that won't have a pleasant texture.
Not always, but it's recommended. Many boneless, skinless chicken thighs have excess fat or connective tissue that can become chewy after cooking. A quick trim helps improve the texture without removing much meat.
No. The USDA advises against washing raw chicken because it can spread bacteria around your kitchen through splashing water. Pat the chicken dry with paper towels if needed.
A sharp chef's knife is the best all-around choice for most home cooks. A small utility or boning knife also works well for trimming around connective tissue and other tight areas.
Yes. Once trimmed, place the chicken in an airtight freezer-safe container or freezer bag, remove as much air as possible, label it with the date, and freeze promptly for the best quality.
Chicken Recipes
Looking for chicken recipe ideas? Try these:
- Crispy Garlic Parmesan Baked Chicken
- Kimchi Fried Rice Recipe | Simple Base You Can Build On
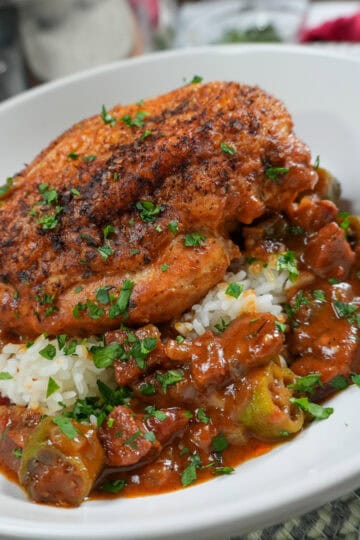
- Pan-Roasted Chicken and Andouille Sausage Gumbo
- Fresh Berry Apple Pecan Chicken Salad with Goat Cheese



More Cooking Tips and Tutorials
If you found this tutorial helpful, you'll love my Cook's Notebook collection. From knife skills and flavor bases to time-saving tricks and essential equipment guides, this section is packed with chef-tested lessons to help you cook with confidence.
- Seasonal Produce Guide: What Fruits and Vegetables Are in Season?
- How to Roast Food: The Fundamental Principles of Roasting
- 2026 Fall Seasonal Produce Guide: Fruits and Vegetables to Enjoy This Season
- Indian Cooking Techniques That Changed How I Think About Food


Chef Maika Frederic-Liebman
Chef and Educator
Professionally trained Haitian-American chef Maika Frederic created Just Maika Cooking, where she shares globally inspired recipes, cooking techniques, ingredient guides, and food safety tips to help home cooks become more creative and confident in the kitchen. Combining years of professional culinary experience with a passion for teaching, she makes global flavors approachable through practical, accessible instruction for cooks of every skill level.
SUBSCRIBE: 👈To my YouTube Channel to Get Notifications of New Videos.
Have a Comment or Question?
If you have a question or comment about this post, please post it below. You will receive a prompt response. It also helps our other readers to stay informed. Thanks!

Leave a Reply