


Learn the easiest way to cut up a whole chicken using a sharp knife, a cutting board, and simple step-by-step techniques. This beginner-friendly guide shows home cooks how to separate the different parts of a whole chicken from breast meat to chicken legs while saving every piece for cooking and stock.
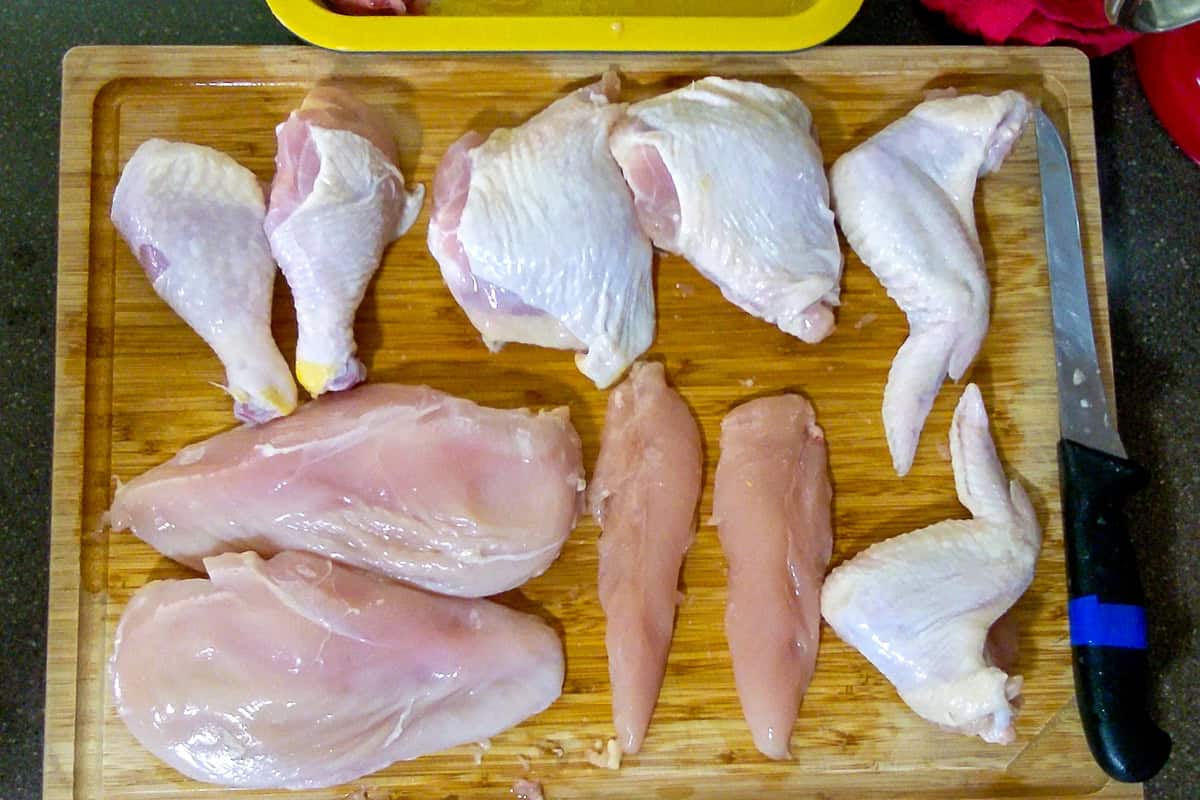
Table of Contents
Jump to:
- Benefits of the Whole Chicken
- Tools You'll Need
- Kitchen Must-Haves Reviews
- Culinary Glossary
- Instructions and Anatomy of a Whole Chicken
- 1. Set Up Your Workspace
- 2. Remove from the Breast Bone
- 3. Remove the Halves
- 4. Seperate Breasts from the Leg Quarters
- 5. Separate the Breast and Wing
- 6. Divide the Leg Quarters
- 7. Trim and Save
- Storage & Freezing Instructions
- Food Safety Tips
- 5 Quick Prepping Tips
- Frequently Asked Questions
- Chicken Recipes
- Cooking Tips and Tutorials
- Have a Comment or Question?
Benefits of the Whole Chicken
Learning to cut up a whole chicken is one of the most useful skills any home cook can master. With a sharp knife, a sturdy cutting board, and a few simple techniques, you can transform a whole bird into perfectly portioned chicken parts ready for meal prep, stock, or your next chicken salad.
It's the easiest way to save money, learn about the different parts of a whole chicken, and gain confidence in your food preparation.
Why It's Worth Doing
Buying a whole bird from the grocery store gives you more value than pre-cut packs of chicken breasts, thighs, or drumsticks. You get both white and dark meat options, plus the bony portion of the chicken for making homemade chicken stock or bone broth. Once you understand how each joint works, the entire process becomes much easier than it looks.

Even in culinary school, chefs start here learning to follow the rib cage, find the line of white fat, and use the tip of their knife to make precise cuts. Get more chicken prepping skills on my hub.
Tools You'll Need
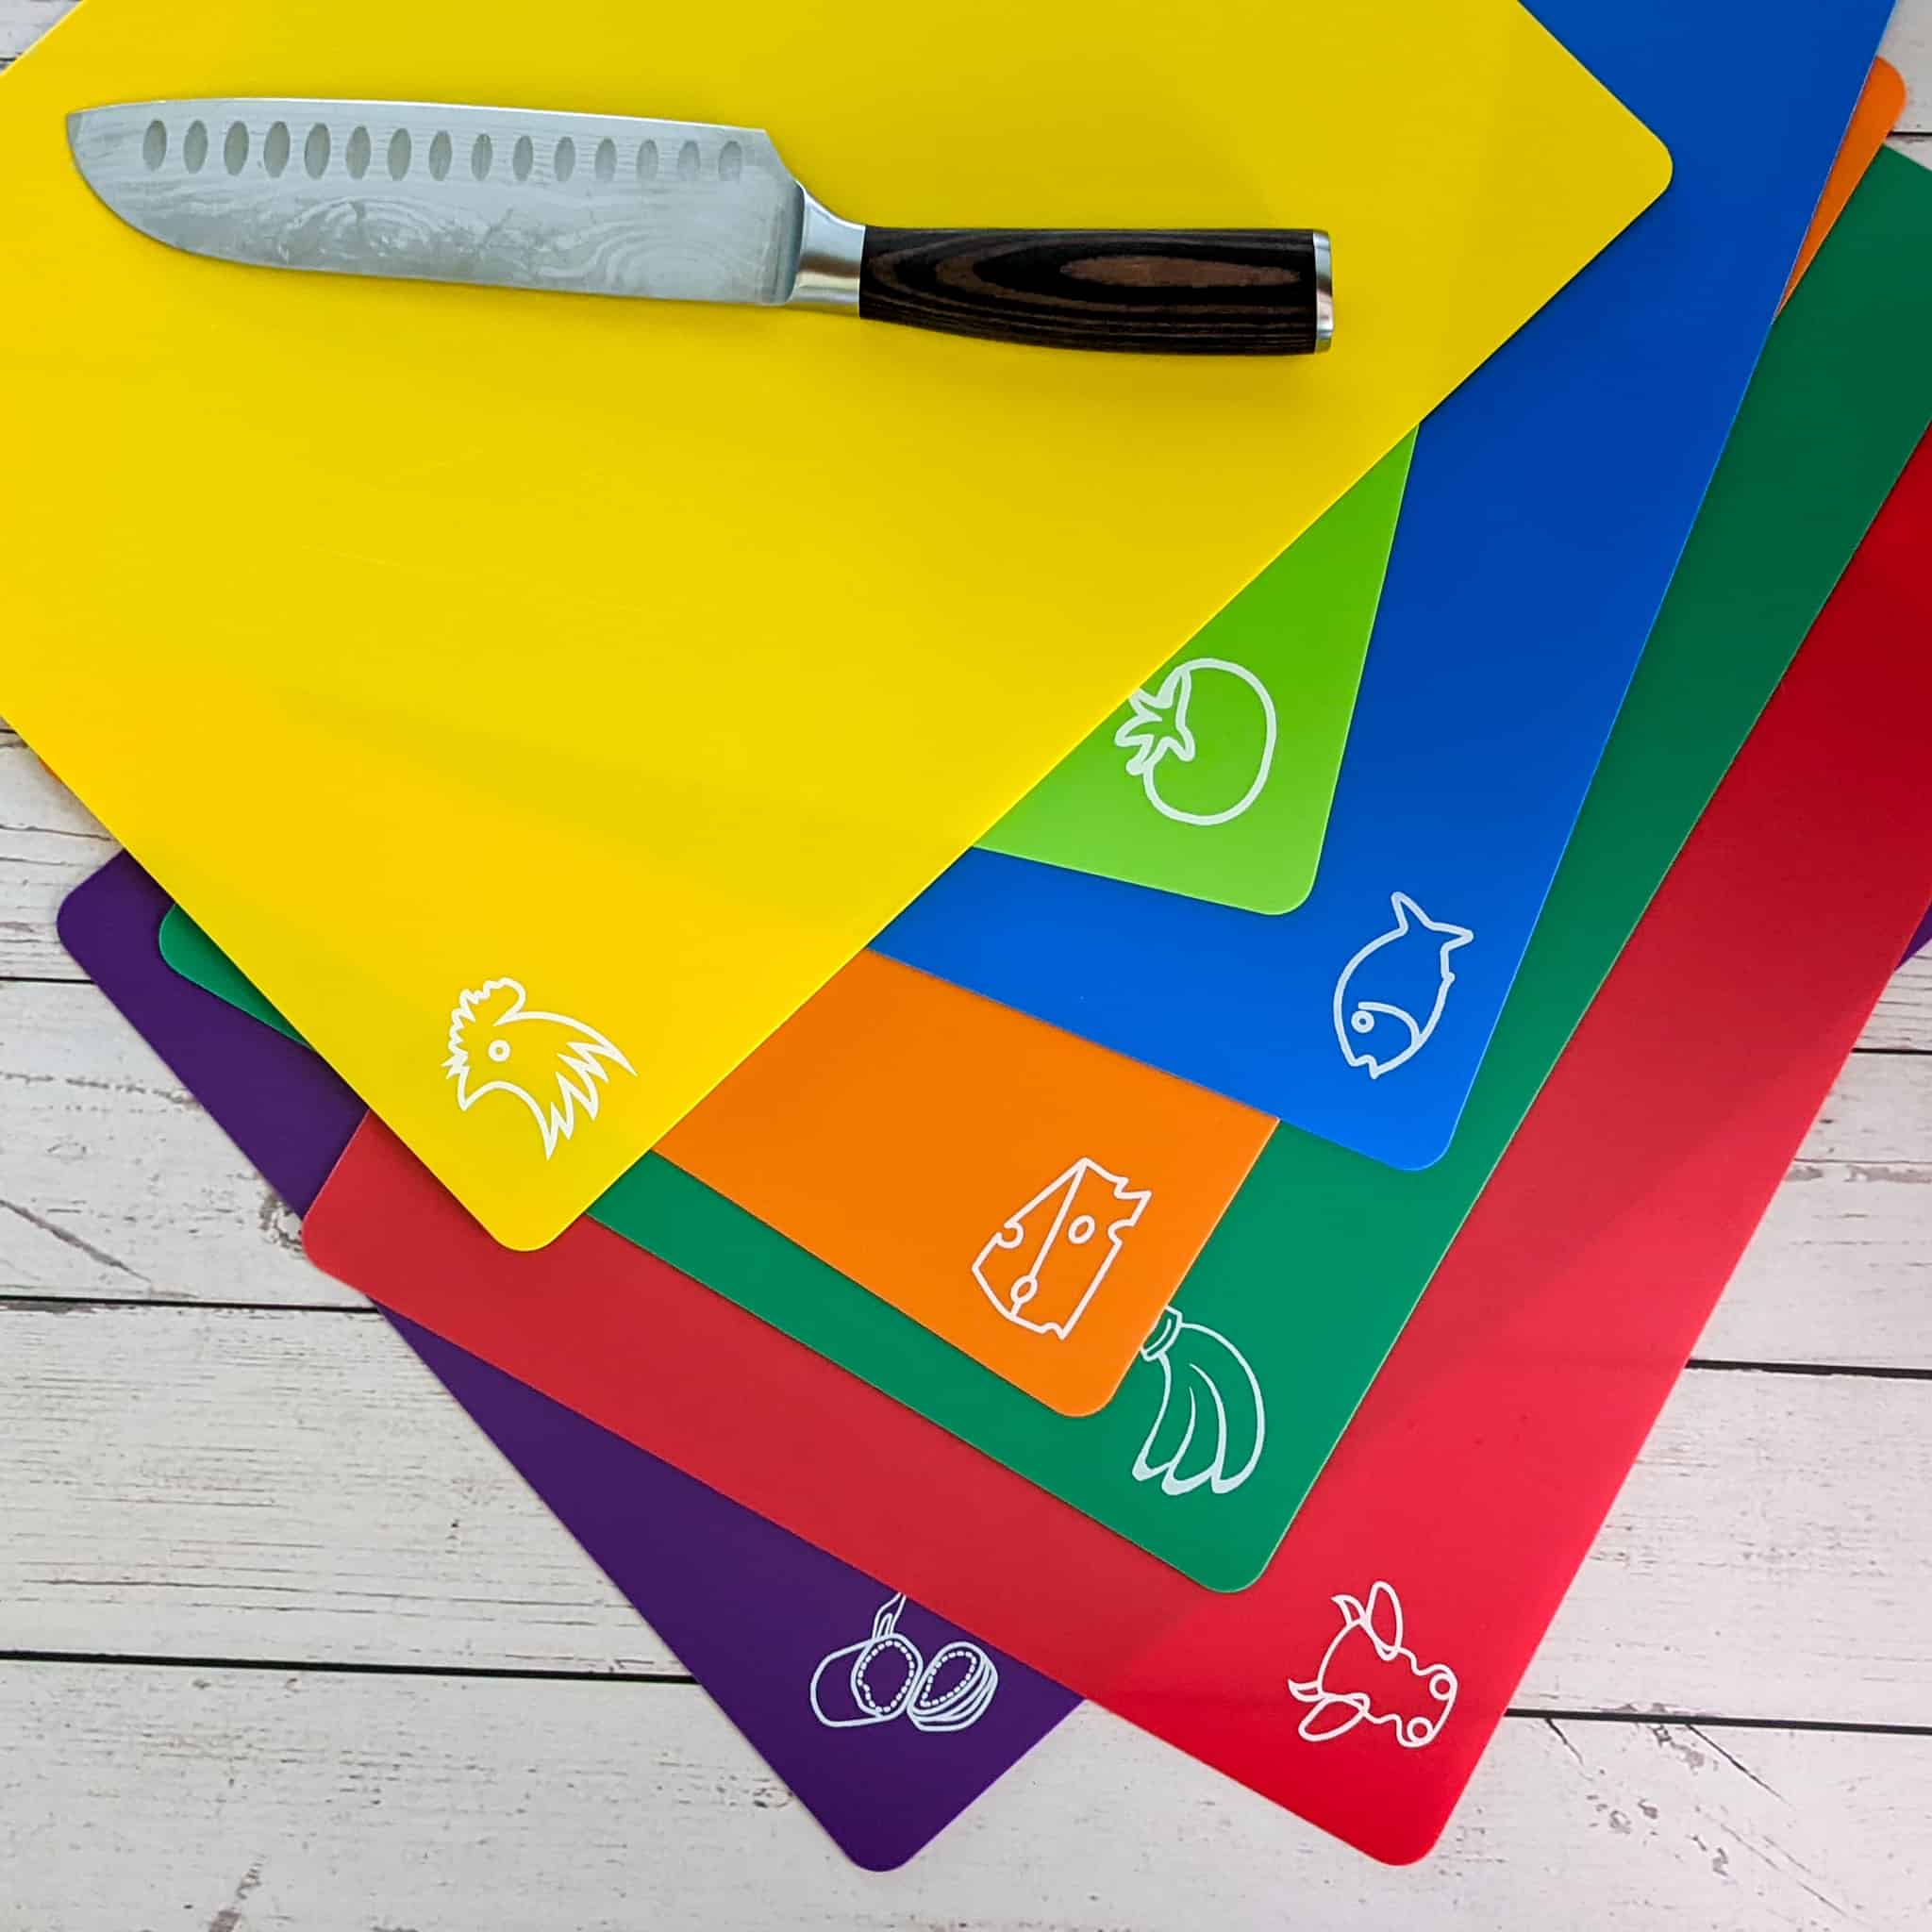
- Cutting Board - Use one made for raw poultry to prevent cross-contamination.
- Boning Knife - A good knife with high-carbon steel and a strong edge makes clean cuts. It is ideal for delicate areas like around the rib cage. It is also a flexible design for cutting around bones and joints. It allows you to separate chicken parts precisely without damaging the meat.
- Ultra-Sharp Chef's Knife - (Optional) For heavier cuts or slicing through joints, a show-stopping chef's knife with a balanced blade's spine will give you better control.
- Kitchen Shears or Kitchen Scissors - Great for trimming wing tips or separating the back of the chicken.
- Paper Towels - Keep them handy to dry the chicken and give yourself a better grip while handling raw chicken.
- Soapy Water - Always wash your tools and surfaces after cutting raw poultry.
Kitchen Must-Haves Reviews
Find a collection of my reviews of kitchen equipment that I have purchased or recommend. Kitchen Must-Haves - Find other tools I use here.
My Review: I’ve used these Fotouzy Cutting Board Mats for a long time, and while they’re flexible, dishwasher-safe, and great for preventing cross-contamination with their color coding, I now prefer solid plastic cutting boards. They’re BPA-free, non-porous, and wide enough to protect my wooden board, especially handy when zesting or transferring ingredients. That said, they don’t stay perfectly steady, even with a damp towel underneath, so I give them a 4 out of 5. But I still use it a lot for quick meat and veggie preps and place them right in the dishwasher.
My Review: As a professional chef, I rely on quality knives. After loving the PAUDIN Santoku Knife, I invested in the 7-Piece Chef Knife Set, and I'm thrilled! These lightweight, sharp knives make prep work effortless, for when I'm dicing or chopping. The high-carbon stainless steel blades maintain their edge, and the Pakkawood handles provide a comfortable grip. I've used this set in my classes and home kitchen, and it consistently delivers precision. If you want a reliable, professional-quality knife set without overspending, PAUDIN is a fantastic choice! Highly recommended for both home cooks and professionals!

My Review: The Sunnecko Heavy Duty Kitchen Scissors are the best I've found, closely resembling my trusty pair from over 20 years ago. These ultra-sharp, stainless steel shears feature a micro-serrated blade that effortlessly cuts through chicken, meat, and more. Every part of the scissors serves a purpose: trimming poultry, slicing herbs, cracking nuts, and opening bottles. Durable, dishwasher safe, and reliable, they’re an essential tool for any cook. They’ve saved me countless times, proving that multi-functional kitchen shears are a must-have.

Recommended Reads
- How to Spatchcock a Chicken: Easy Step-by-Step Guide for Juicy, Even Cooking
- Finger-Licking Chicken Wing Recipes You'll Crave All Year
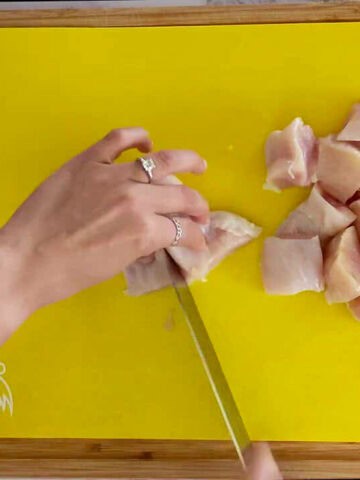
- How to Cut Chicken: Several Methods for Prepping Tutorials
- 10 Proven Spice‑Storage Hacks (Stop Wasting Flavor)
- How to Butterfly Chicken Breasts | Step-by-Step Guide
Culinary Glossary
This section concisely defines key ingredients and techniques related to this post to enhance understanding and improve cooking skills.
- Breast Meat: The lean, white meat section of the chicken is located on the front of the bird. It cooks quickly and is great for dishes like chicken salad or stir-fry.
- Rib Cage: The curved bone structure protects the chicken's organs. When cutting, you'll glide the tip of your knife along the rib cage to free the breast meat cleanly.
- Leg Quarter: A section of the chicken that includes both the thigh and drumstick. It's a favorite cut for roasting or braising.
- Fat Line: The thin line of white fat that naturally marks where the thigh meets the drumstick is your visual guide to find the joint for easy separation.
- Wing Tips: The pointed end of the chicken wings doesn't hold much meat. Save them for homemade chicken stock or bone broth to add richness.
- Shoulder Joint: The joint connecting the wing to the breast is where you'll cut when separating chicken wings.
- Carcass: The bony portion of the chicken that remains after removing the main meat cuts. It's ideal for making flavorful stock when simmered in cold water.
- Raw Poultry: Refers to uncooked chicken, turkey, or other birds. Always handle raw chicken carefully, using a separate cutting board and soapy water cleanup to prevent cross-contamination.
- Kitchen Shears: Heavy-duty scissors are used in food preparation, especially for trimming excess fat, cutting through the back of the chicken, or removing wing tips.
Instructions and Anatomy of a Whole Chicken
When a whole chicken is cleaned and ready for cooking, it's typically a broiler or fryer chicken that includes the entire body minus the head, feet, and internal organs (except for the giblet package tucked inside). Below is a breakdown of the main parts and joints used in butchery. Follow the instructions and tips below using the step-by-step picture guide.
1. Set Up Your Workspace
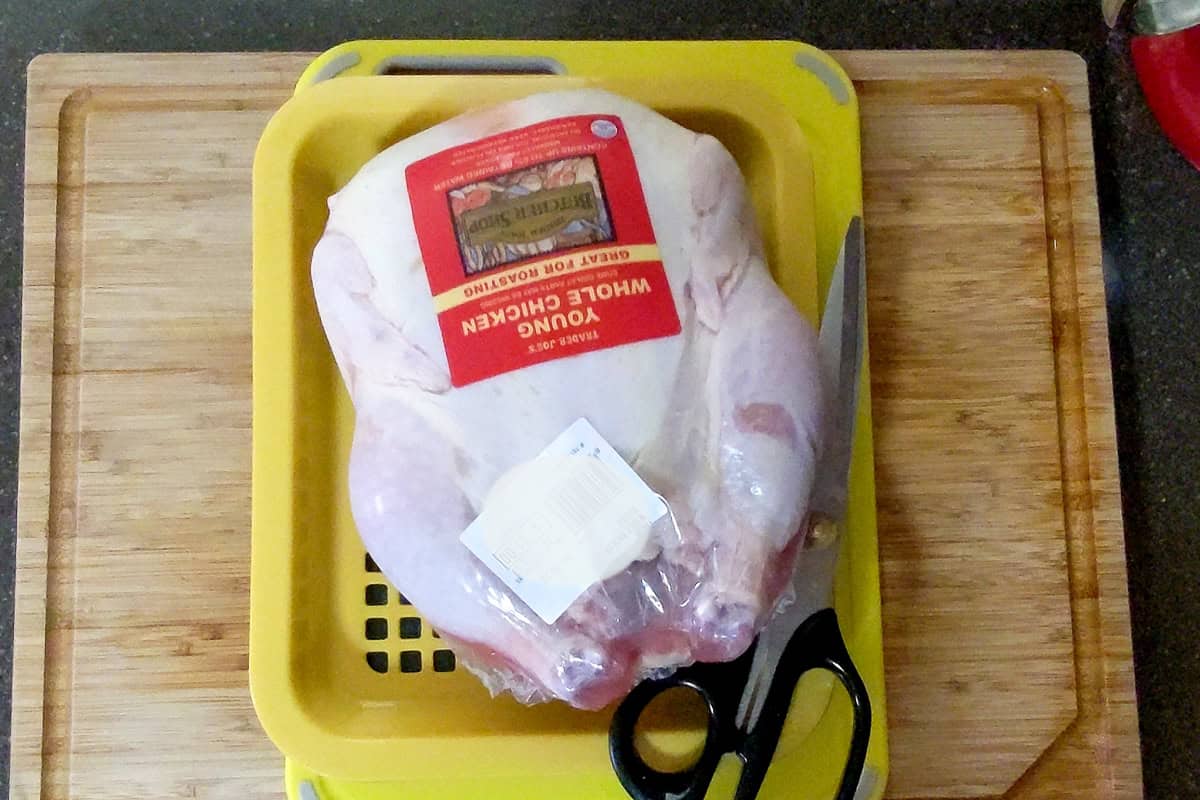
Use a drainage tray or a large bowl to place the whole chicken package in. Shears are great for cutting the package open.
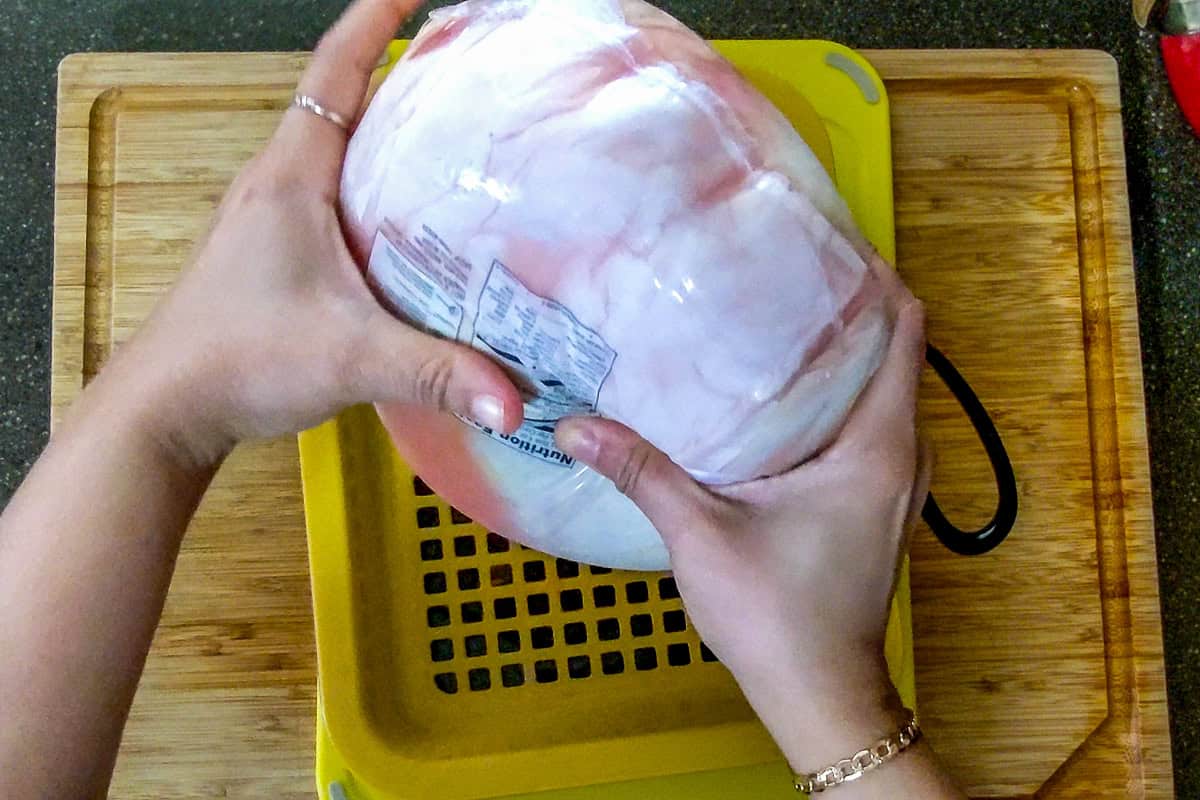
Make a cut at the top between the Drumsticks to drain the excess liquid from the package and Cavity.
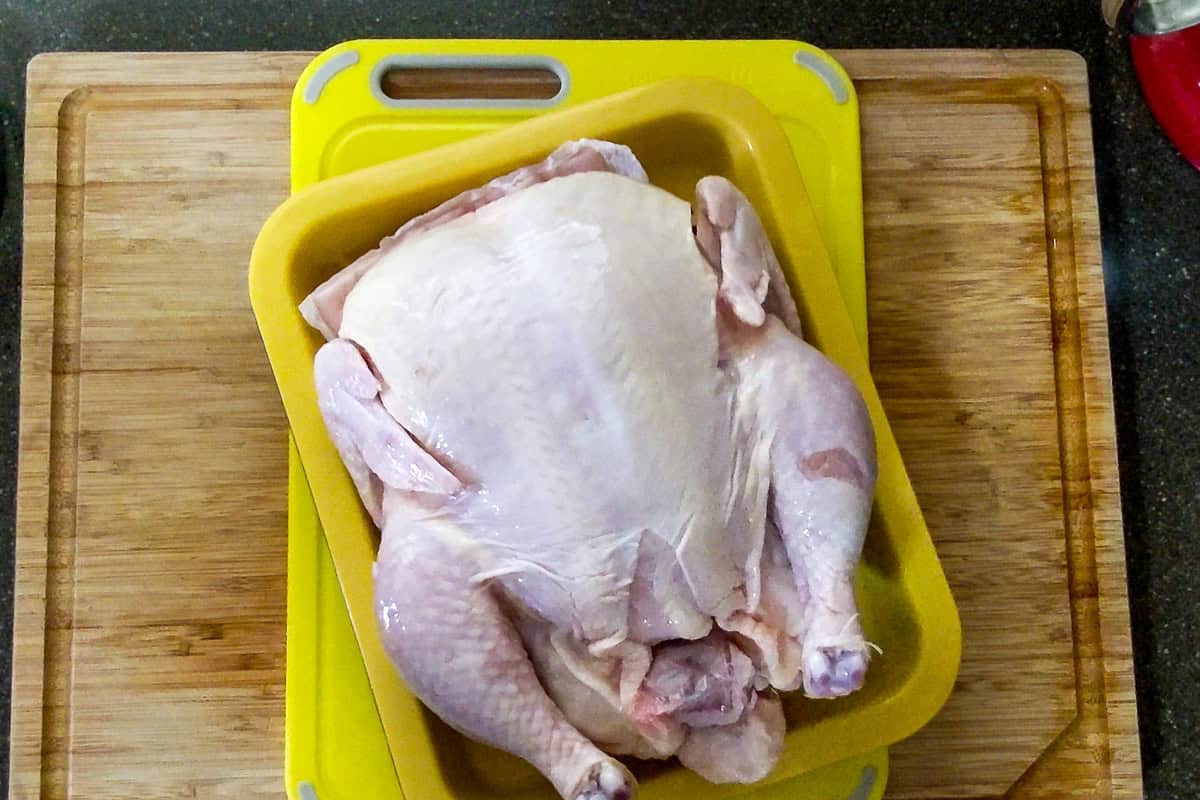
Remove any materials in and around the bird.
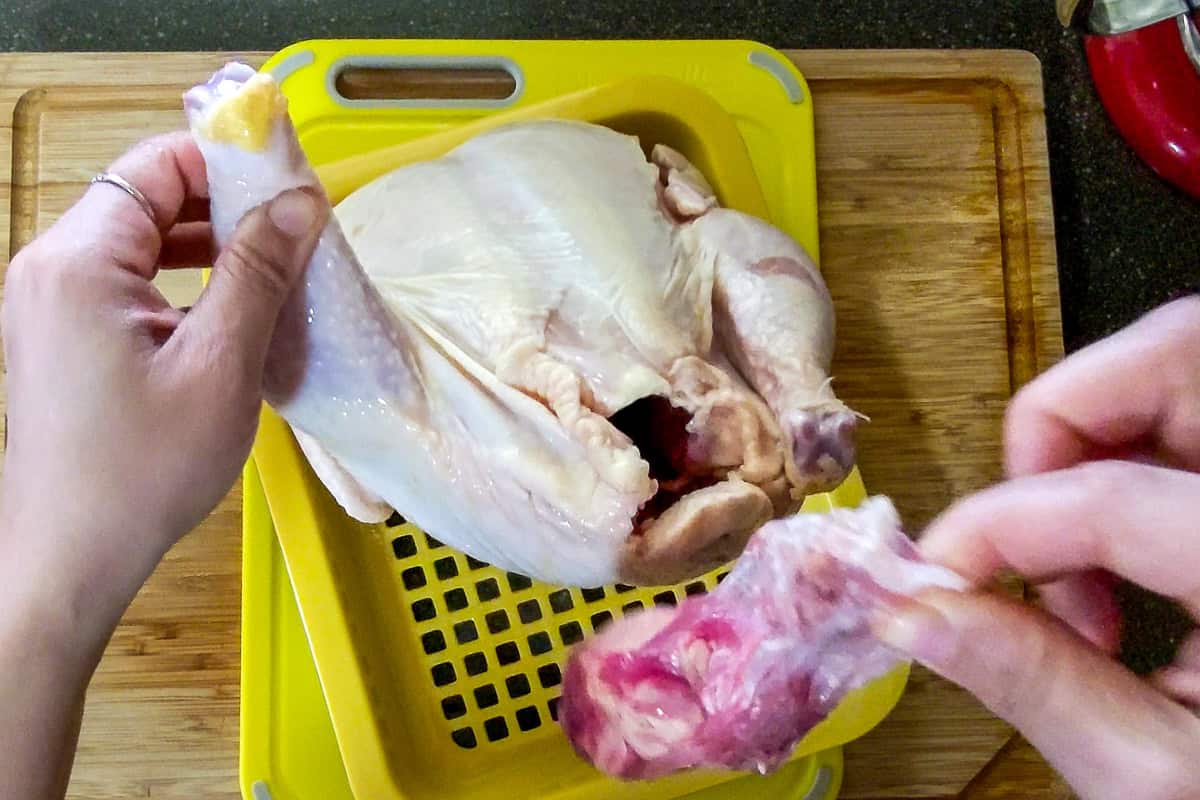
Some whole chickens will have a Giblet bag that needs to be removed.
Giblets? It refers to the neck, liver, gizzard, and heart, that is usually tucked inside the cavity.
Again, drain any excess liquid from the Cavity. In the image, you can see the Neck Cavity Area at the top. This is the upper opening that surrounds the Wishbone, which can be removed before cooking for easier carving.
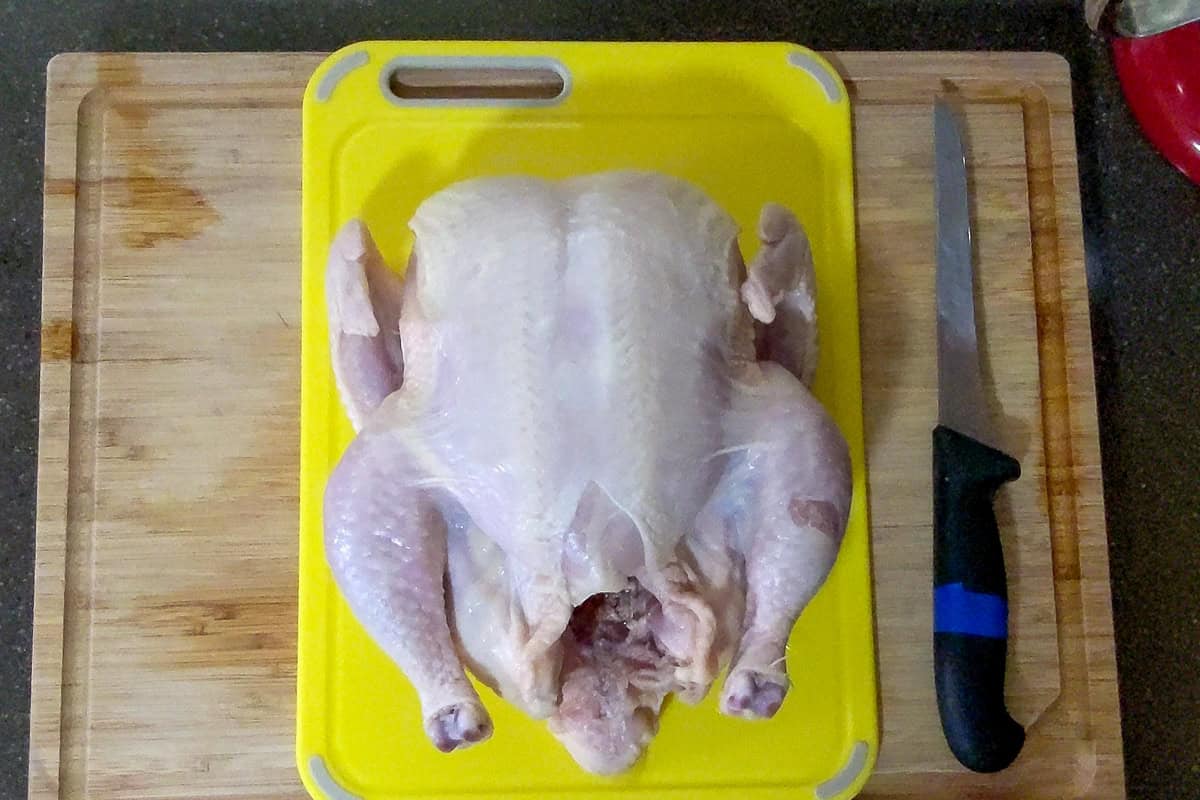
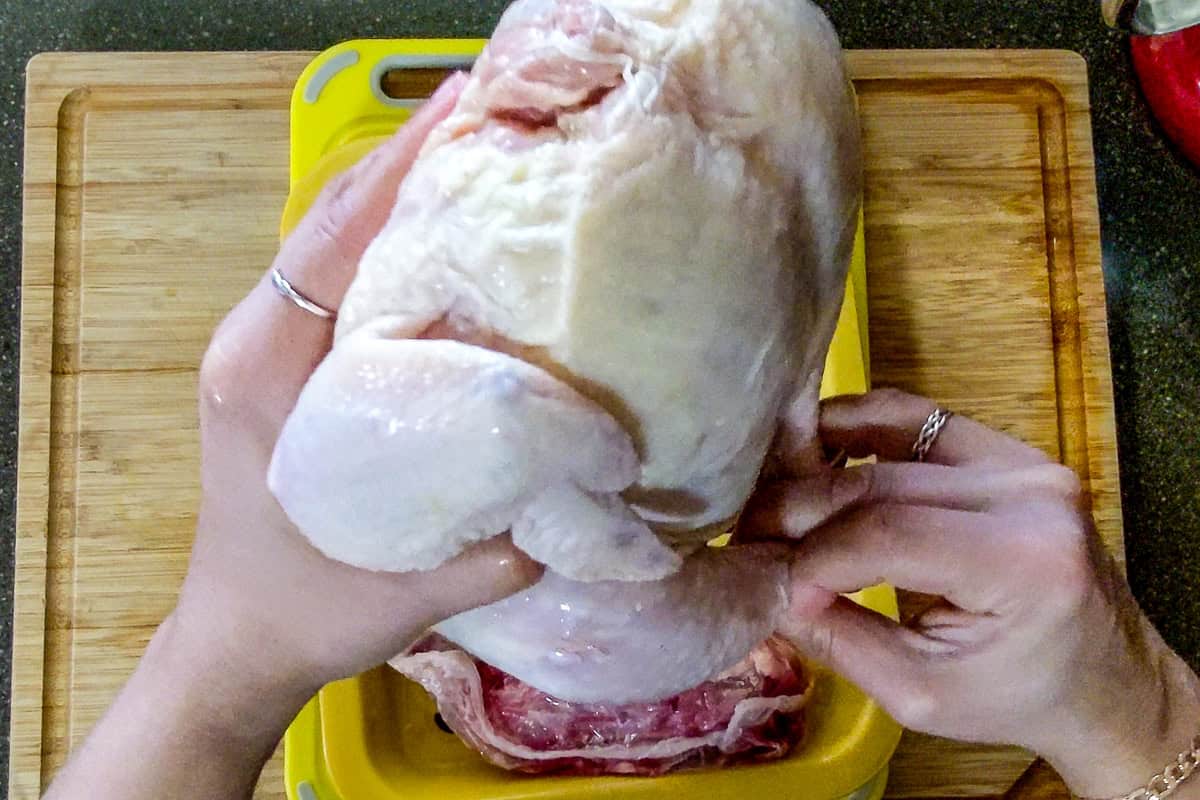
Lay your whole bird breast-side up on your cutting board. Pat it dry with paper towels for a steady grip. Make sure your knife is sharp; a dull blade makes cutting slippery and unsafe.
Use medium strokes with a boning knife, a high-carbon blade for durability and cleaner cuts.
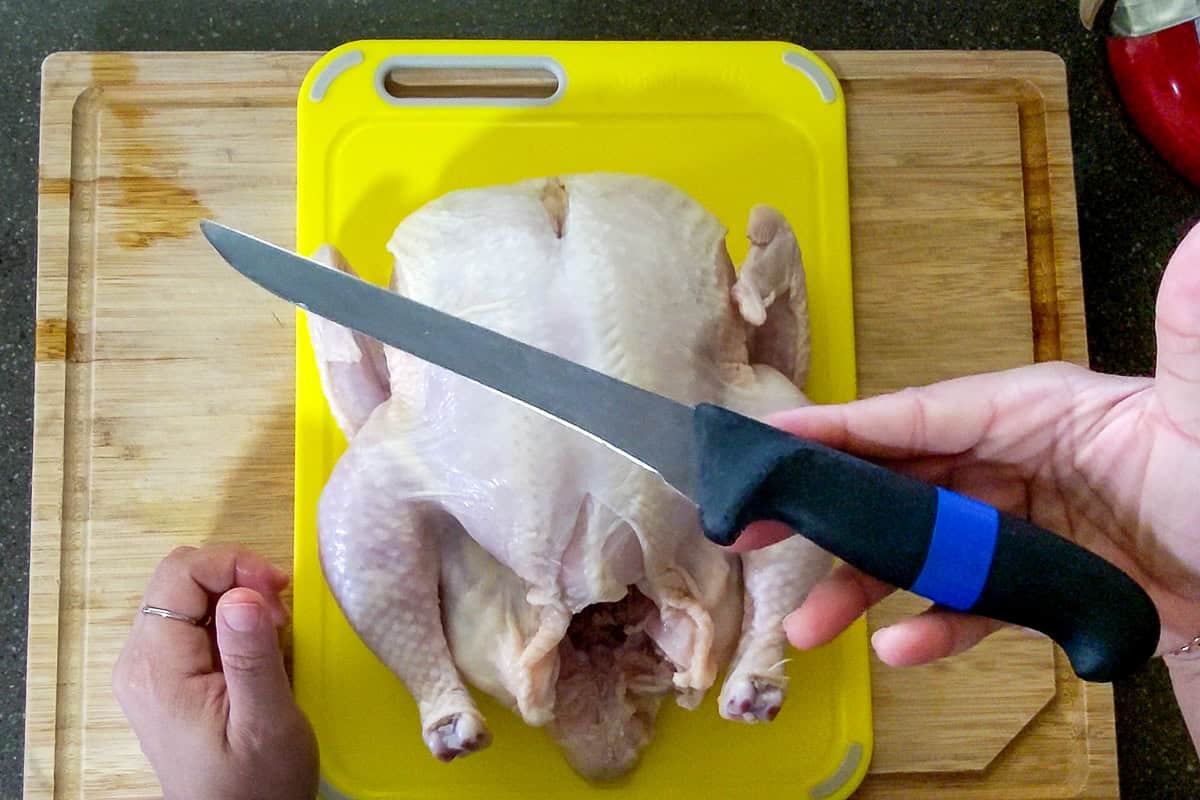
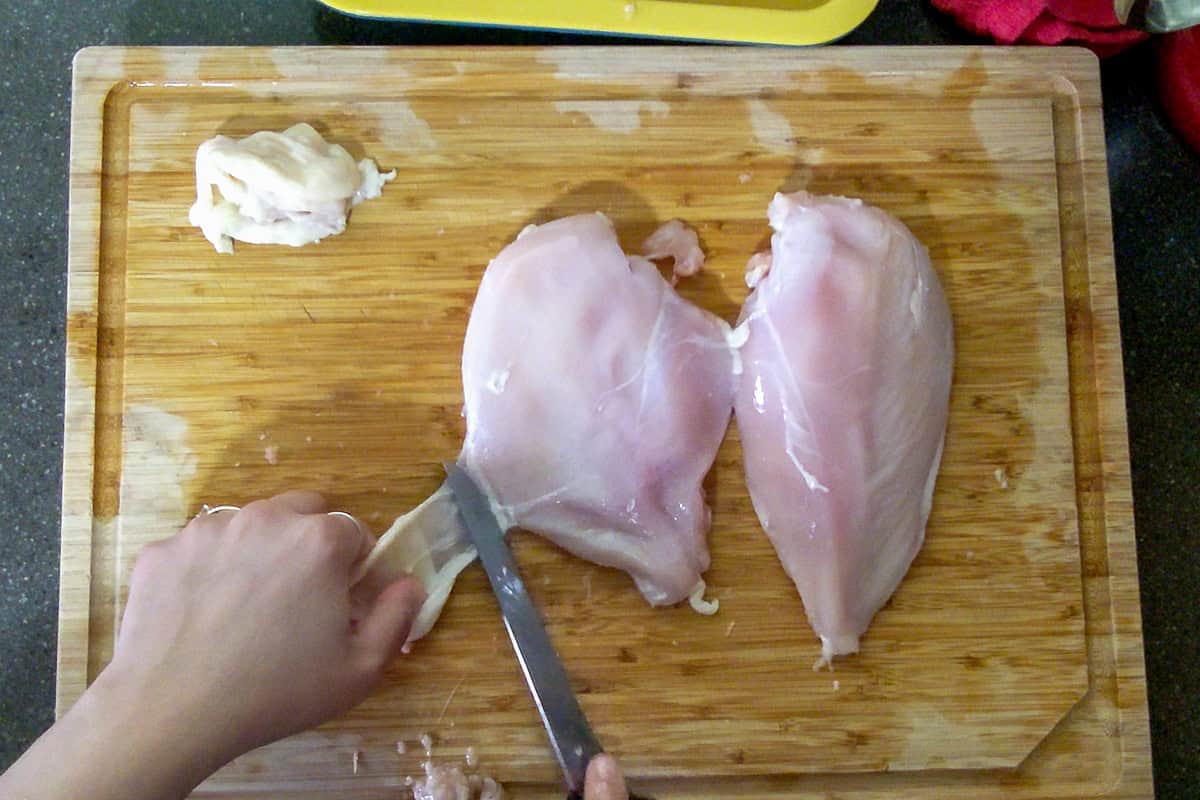
2. Remove from the Breast Bone
The Breast (White Meat) is the largest section of the bird, located on the front, covered with smooth skin. Contains two lobes of meat divided by the Breastbone. Each side includes the Tenderloin (the inner fillet) beneath the main breast muscle.
Find the center of the breast, where the Rib Cage meets the top of the Breast.
Using the tip of your knife, slice carefully along one side of the Breastbone, keeping the blade close to the bone.
Use your free hand to steady the chicken as you cut.
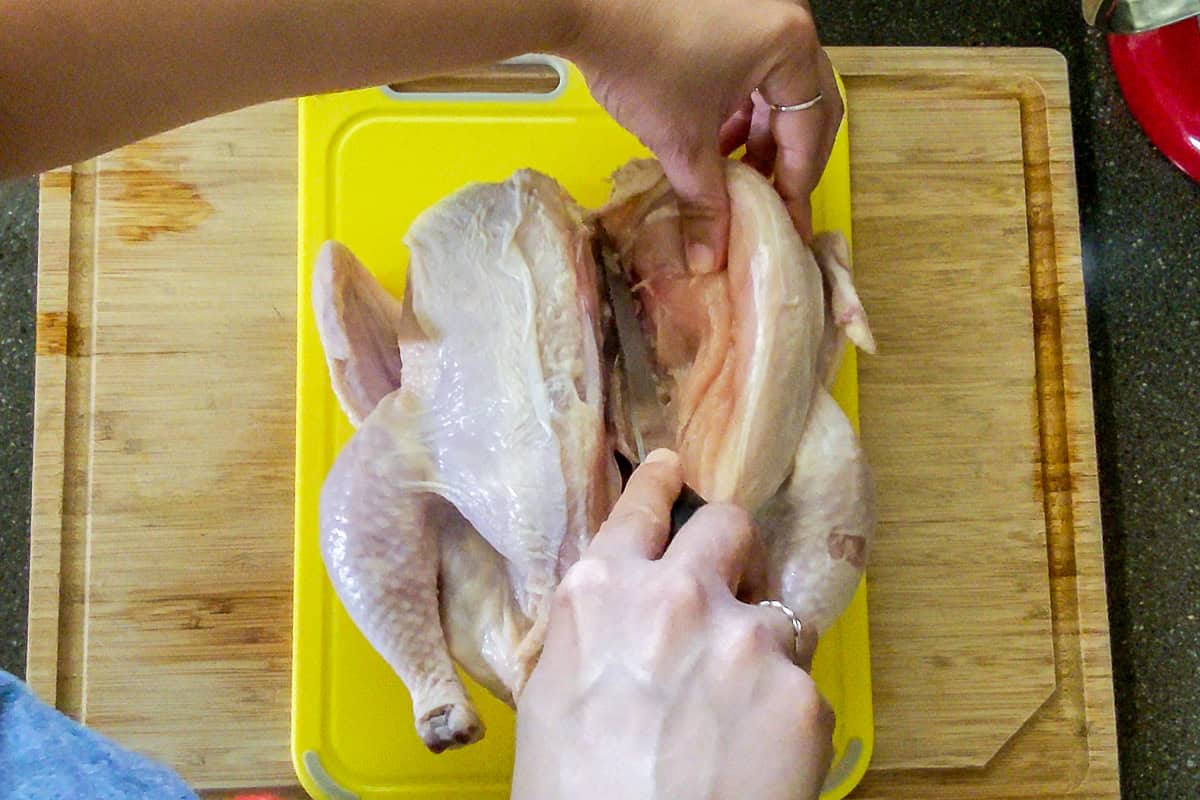
Follow the curve of the Rib Cage by keeping the knife angle shallow and letting it glide along until the breast meat separates cleanly.
Breast Bone and Rib Cage? The midline cartilage and curved bone structure along the front of the bird. You cut alongside this to remove the breast meat halves.
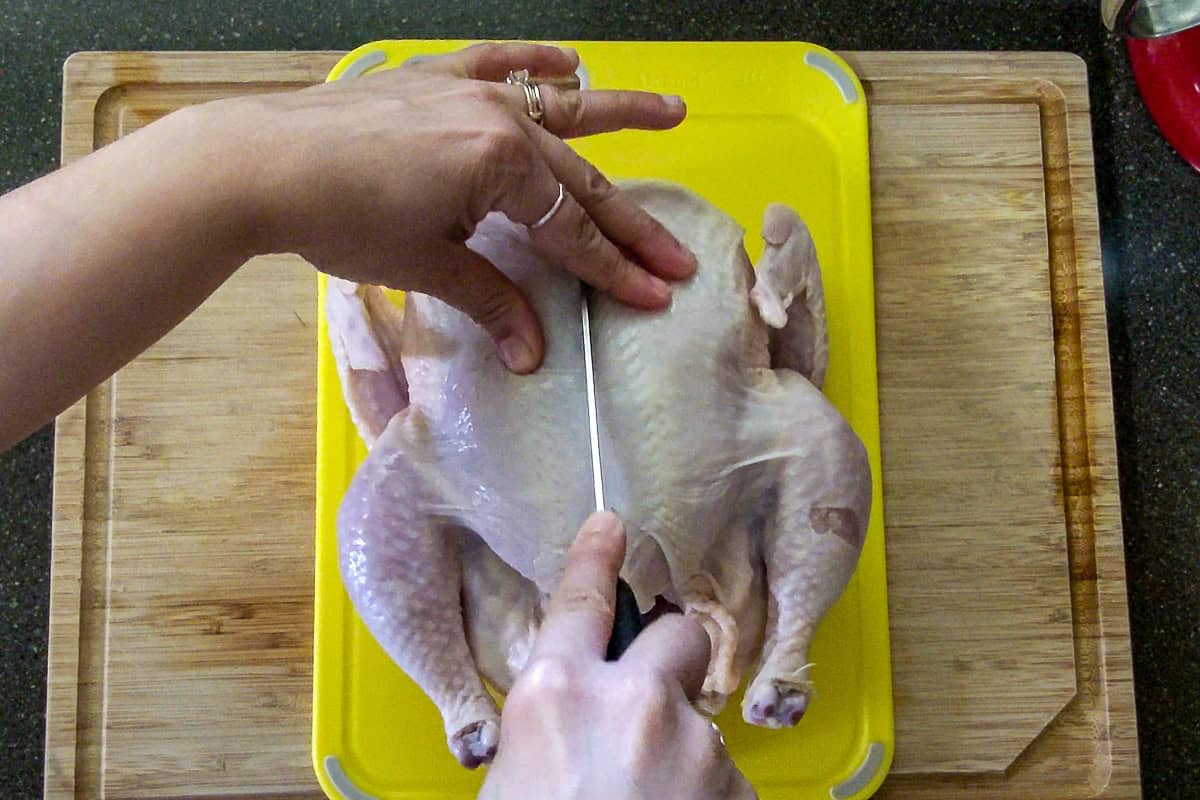
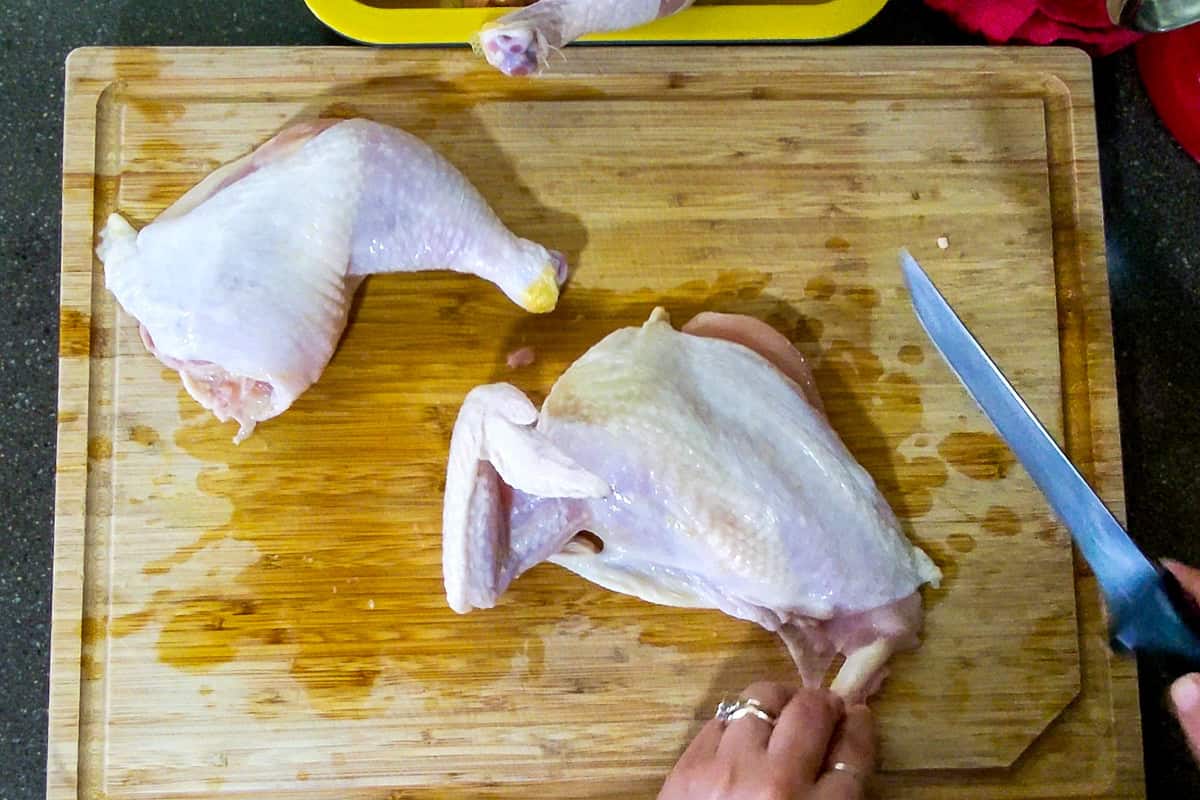
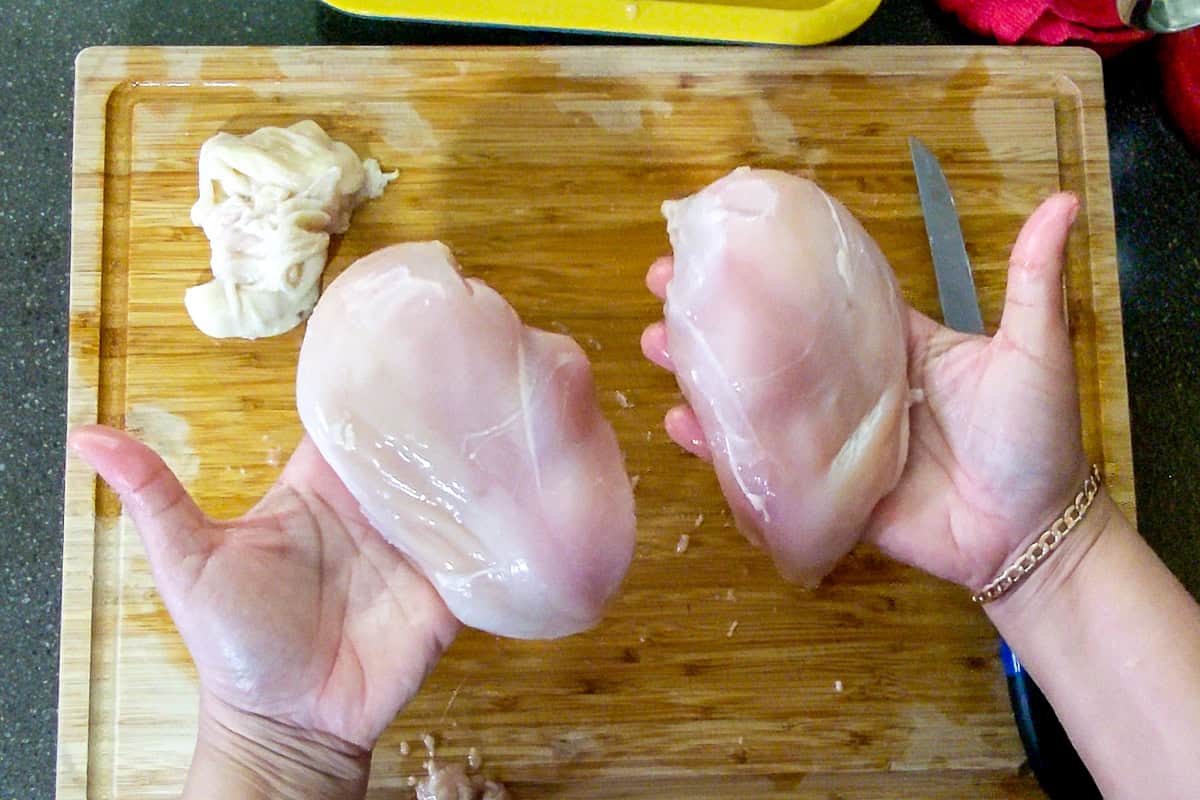
3. Remove the Halves
First, seperate the Wishbone (Furcula). It's a small V-shaped bone at the top of the Breast near the Neck Cavity. Removing it helps when carving cooked chicken or cutting raw breasts more evenly.
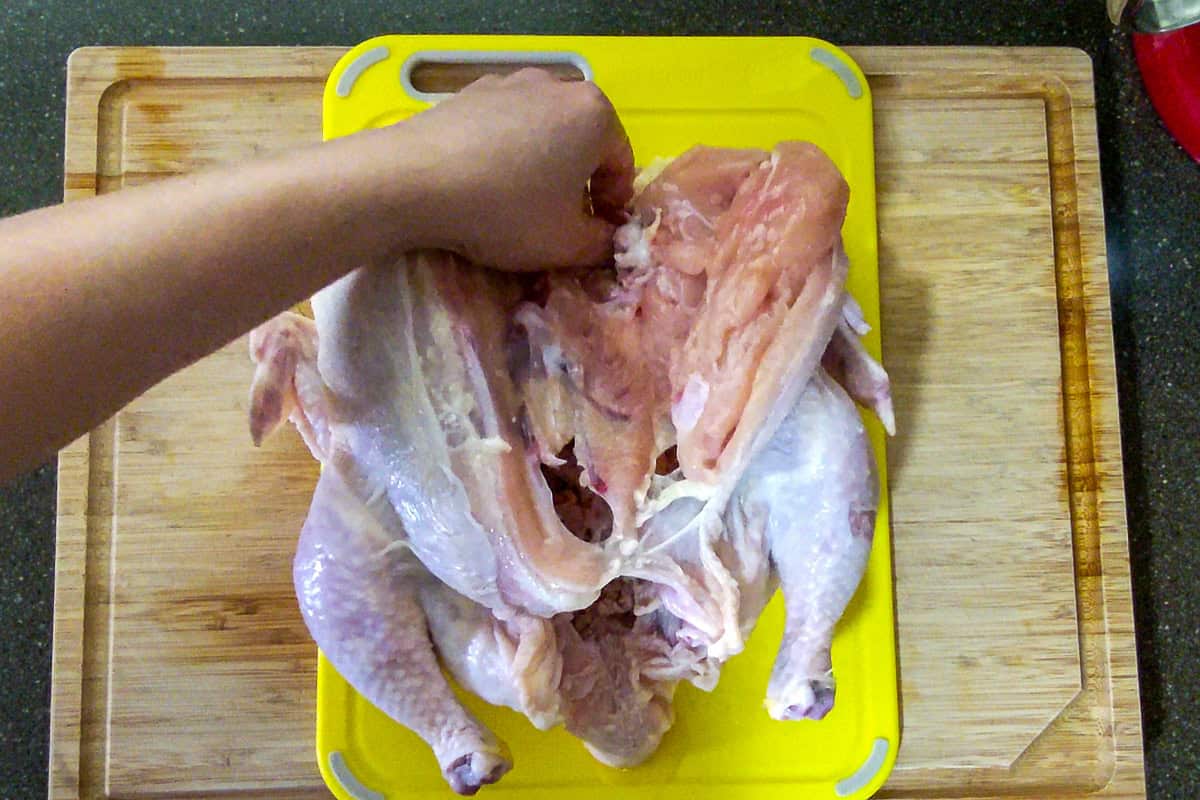
Find the Shoulder Joint (Wing Joint) that connects each wing to the breast; you'll cut here to remove the Wing or Drumette.
Lay one chicken half skin-side down. Use your knife to locate where the thigh connects to the body. Bend the thigh back slightly to expose the Hip Joint (Thigh Joint); that attaches each thigh to the back of the chicken; separating here releases the Leg Quarter from the Carcass.
Then slice through it to separate the Leg Quarter from the upper section. Repeat on the other side to remove both halves from the carcass.
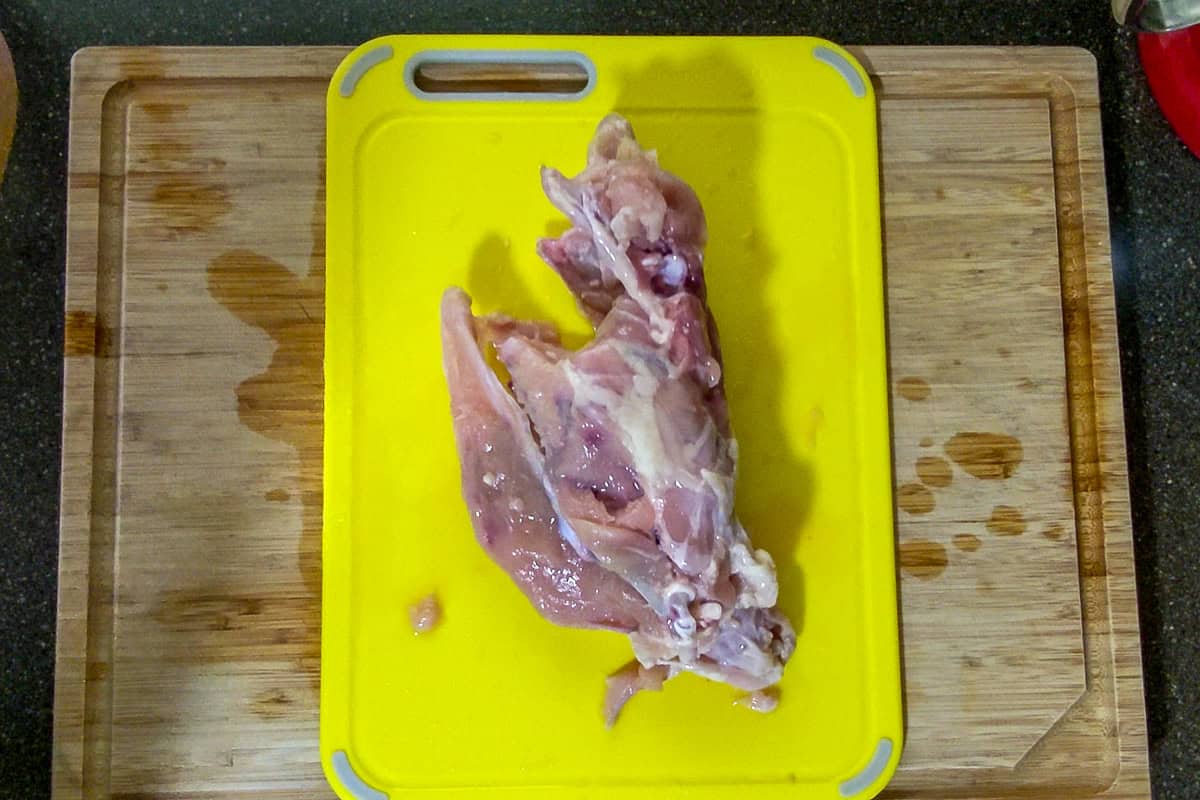
You are now left with the Back or Carcass (Bony Portion). This is the frame of bones that remains once the breast meat is removed. It includes the spine, ribs, and connecting cartilage, which is often reserved for making bone broth or homemade chicken stock.
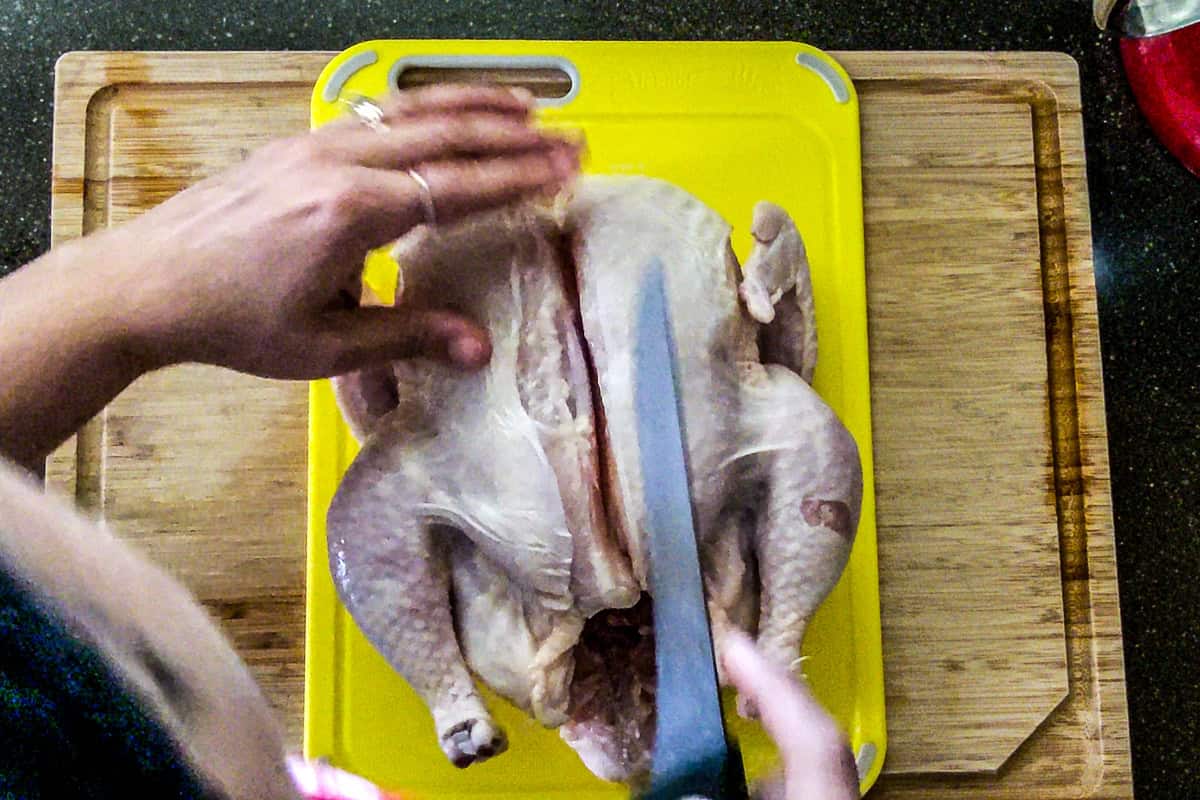
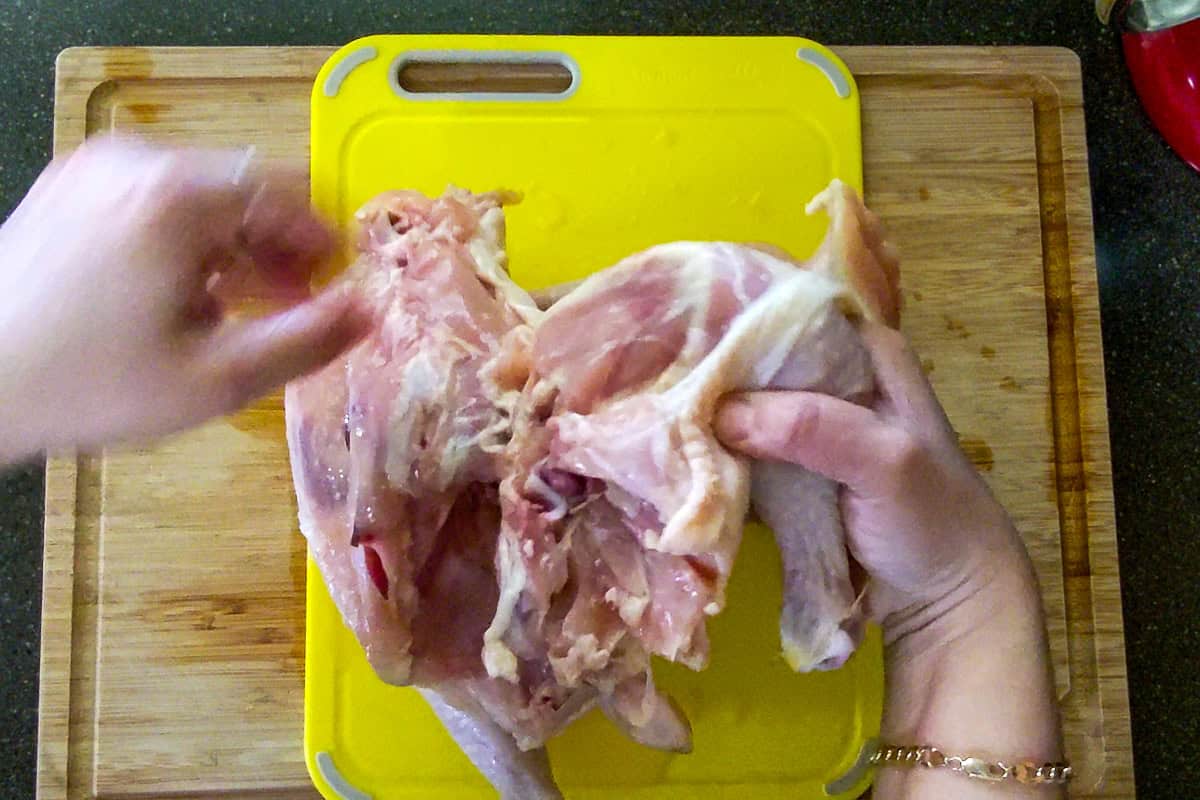
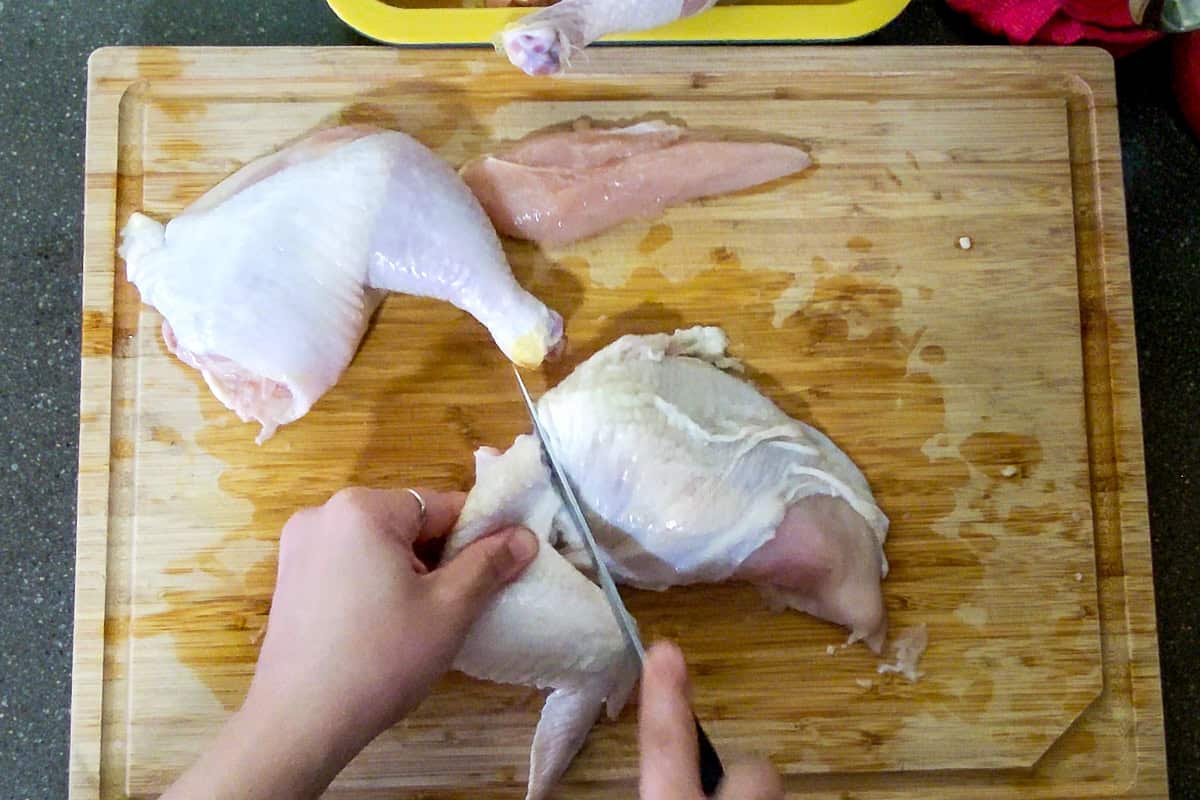
4. Seperate Breasts from the Leg Quarters
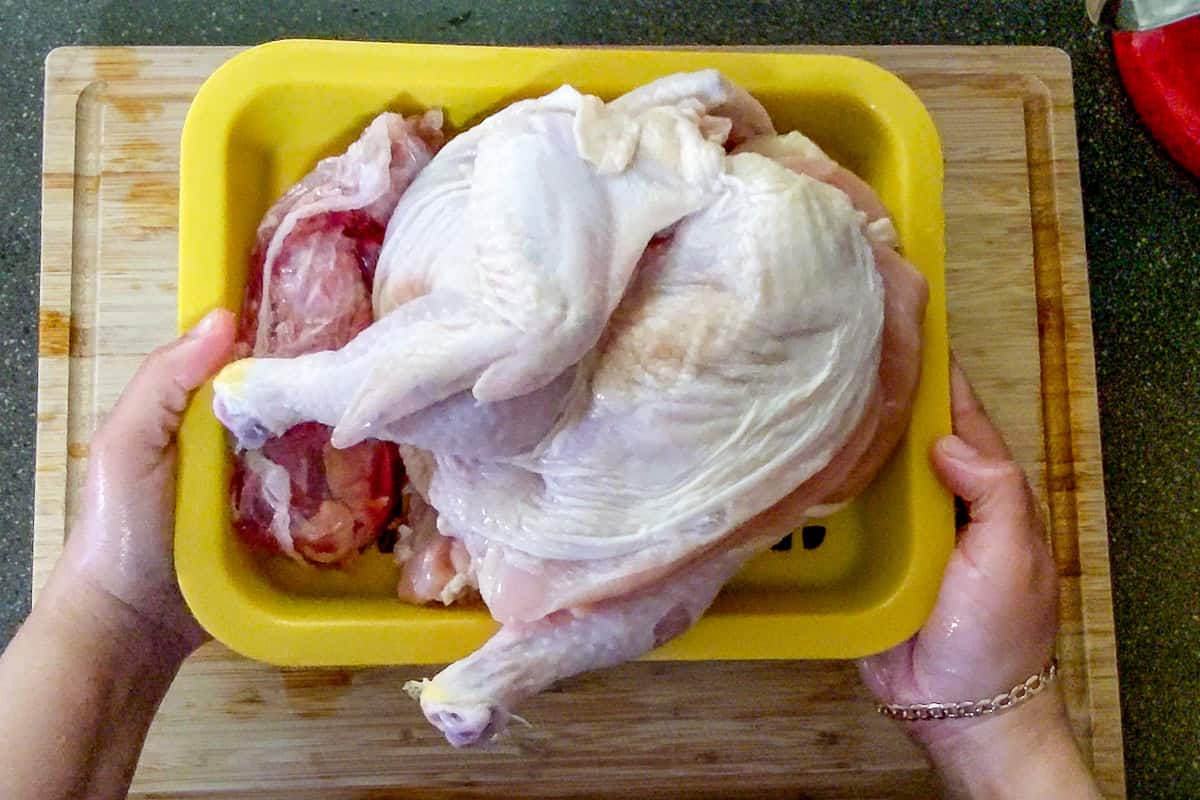
A drainage tray is great for keeping all pieces off the board. If you do not have one use a sheet pan and rack.
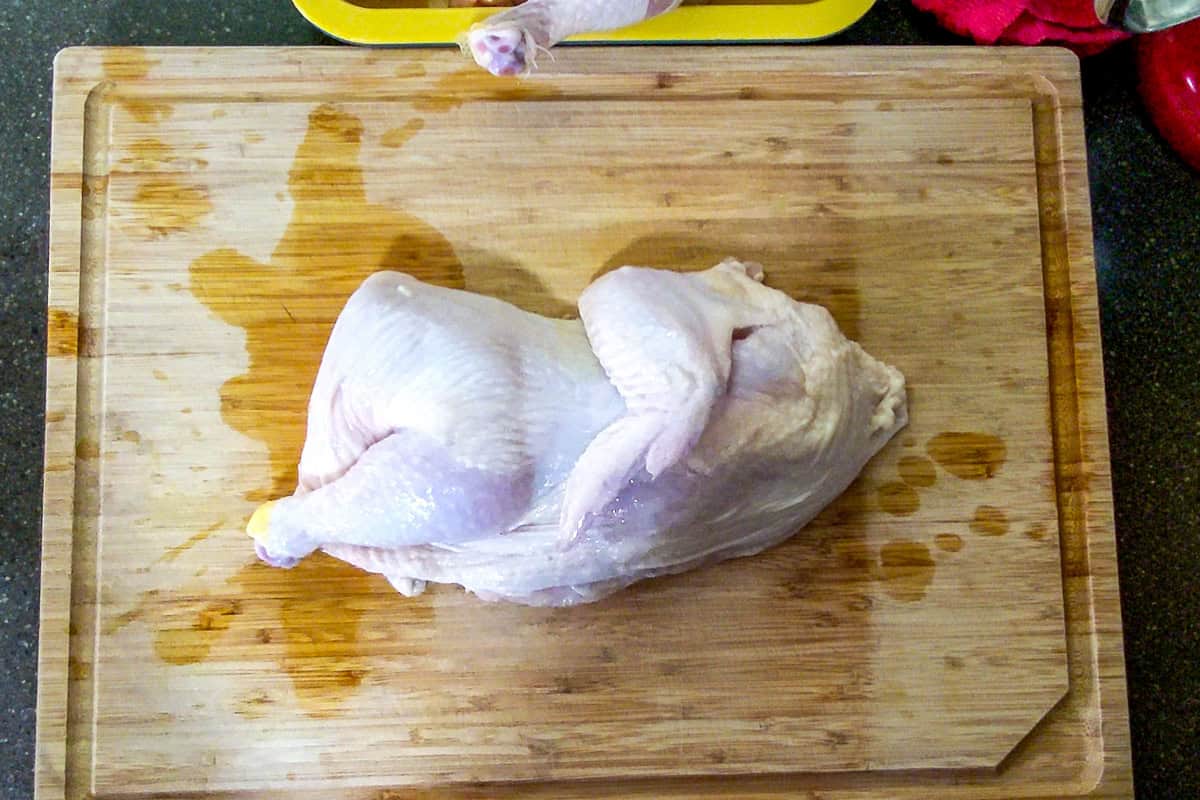
Place one of the Chicken Havles on to cutting board. You can stop here if you wish. This is great for grilling and roasting.
To seperate make sure the bird is skin side down.
Use your knife to slice and divide the two pices. Then, place the raw chicken breast skin-side down on a clean cutting board.
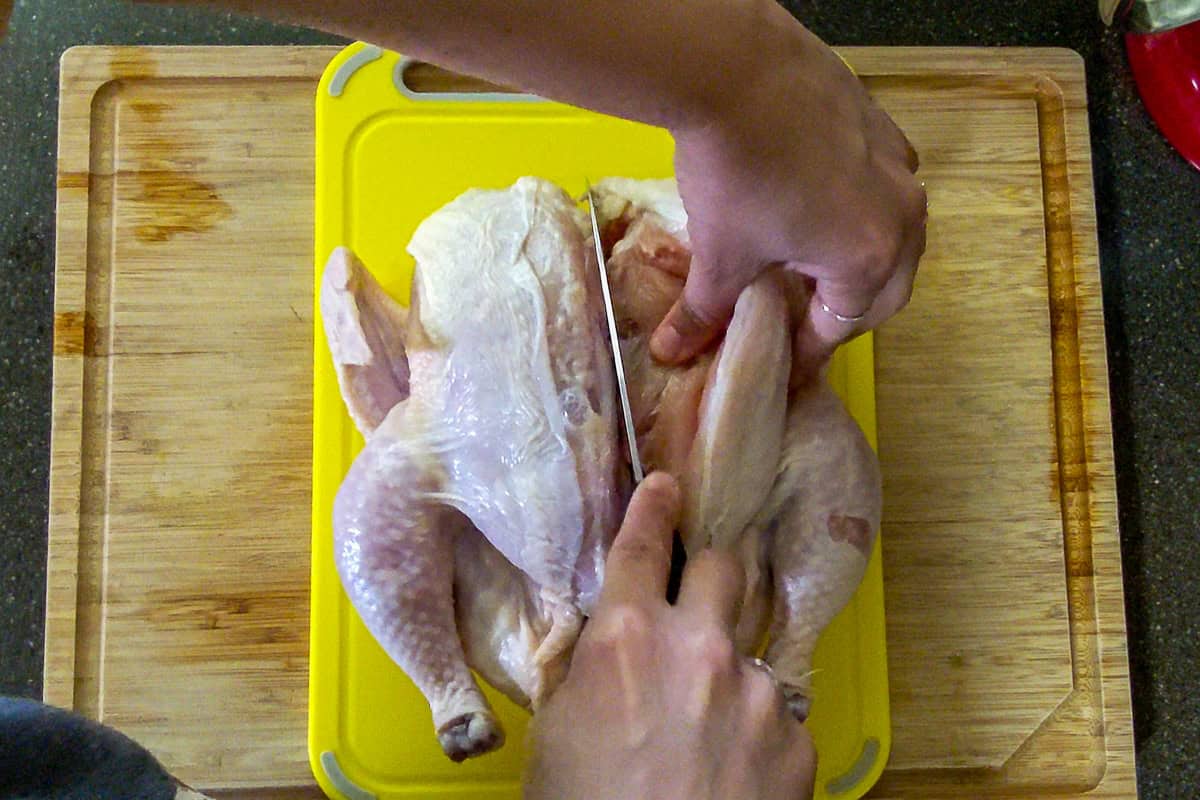
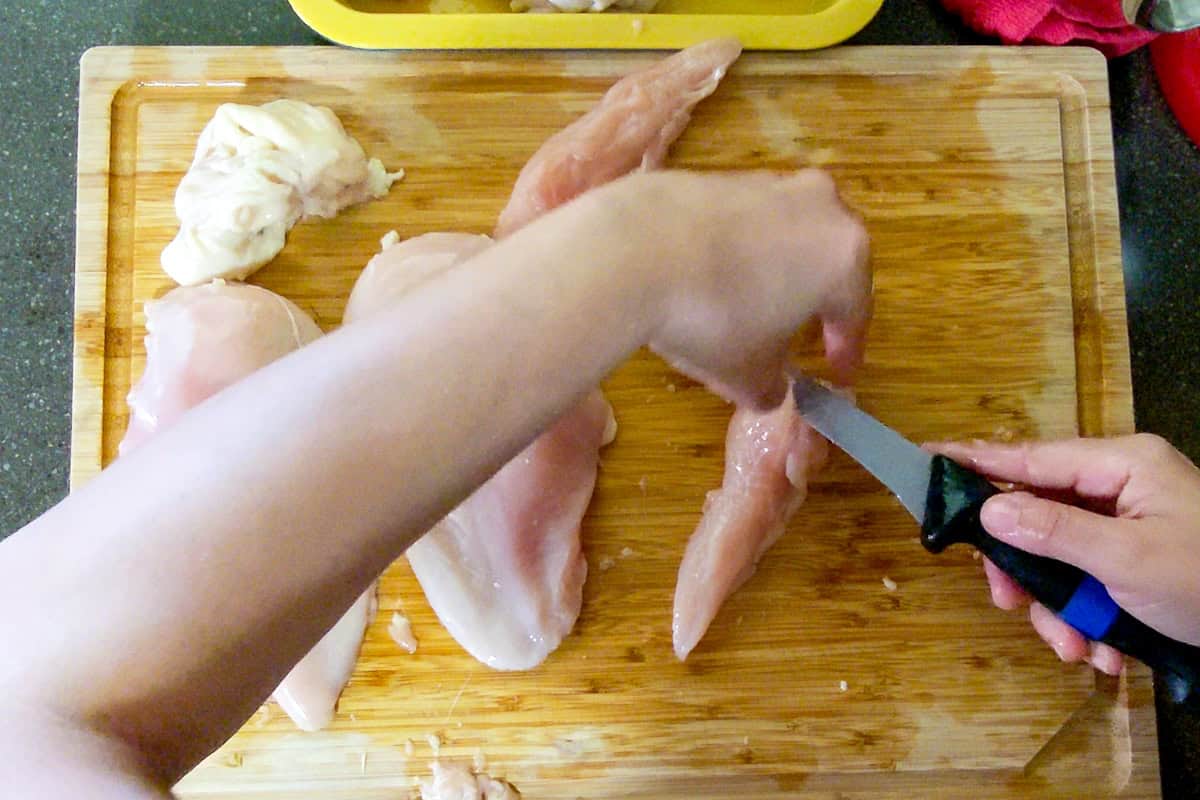
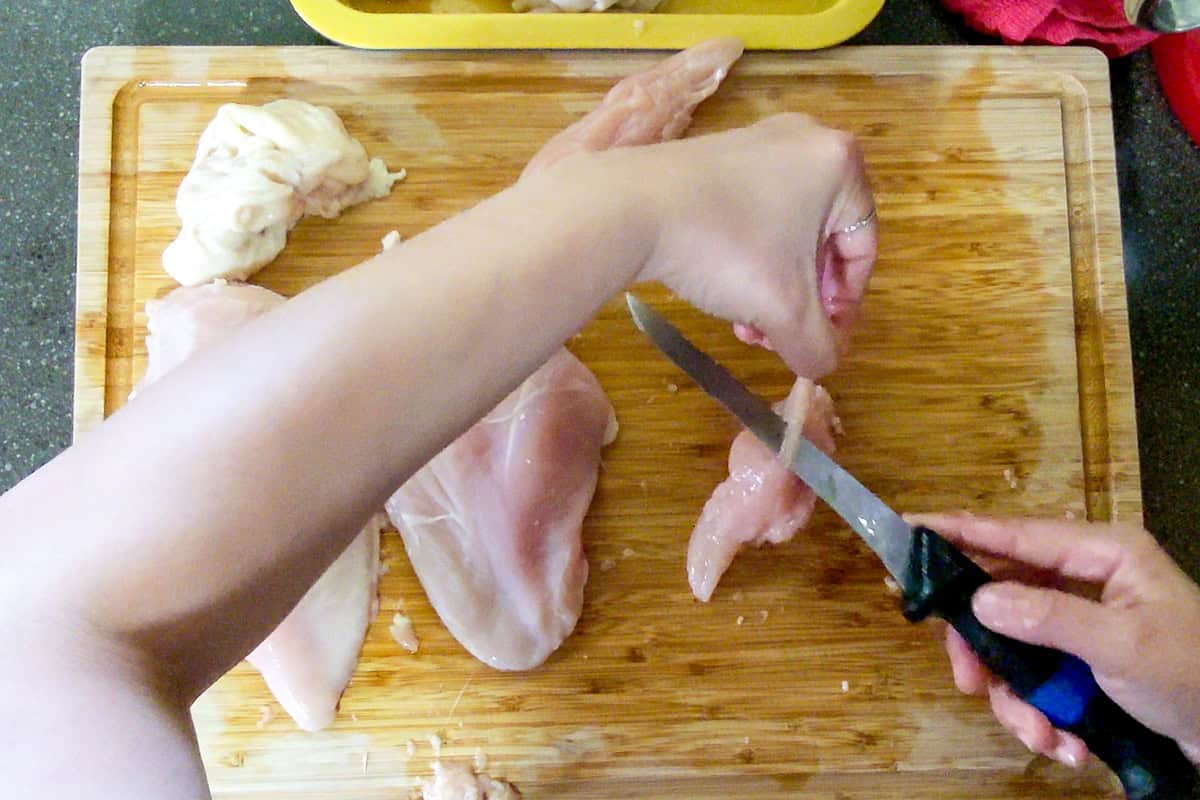
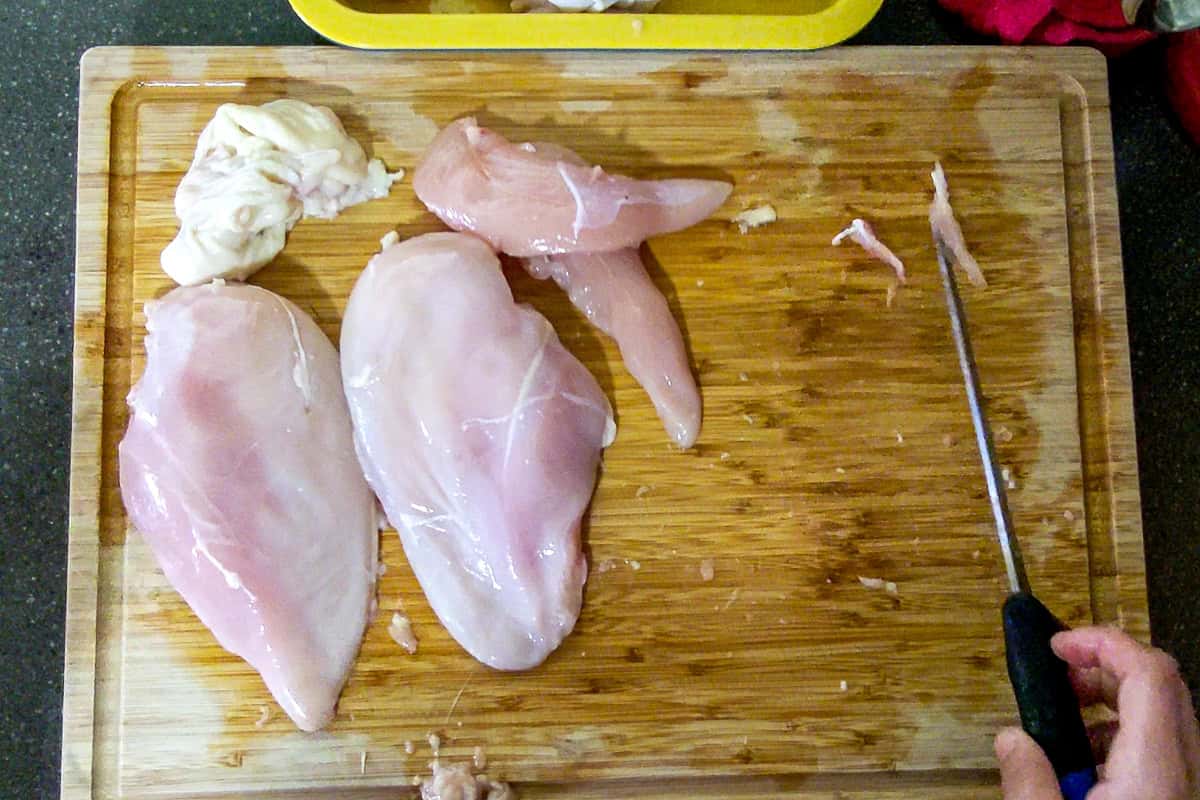
5. Separate the Breast and Wing
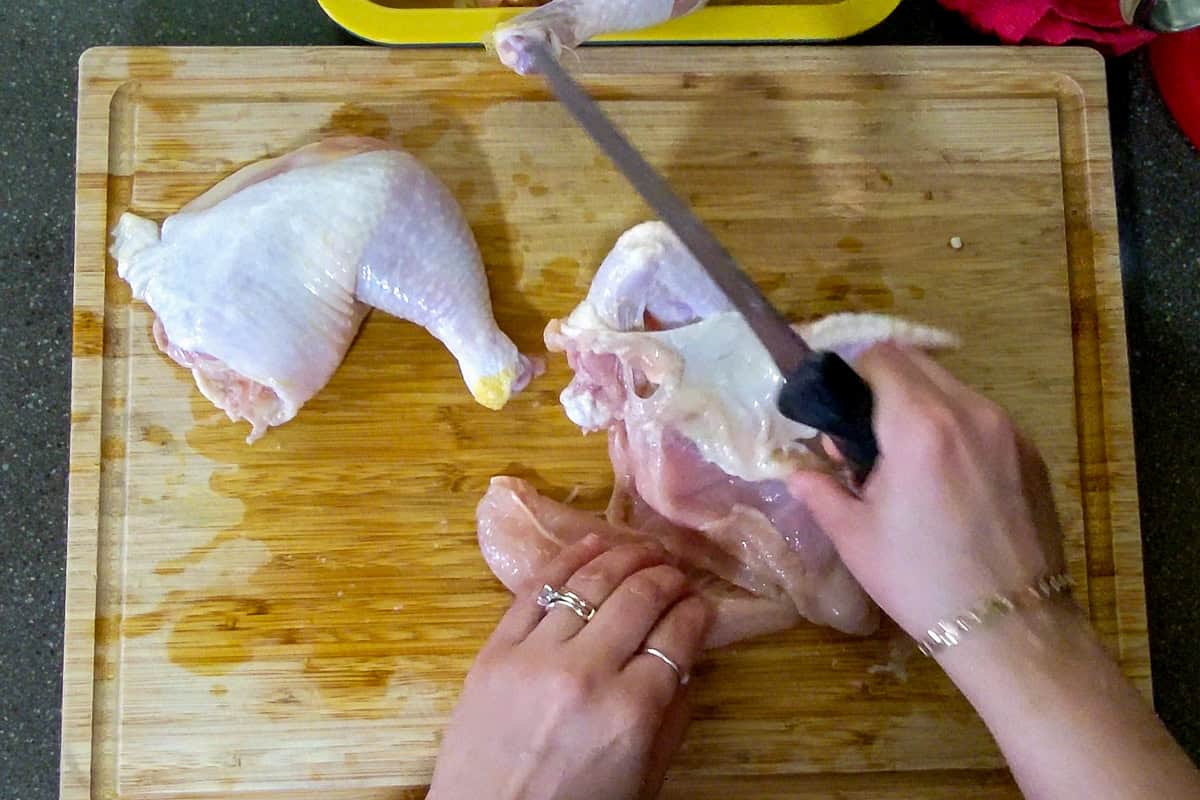
Find the Tenderloin (the loose strip of meat running along the underside of the breast). Slide the tip of your knife under the seam where the tenderloin meets the breast. Use short, shallow strokes to release the tenderloin, keeping the blade flat against the Breast to avoid waste. Lift the tenderloin off and set it aside.
Fun Fact: the chicken tenderloin is actually where chicken tenders come from the small, tender strip of meat tucked beneath each breast that stays extra juicy when cooked.
At the Shoulder Joint, where the Wing meets the breast, use the tip of the knife or kitchen shears to cut cleanly through. This gives you the chicken wings and breast as separate pieces.
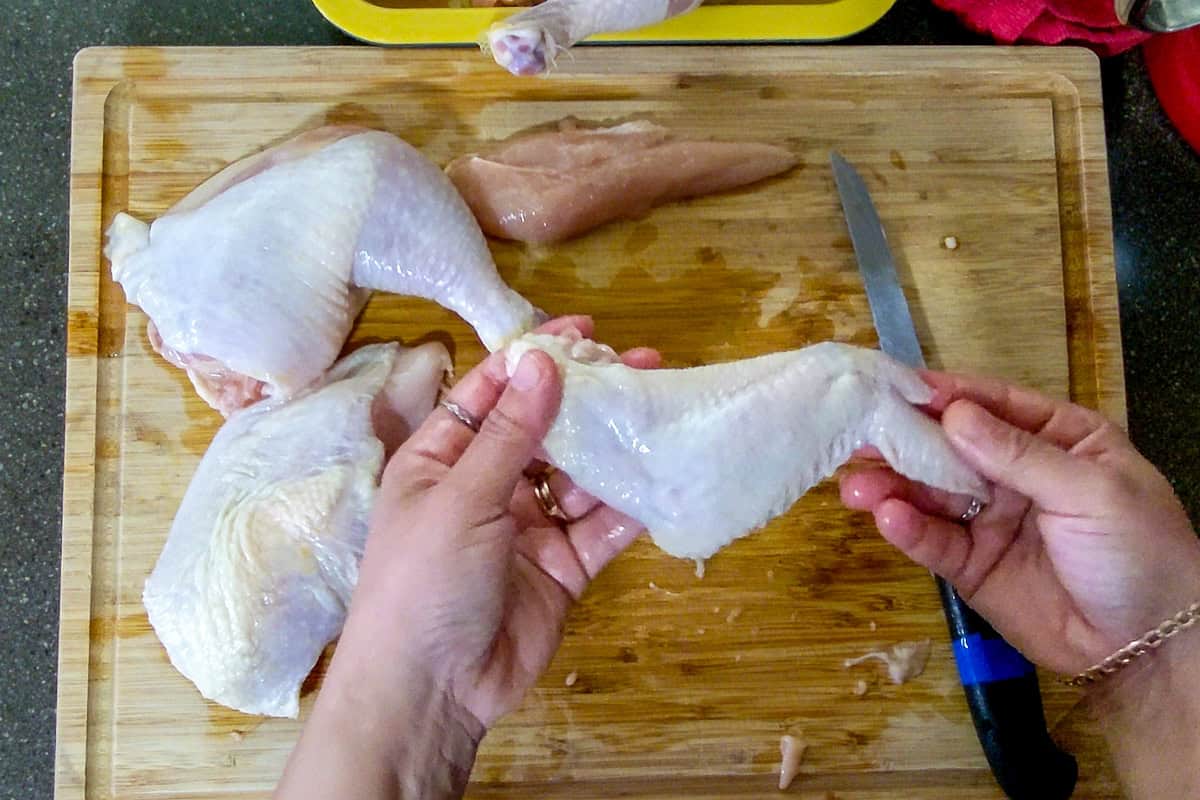
Each Chicken Wing has three segments (from left to right):
- Drumette - attaches to the shoulder joint at the breast.
- Flat (Wingette) - the middle section between two bones.
- Wing Tip - the pointed end, mostly skin and bone, ideal for stock.
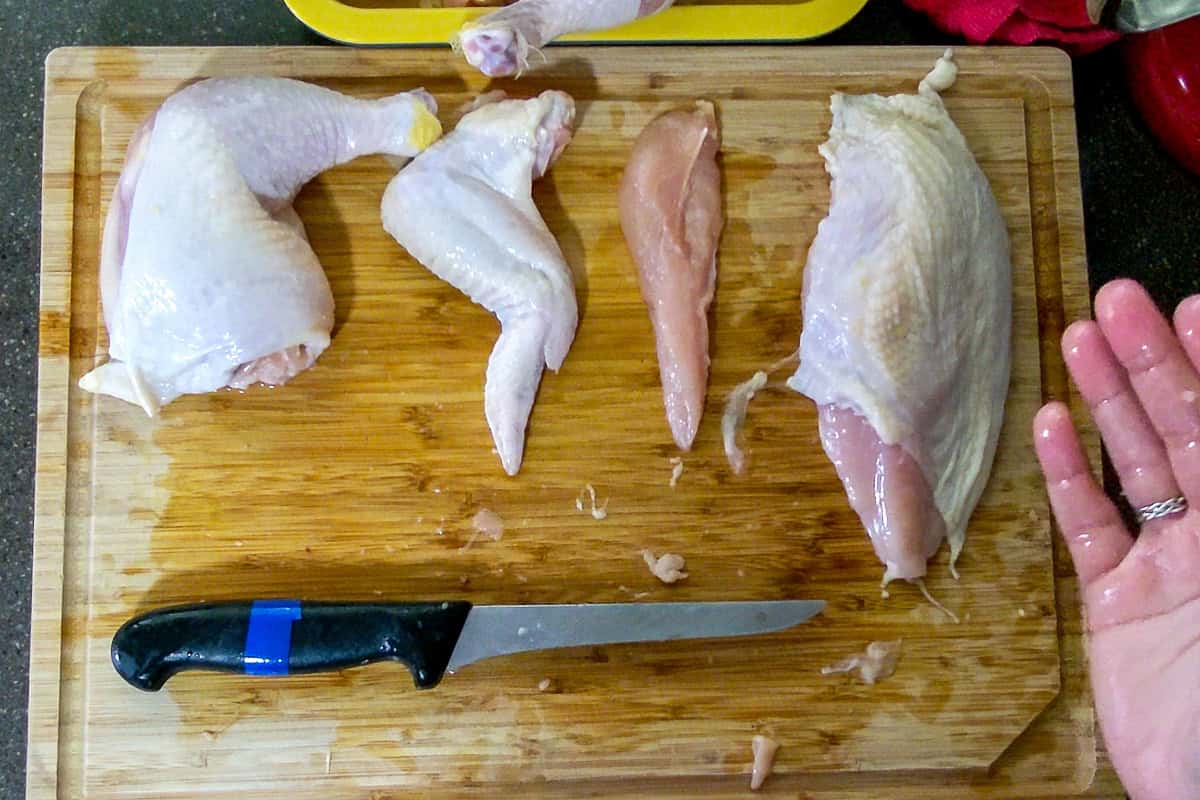
From left to right: Leg Quarter, Chicken Wing, Tenderloin and Skin on Chicken Breast.
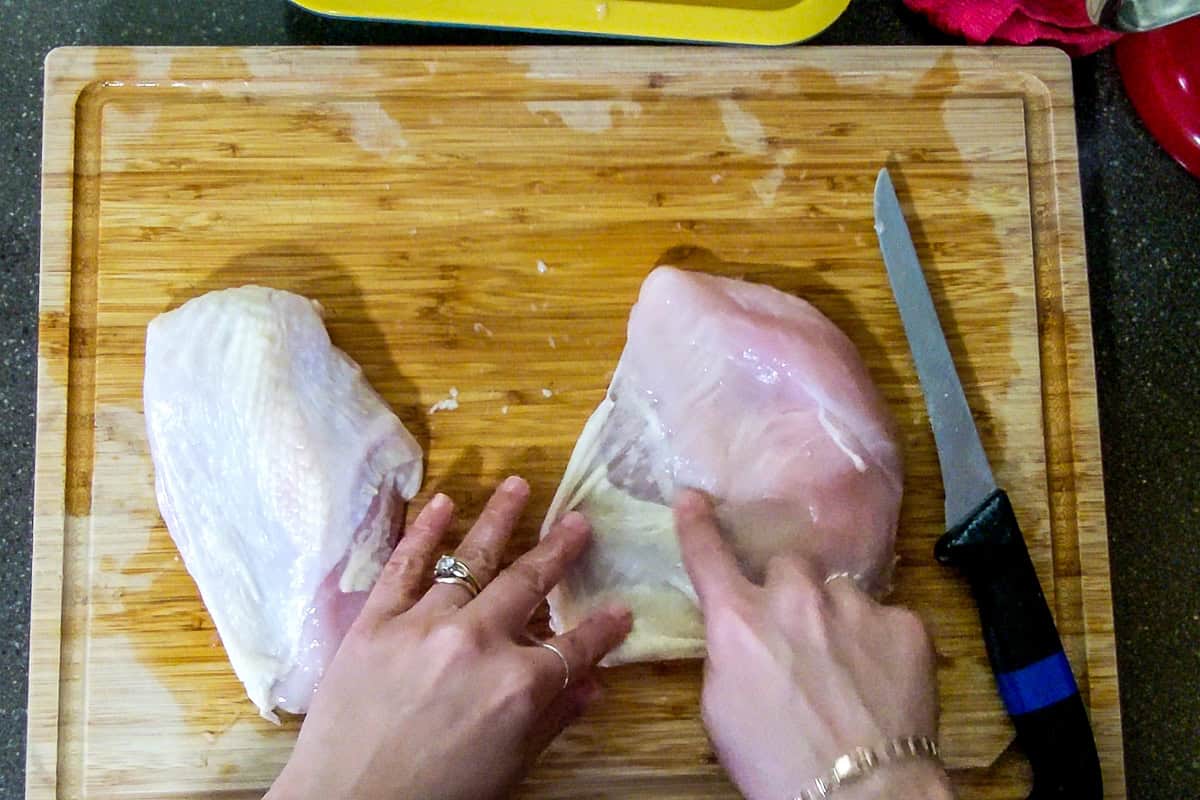
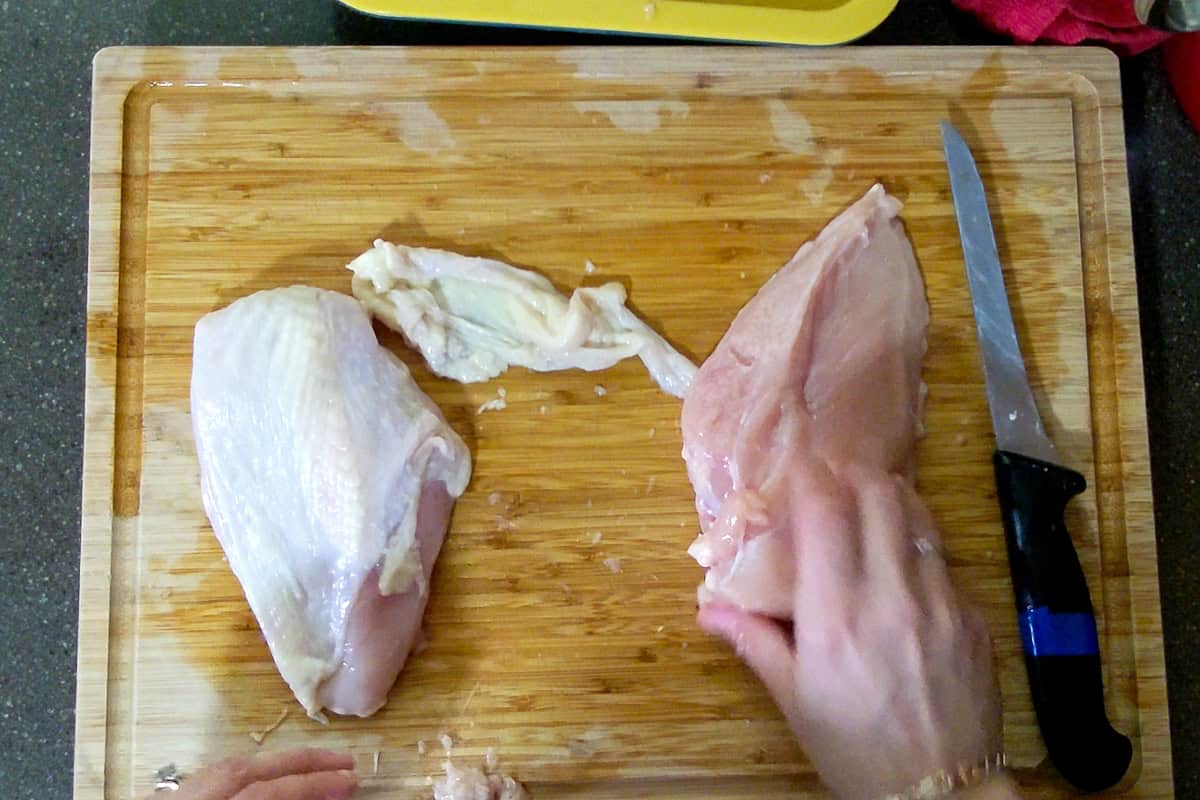
Removing the Skin (Optional): Place the Chicken Breast skin-side up on a clean cutting board. Starting at the thicker end (top of the breast), use your free hand to gently lift a corner of the skin to create a small flap.
Hold that flap firmly between your fingers or with a paper towel for better grip.
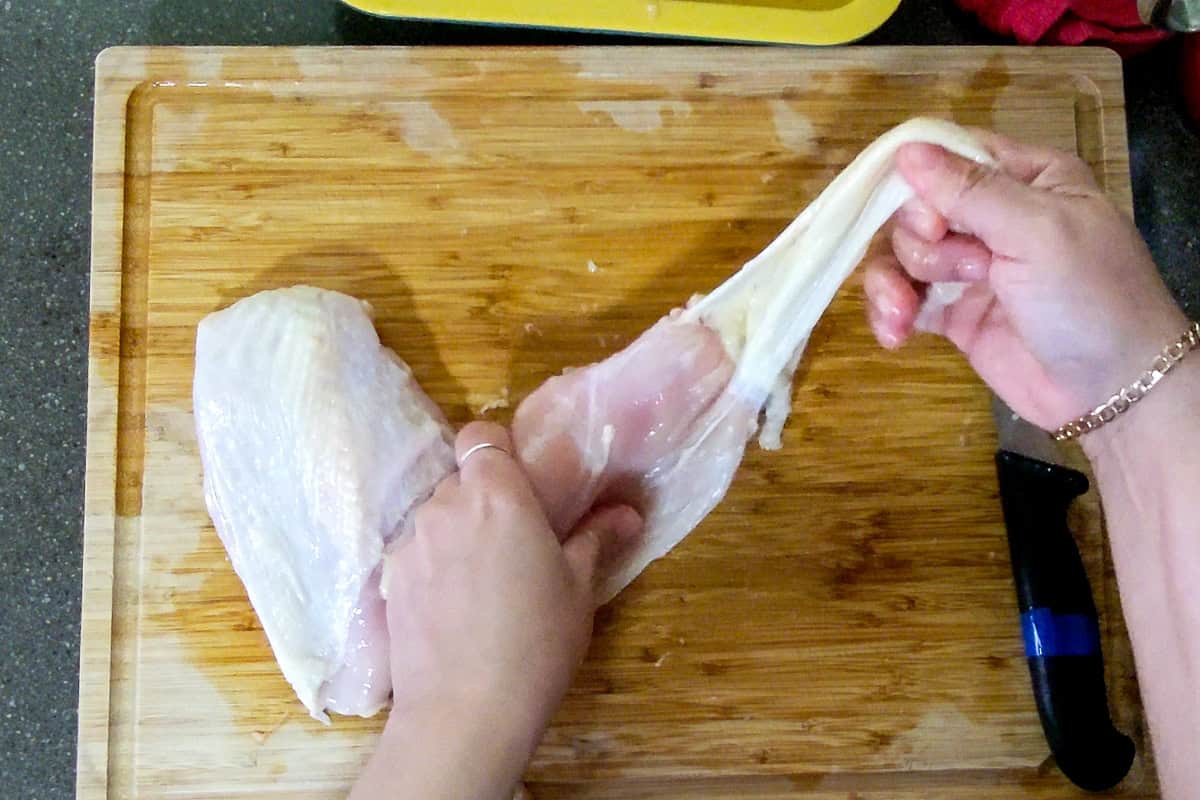
Gently pull the skin back in one slow, steady motion, using short knife strokes if needed to release any stubborn spots.
Trim away any excess fat or bits of connective tissue left behind.
Save the removed skin in a small bag it can be rendered for crispy chicken fat (like gravy) or added to broth for extra flavor.
Remove the White Connective Tendon from the Tenderloin: Grip the visible white Tendon with a paper towel (if using, for traction). Place the tip of your knife just under the tendon at the thick end, keeping the blade angled slightly up toward the tendon (not into the meat).
Pull the Tendon gently upward with your towel hand while you saw lightly against it with the knife this separates tendon from meat without tearing. Continue pulling until the tendon slides out cleanly; trim any tiny remnants if needed.
Chef's Quick Option (What I did): Pinch the tendon with a towel, place the tenderloin curve over the back (spine) of the knife, and pull the tendon straight up; the knife acts as a fulcrum and the tendon slips out in one motion. Fulcrum? The fixed point or support around which a lever pivots to make lifting or cutting easier.
Top from left to right: Chicken Skin and Tenderloins. Bottom: Boneless Skinless Chicken Breasts.
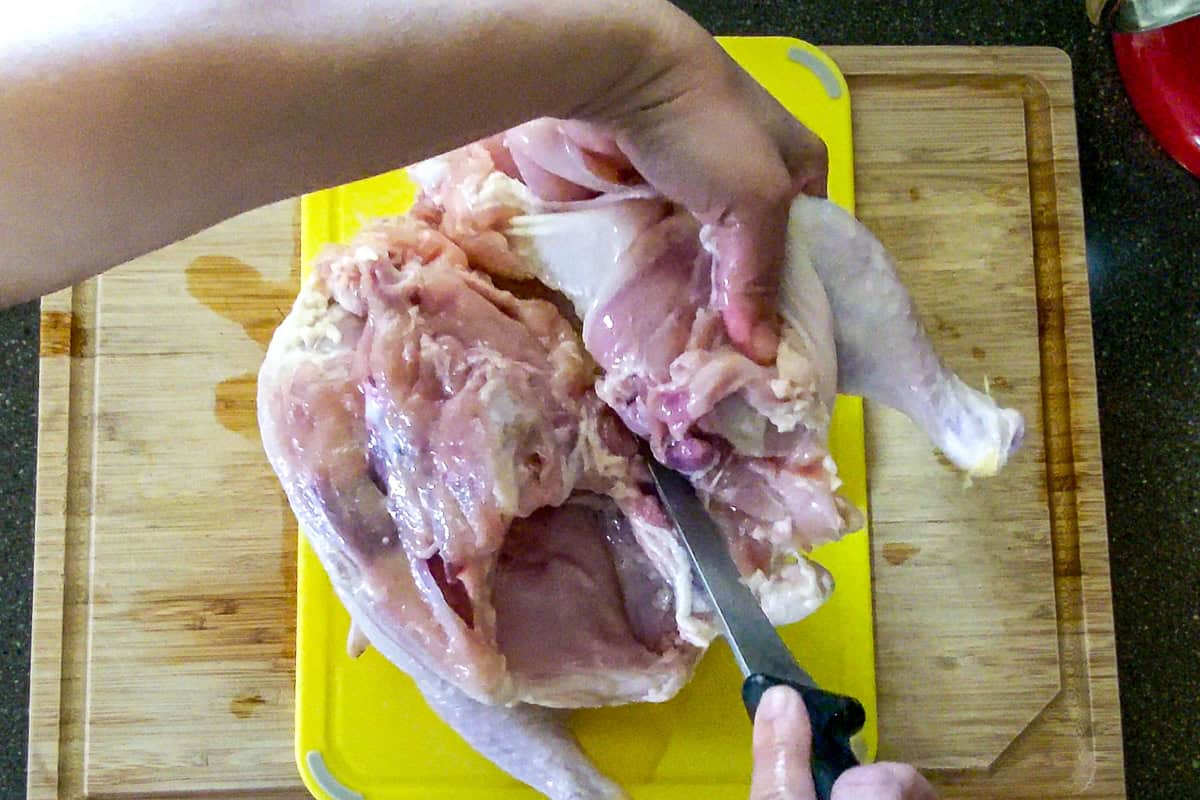
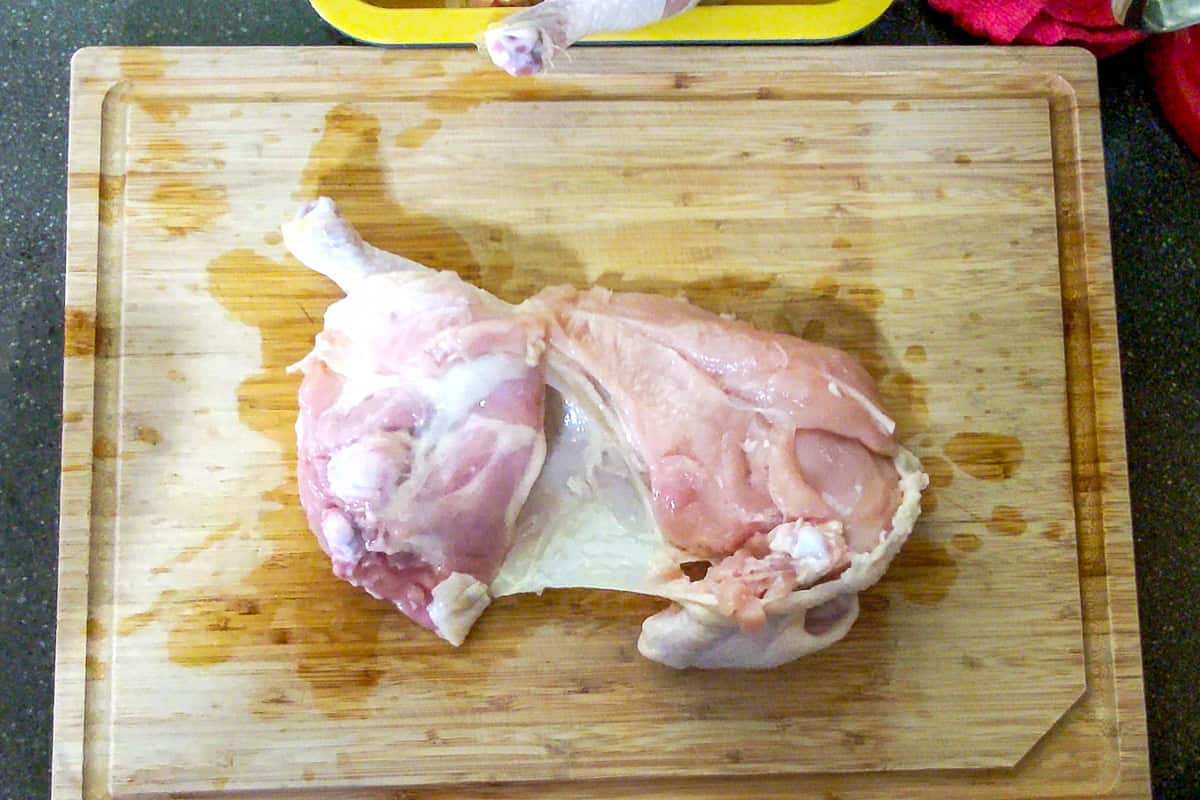
6. Divide the Leg Quarters

Each Leg Quarters (Dark Meat) includes the thigh and drumstick, attached at the knee joint (also called the hock joint). The thigh joint (or hip joint) connects the leg quarter to the back of the chicken.
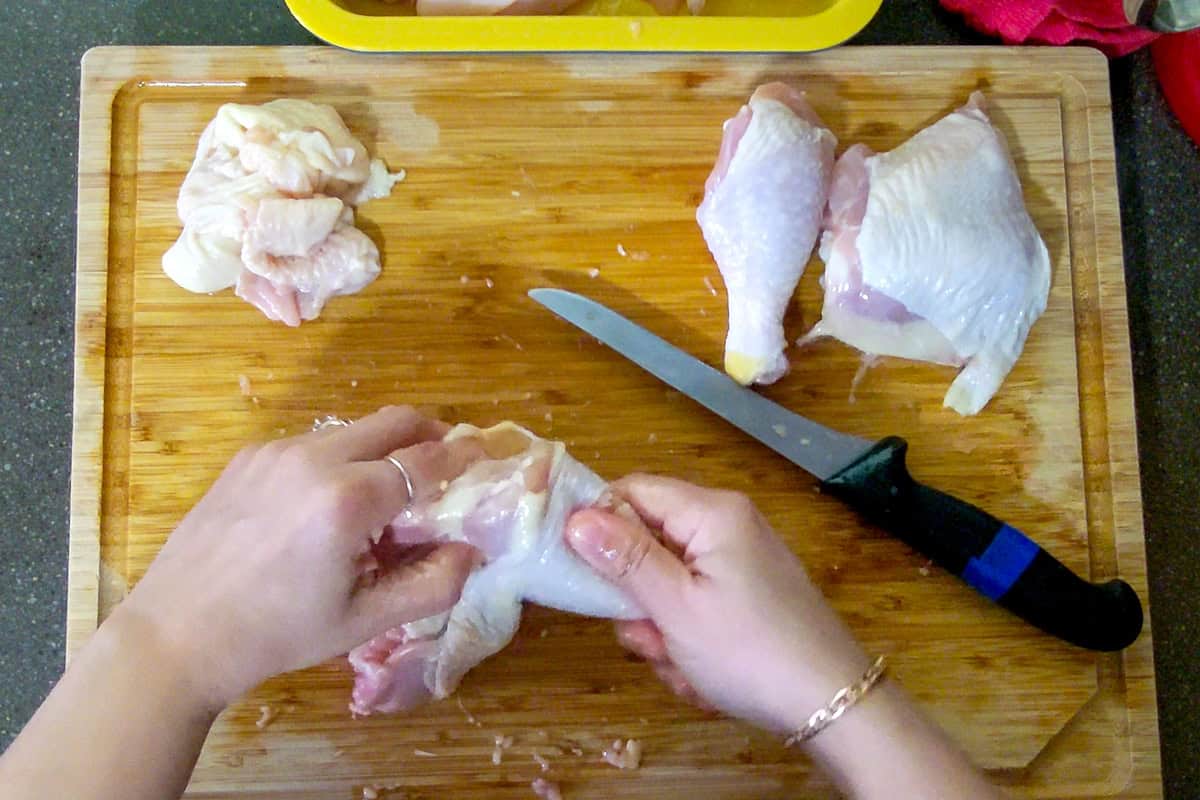
The hardest part is finding joints; don't force your knife through bone, use the line of white fat as your map. Optional: to separate the joints, you can crack it using both hands, going in the opposite direction of how it normally moves.
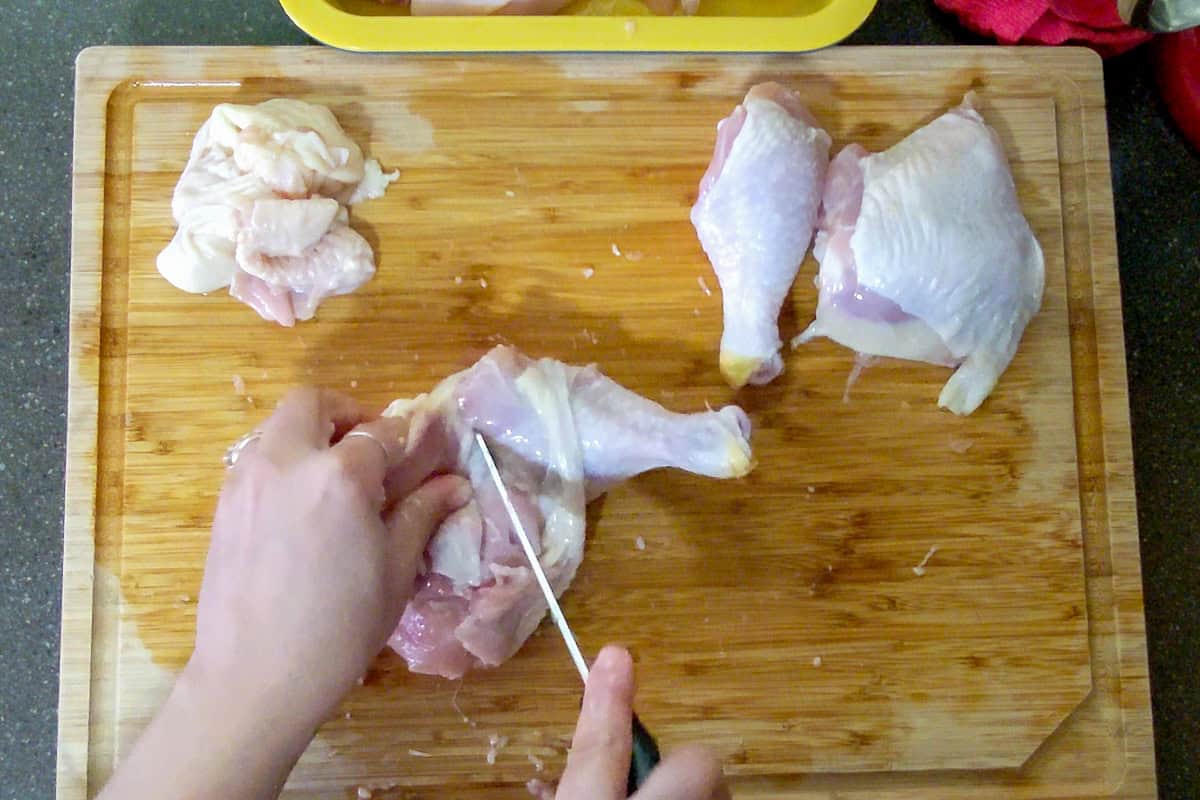
Lay the Leg Quarter flat and look for the fat line running between the Chicken Leg and Thigh.
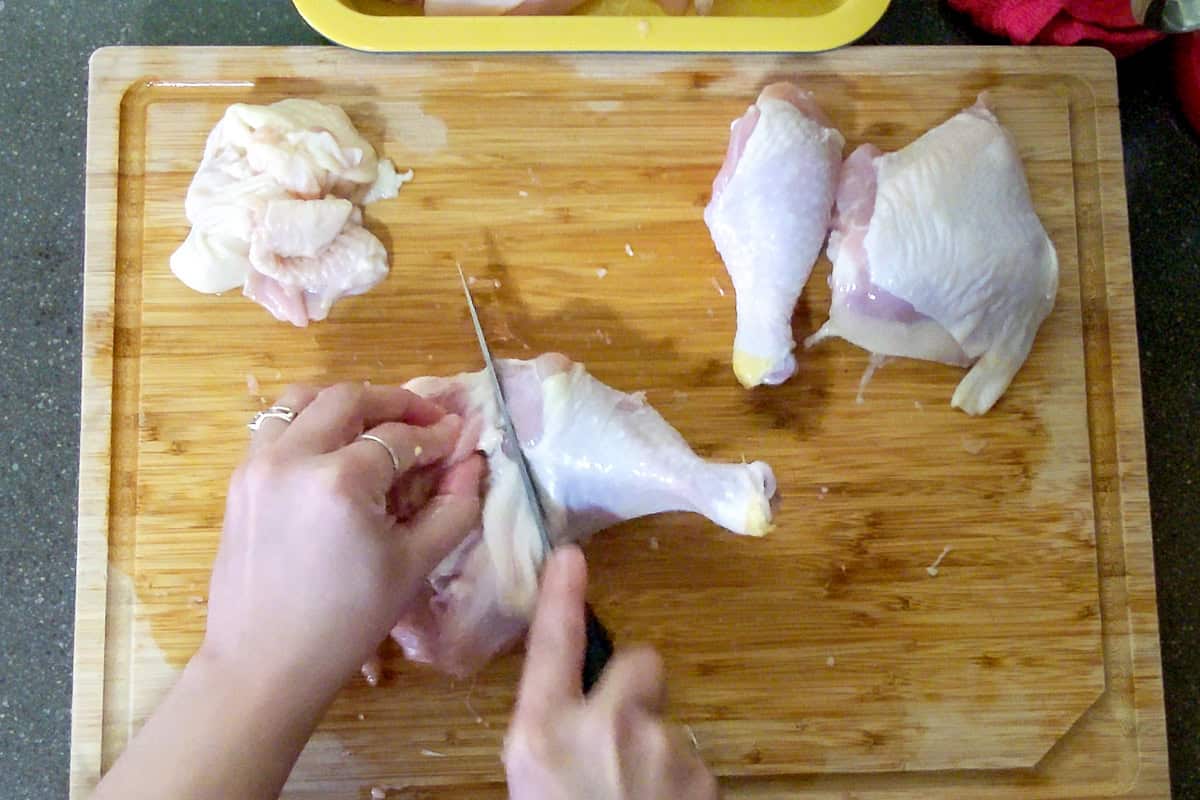
Cut straight through that line; it's your guide to the Knee Joint (Hock Joint). It's where the Drumstick and Thigh join; this is where you cut to divide the Leg Quarter into two parts.
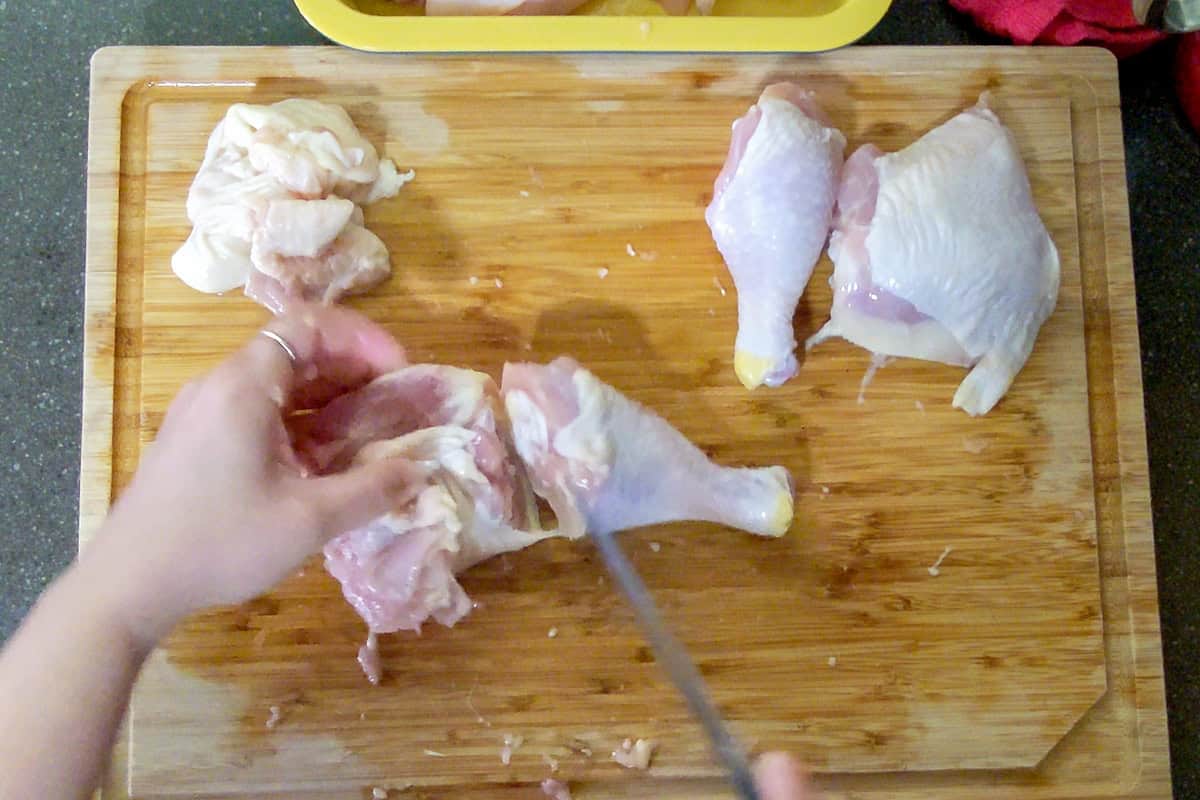
The blade should pass easily if you're in the right spot.

Always cut through joints, not bones, to preserve the integrity of each piece.
7. Trim and Save
Save the wing tips, carcass, and trimmings; these add rich flavor to bone broth or homemade chicken stock when simmered in cold water.
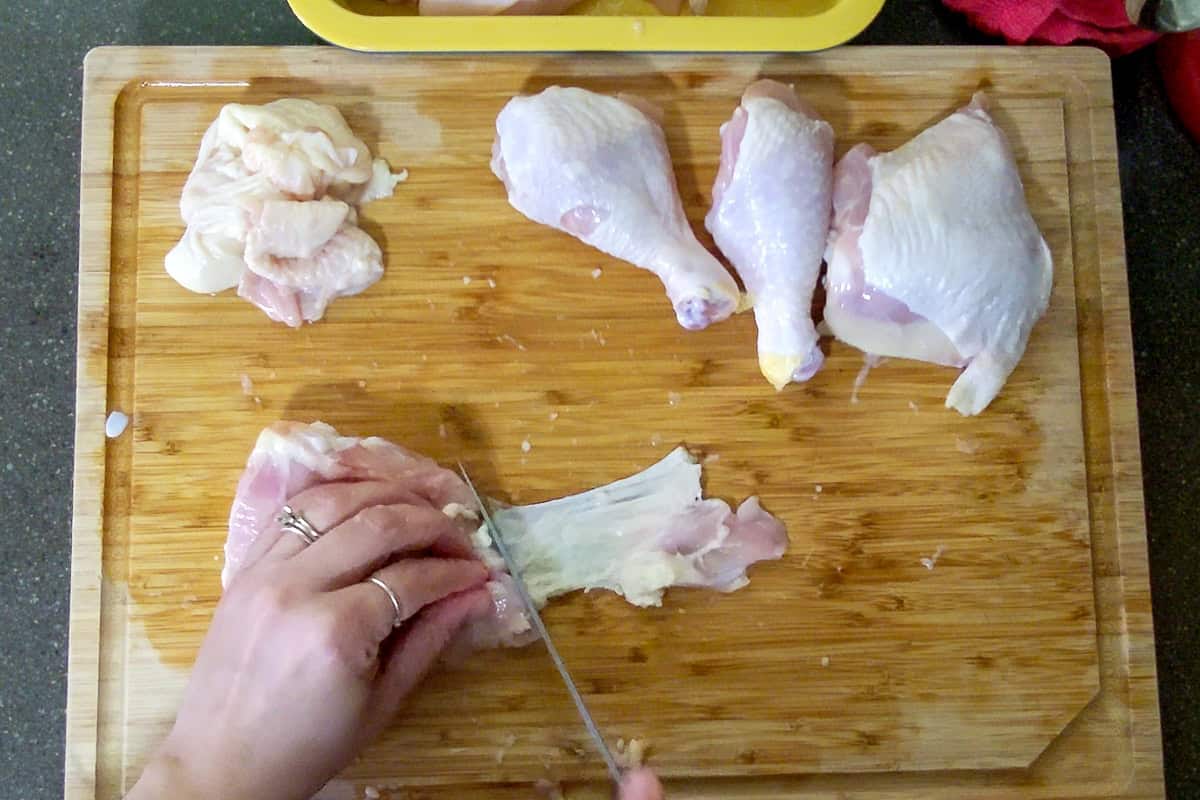
Remove any excess fat or loose skin from your chicken pieces.
After cutting, you'll have a variety of chicken parts:
- 2 chicken breasts (great for chicken salad or grilling)
- 2 chicken thighs
- 2 chicken legs
- 2 chicken wings
- 1 carcass (for stock or broth)
Wash your hands, tools, and surfaces in soapy water immediately after working with raw poultry.
Storage & Freezing Instructions
After cutting your whole bird into chicken pieces, it's important to store them properly to keep the meat fresh and safe to eat. Whether you plan to cook right away or freeze for later, following these steps helps maintain texture, flavor, and food safety. Learn more about Understanding Food Temperature Safety Zones: Cook, Store & Serve Safely.
Refrigerating Fresh Chicken
- Place your chicken breasts, thighs, legs, and wings in airtight containers or zip-top bags.
- Keep raw poultry stored in the coldest part of the fridge, ideally below 40°F (4°C).
- Use within 1 to 2 days for the best quality and to prevent spoilage.
- Always store the chicken on a plate or tray to catch any drips and prevent cross-contamination with other foods.
Chef Tip: Label your containers with the date of storage and the type of cut (for example, "Thighs - Oct 2025") to make meal planning easier later.
Freezing Chicken Pieces
- For longer storage, freeze your chicken parts individually before bagging to keep them from sticking together. Lay them out on a sheet pan and freeze for about 2 hours first.
- Once firm, transfer the pieces to freezer-safe bags or vacuum-sealed pouches.
- Press out as much air as possible before sealing. This helps prevent freezer burn and preserves the chicken's moisture.
- Store frozen chicken for up to:
- 9 months for whole pieces (breasts, thighs, drumsticks, wings)
- 3-4 months for smaller pieces or trimmings
- Always thaw in the refrigerator overnight or use the cold water method, keeping the chicken sealed in its bag and submerged, changing the water every 30 minutes.
Storing for Stock, Broth or Gravy
They'll keep in the freezer for up to 6 months and can be added directly to a pot of simmering cold water without thawing first. Save the carcass, wing tips, and excess fat in separate freezer-safe bags labeled "For Stock."
Combine these when you're ready to make homemade chicken stock or bone broth. Important: Freeze the giblets to make rich gravy.
Food Safety Tips
Always store and thaw raw chicken below other foods in your refrigerator to prevent drips. Wash your hands, cutting board, and knives with soapy water after handling. If the chicken smells sour or feels slimy, discard it freshness and safety go hand in hand.
- What Is HACCP and Why Every Home Cook Should Care About It
- Holiday Kitchen Safety Tips: How to Cook, Serve, and Store
- What is Salmonella? For Home Cooks | Causes and Tips
- How to Marinate Chicken: Tips, Quick Methods & Flavorful Shortcuts
5 Quick Prepping Tips
Cook's Notebook is your Cooking Tips Resource Guide. Become a better home cook with tips to help you cook more efficiently.
- Dry the Chicken First: Use paper towels to pat the bird dry before cutting. This keeps the smooth skin from slipping and gives your knife better traction.
- Use a Sharp Knife, Not Force: A good knife preferably an ultra-sharp chef's knife or boning knife does the work for you. Forcing a dull blade through joints can tear meat and damage the blade's spine.
- Follow the Fat Lines: Look for the line of white fat between joints like the thigh and drumstick. It shows you exactly where to cut without hitting bone.
- Keep Your Free Hand Steady: When guiding your cuts, rest your free hand flat on the bird for balance, keeping your fingertips safely away from the blade.
- Organize As You Go: Group chicken pieces on a tray as you cut breasts, legs, thighs, wings, and carcass to make the entire process cleaner and faster.
Frequently Asked Questions
Here, you will find a list of common questions that I have answered. If you have questions, please write them in the comment section below.
Start by slicing down the center of the breast meat to remove each half, then separate the leg quarters and wings. Following natural joints makes the entire process smooth and beginner-friendly.
If your knife moves easily, you're on a joint. If it resists, you're hitting bone. Look for the fat line or white cartilage as your visual cue.
Yes, kitchen shears or kitchen scissors work great for trimming wing tips or cutting through the back of the chicken, especially if you're not comfortable with a knife yet.
Save the carcass, excess fat, and wing tips to make homemade chicken stock or bone broth. Just simmer them in cold water with herbs and vegetables for a few hours.
Keep cut chicken pieces in airtight containers or sealed bags for up to 2 days in the refrigerator. For longer storage, freeze them and thaw in cold water before cooking chicken.
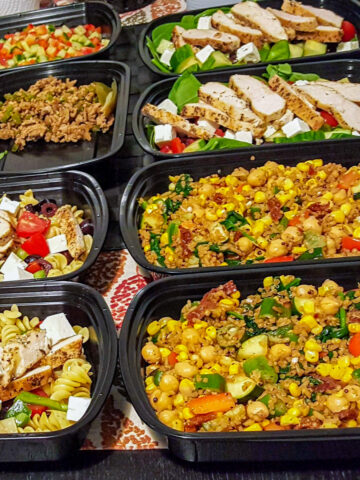
Chicken Recipes
Looking for delicious chicken recipe ideas? Try these:
- Kimchi Fried Rice Recipe - Simple Base You Can Build On
- Pan-Roasted Chicken and Andouille Sausage Gumbo
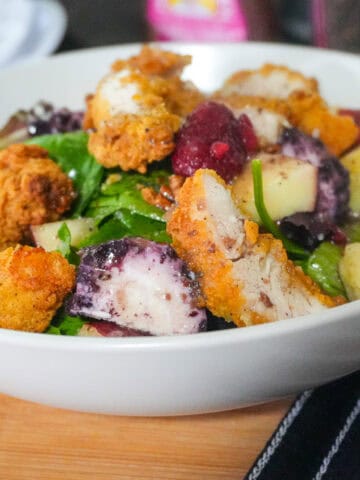
- Fresh Berry Apple Pecan Chicken Salad with Goat Cheese
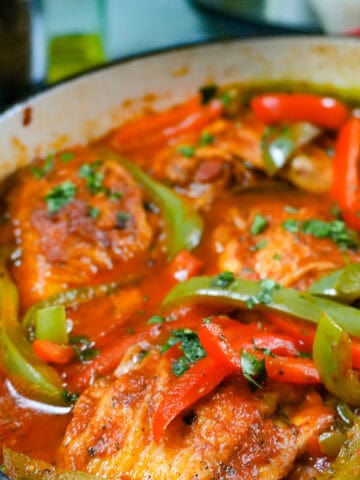
- Braised Chicken | Mexican-Style with Roasted Tomato Sauce
Cooking Tips and Tutorials
If you found this tutorial helpful, you'll love my Cook's Notebook collection. From knife skills and flavor bases to time-saving tricks and essential equipment guides, this section is packed with chef-tested lessons to help you cook with confidence.
- Best Food Audiobooks for Chefs & Home Cooks
- Winter Seasonal Produce Guide: What's In Season
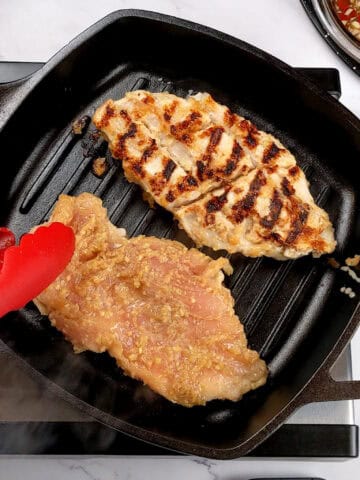
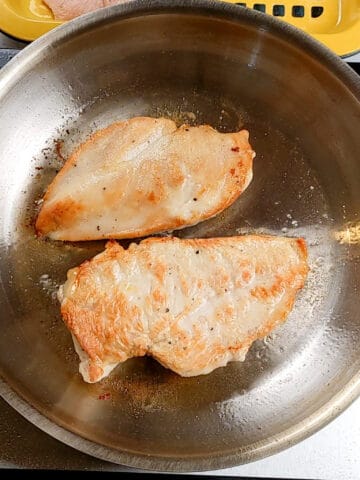
- Best Pans for Searing Chicken (and How Each One Behaves)
- Cooking Tips for Searing Chicken

Subscribe to the YouTube Channel
SUBSCRIBE: 👈To my YouTube Channel to Get Notifications of New Videos.


Chef Maika Frederic-Liebman
Chef and Educator
Haitian-American chef and educator Maika Frederic blends bold flavors with approachable recipes. With a background in professional kitchens, classrooms, and children's therapy, she brings a thoughtful, inclusive touch to every dish as a trained chef, former teacher, and technician. Through her platform, Just Maika Cooking, she shares diverse meals and practical tips to empower home cooks of all ages and levels.
Have a Comment or Question?
If you have a question or comment about this post, please post it below. You will definitely get a quick response. It also helps our other readers to stay informed. Thanks!

Leave a Reply