


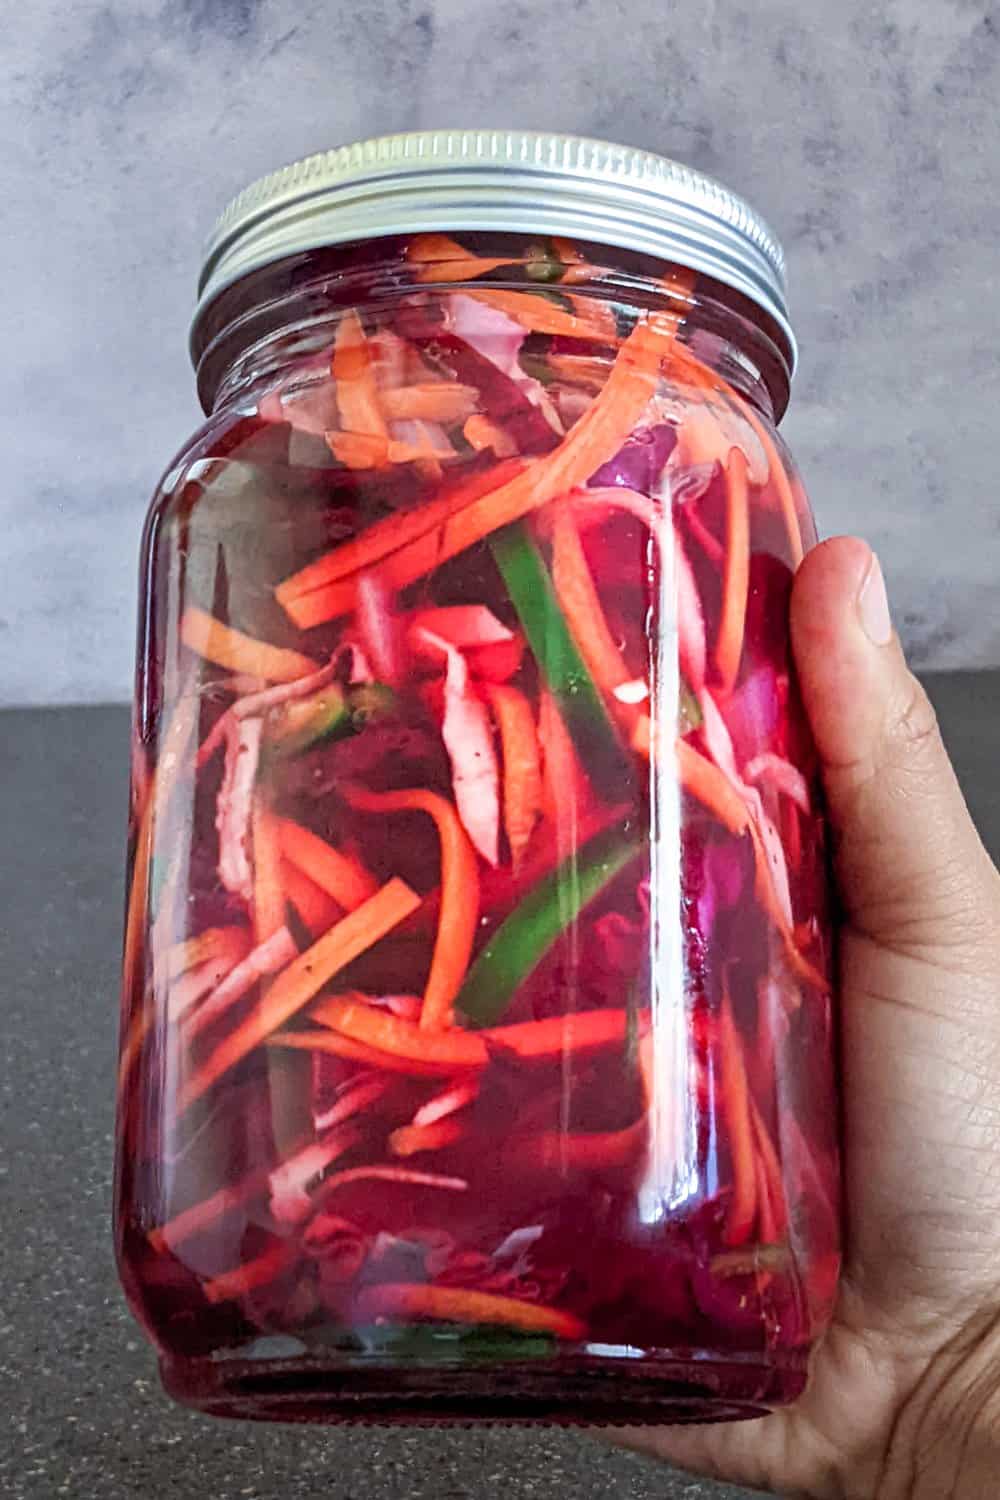
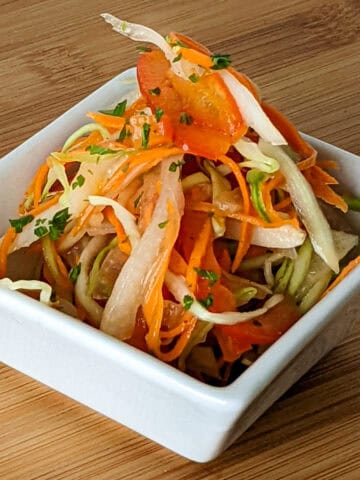
This Quick Pickled Vegetable Pepper Slaw is a no-heat recipe that uses a cold brine to create crisp, tangy, and spicy veggies in just minutes. It's an easy way to add bold flavor to wraps, salads, sandwiches, or snack boards, no cooking required.

Table of Contents
Jump to:
- Don't Even Break a Sweat: The Perfect Way to Pickle Without Heat
- Why You'll Like It
- Cold Pickling vs. Hot Pickling: Know the Difference
- Understanding the Brine: What Makes It Work
- Pickling: A Time-Tested Tradition with a Modern Twist
- Ingredients with Steps
- Culinary Glossary
- Equipment
- Kitchen Must-Haves Reviews
- Substitutions
- Variations
- Storage Instructions
- 5 Prepping Tips
- Frequently Asked Questions
- Side Dish Recipes
- Vegetarian Recipes
- 📖 Recipe
- Serving Suggestions
- Have a Comment or Question?
Don't Even Break a Sweat: The Perfect Way to Pickle Without Heat
If you've ever wanted to skip the boiling pot of water and still enjoy crisp, tangy vegetables, this is your perfect way to do it. Cold pickling or refrigerator pickling is a wonderful recipe for making quick pickled veggies using just a few basic ingredients like vinegar, salt, and water. No small saucepan or high heat required!
Instead of using a hot brine that needs a large pot of water and equipment for long-term storage, this simple recipe lets your raw vegetables sit in a quick pickling brine at room temperature before chilling in the fridge. It's a great way to enjoy deep flavor and bright color in just a couple of days, no canning setup needed.

Plus, you can easily reuse your filled jars again and again for short-term pickling.
Why You'll Like It
- No heating required - Skip the stove and use a cold brine instead.
- Quick & easy - Simple prep with basic ingredients; ready in a couple of days.
- Bold, zesty flavor - Packed with garlic, jalapeño, and coriander seeds.
- Versatile - Great on wraps, salads, bowls, or charcuterie boards.
- Fresh & customizable - Use your favorite veggies and adjust the spice level.
Cold Pickling vs. Hot Pickling: Know the Difference
There are two main styles of pickling: cold pickling for short-term storage, and hot water or boiling pot of water methods for canning and longer storage.
Cold Pickling (also called quick pickling or refrigerator pickling) uses a quick pickle brine, a mix of cup water, cup of vinegar, and seasonings, that's poured over fresh veggies and stored in the fridge. This method doesn't kill off natural bacteria with high heat, so it's not designed for long-term storage, but it produces crisp, refreshing results ideal for everyday meals.
Hot Pickling, by contrast, involves sterilizing jars in a large saucepan or small pot, using a vinegar mixture heated in a small pot, then sealing jars with a hot brine for longer storage. This technique is great if you're preserving sweet pickles, traditional pickles, or making pantry-stable quick pickle fruit to last the whole season.
Understanding the Brine: What Makes It Work
A good quick pickles recipe follows a core rule: the ratio of vinegar to water must be balanced for safety and taste. A 1:1 mix 1 cup vinegar to 1 cup of water is the standard starting point, and you can customize it with added sugar, table salt, and spices like coriander seeds and sprigs of fresh dill for flavor.
Using the right type of vinegar matters, too. While distilled white vinegar is most common, rice wine vinegar, basic vinegar, or different vinegars like apple cider or white wine can change the character of your final product. Some vinegars are better suited for sweet pickles, while others are perfect in savory dill pickles. Just make sure they're at least 5% acidity.
Important
Before sealing your filled jars, always tap or stir gently to release any air bubbles. This improves the texture of the quick-pickled veggies and ensures they're properly submerged. Keep the liquid slightly below the top of the jar to allow space for pressure and movement.
Pickling: A Time-Tested Tradition with a Modern Twist
From ancient preservation methods to your local grocery store, pickling has been around for centuries. While many cultures still make traditional pickles, today's cooks are reimagining them with modern twists.
Last year alone, I experimented with a variety of vegetables for my own homemade pickles, from crunchy carrots to shredded beets. With the fridge method, you can test different vegetables in small batches, making each jar a new adventure in taste and texture. And best of all? You'll be enjoying your pickles by the next day or in just a couple of days.

Nerd out! Here are some great articles to explore. Suggested further reads: History in a Jar: The Story of Pickles and The Juicy 4,000-Year History of Pickles.
Recommended Reads
- Understanding Food Temperature Safety Zones: Cook, Store &
- Spiced Salmon with Pepper Cabbage Slaw and Yellow Rice
- Loaded Plantain Fries with Crispy Chicken Thighs and Spicy Slaw
- Hot Honey Sesame Chicken with Napa Cabbage Stir-Fry
- Korean-Style Beef Short Ribs with Smashed Sweet Potato and
Ingredients with Steps
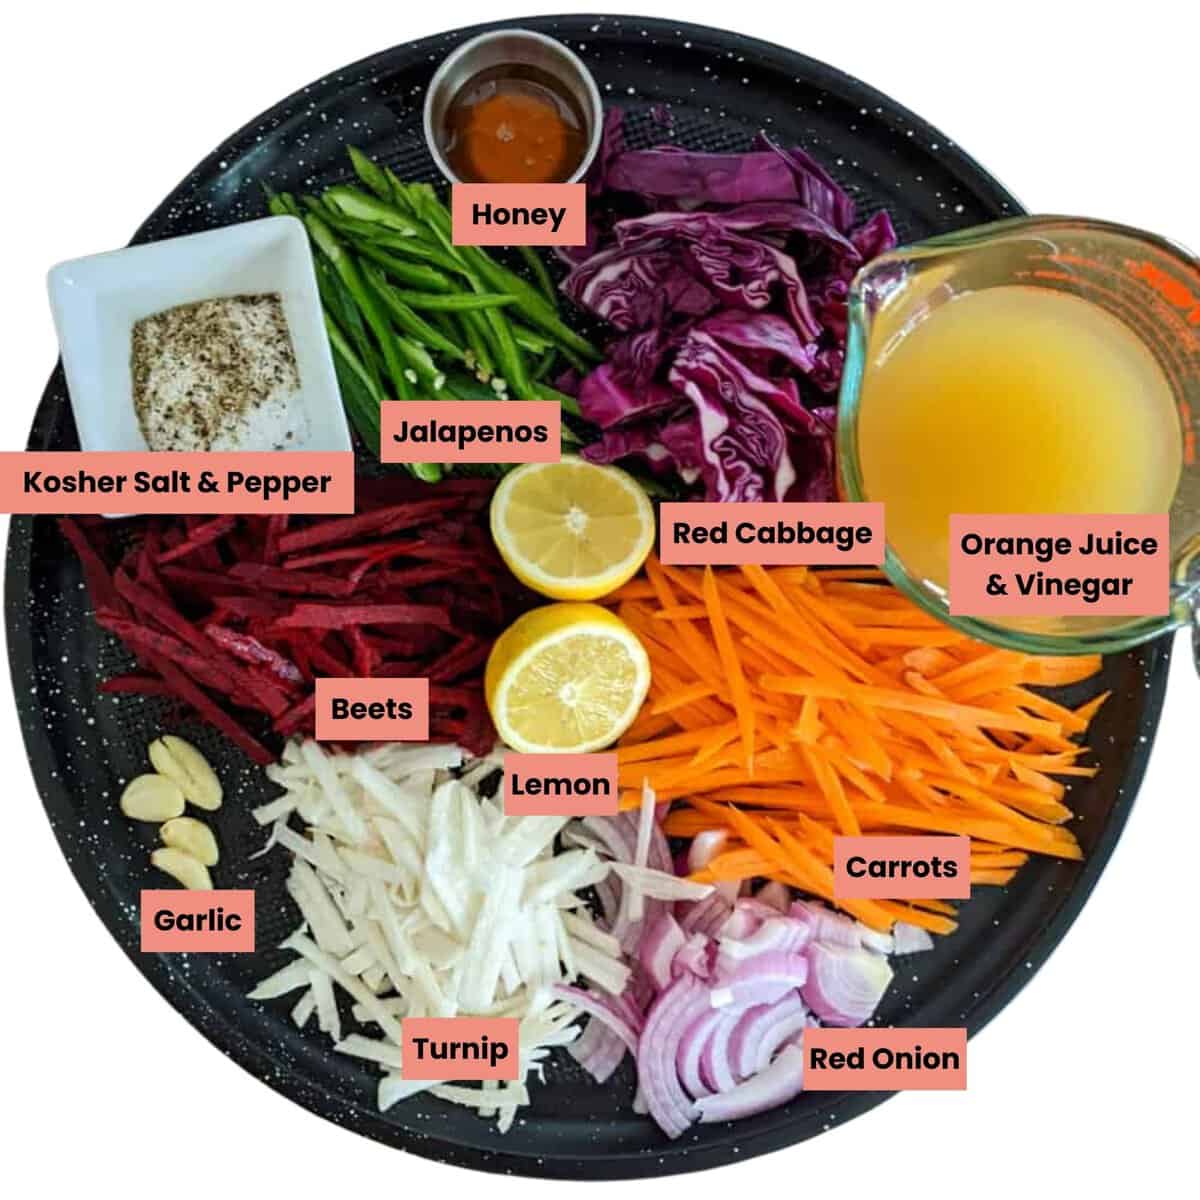
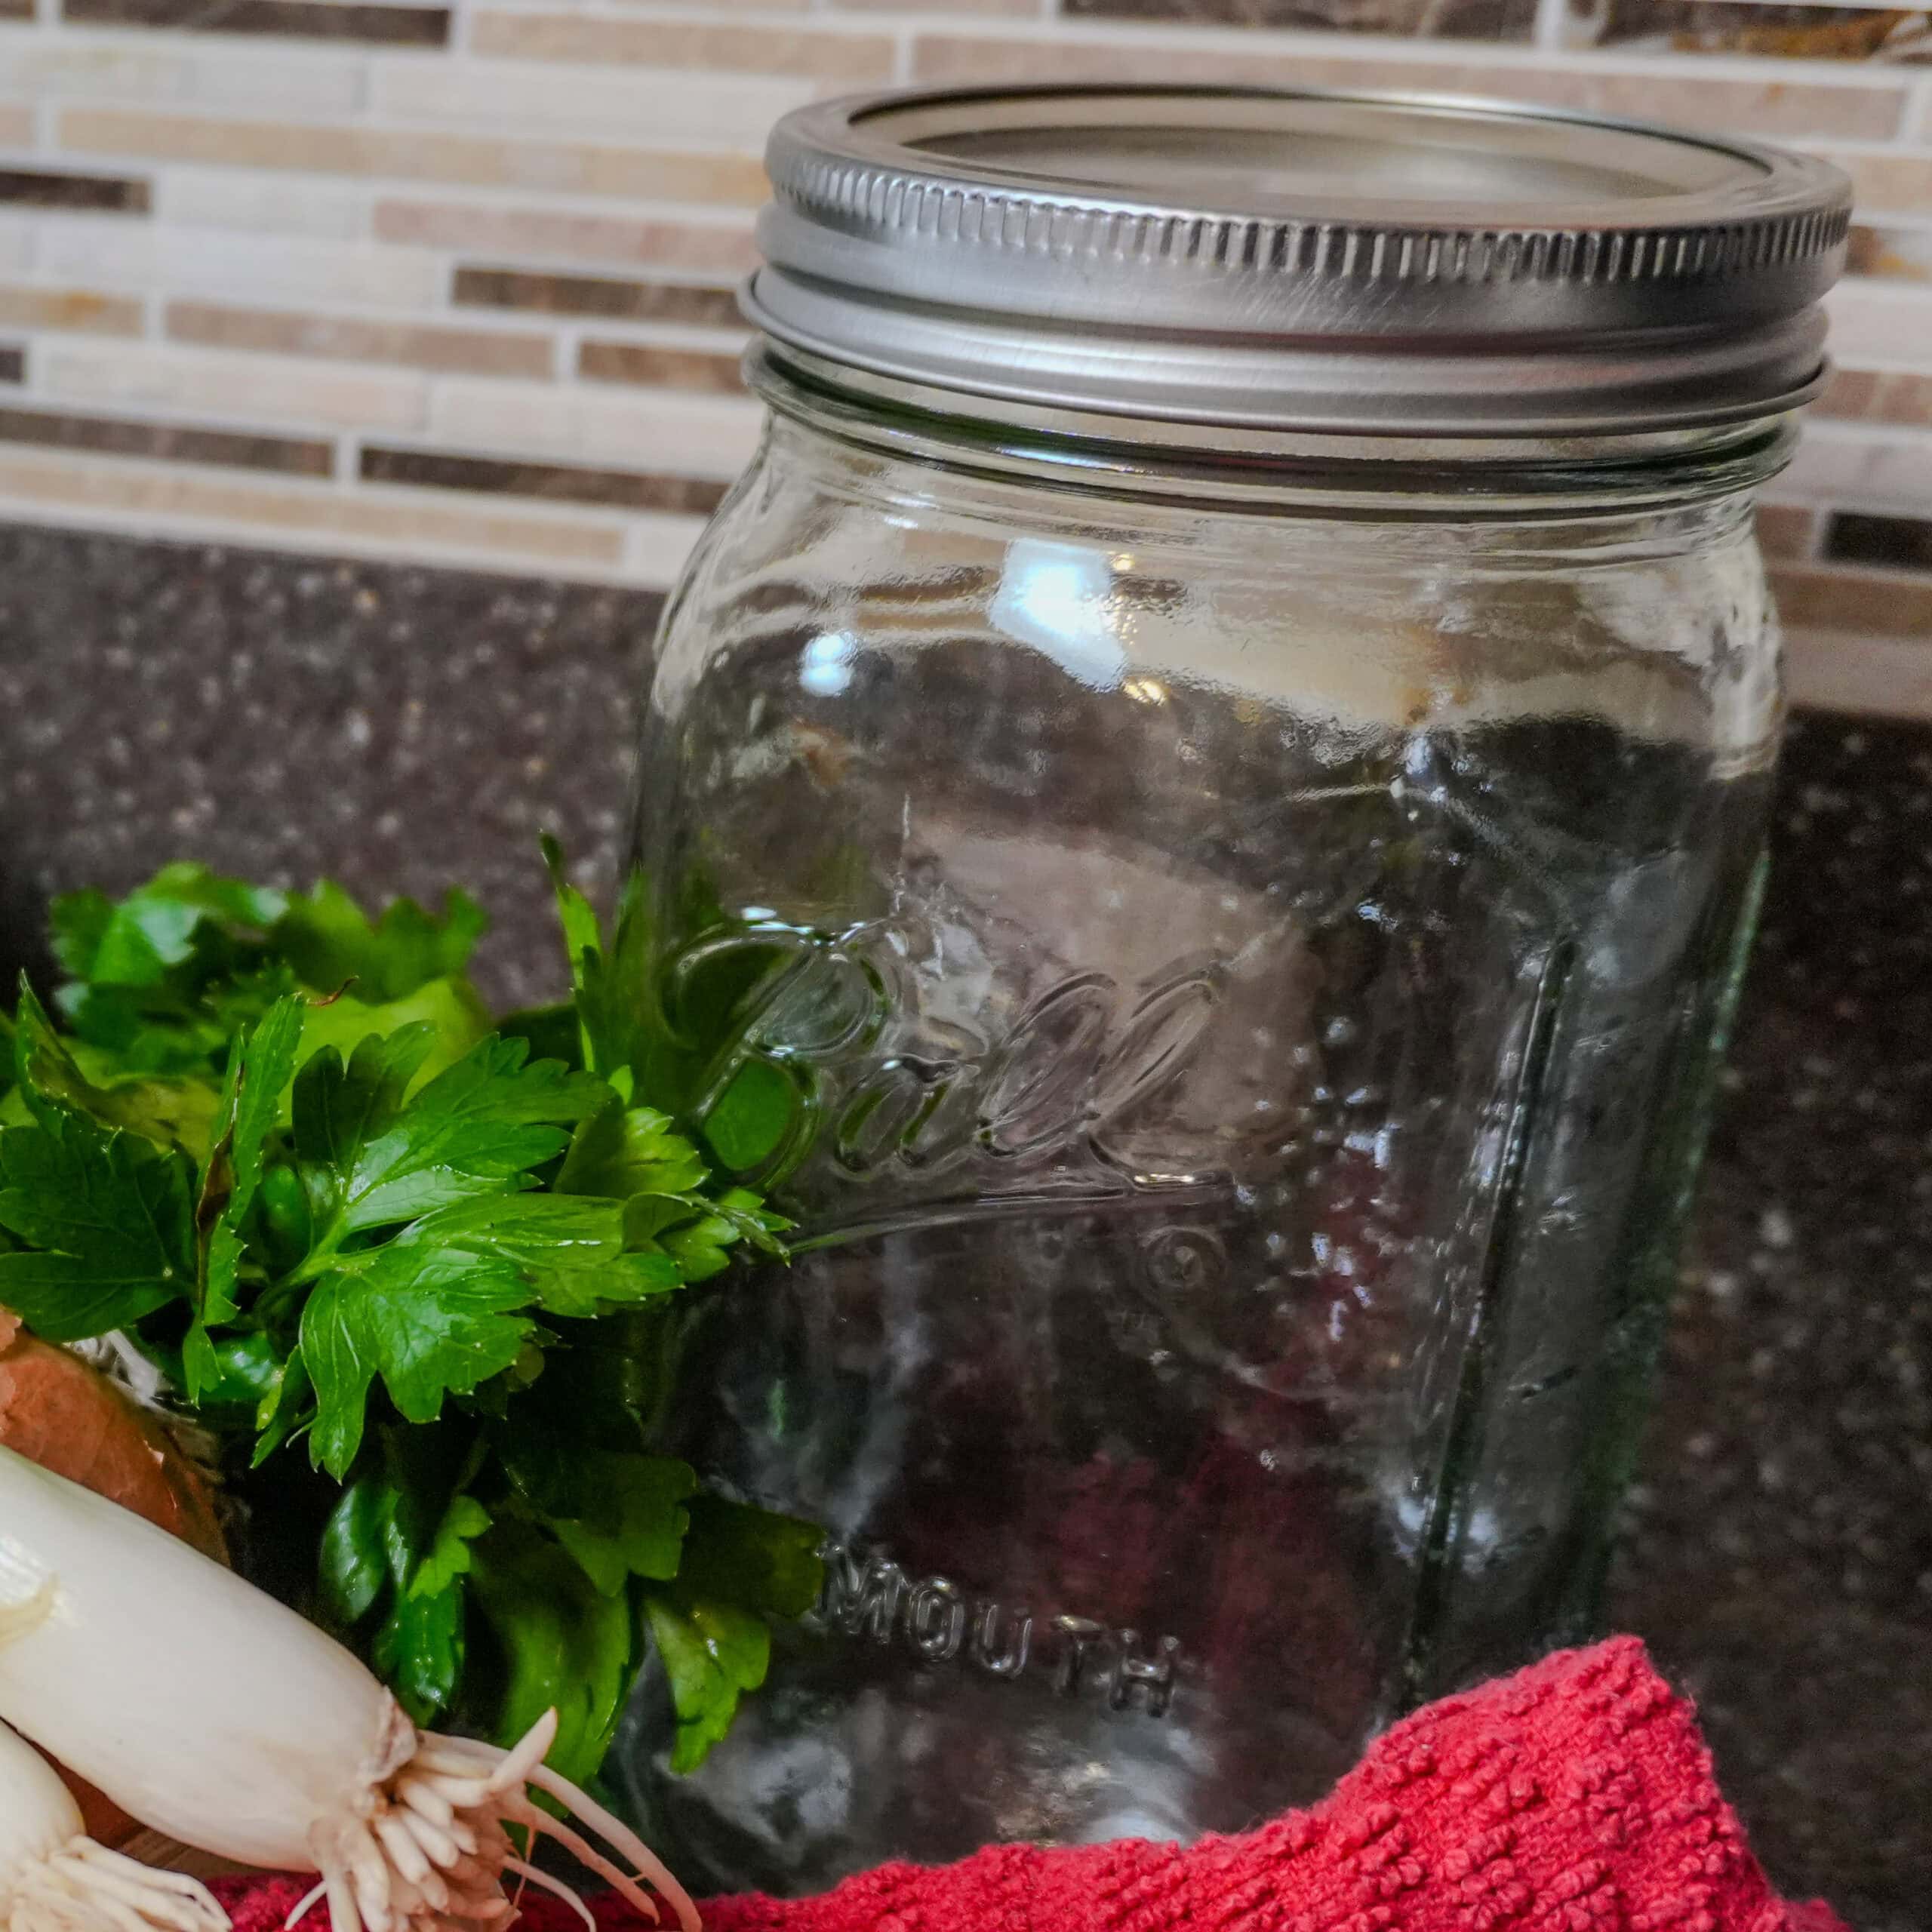
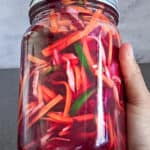
To make pickled vegetables, start by peeling and thinly slicing the turnip, beet, red cabbage, carrots, red onions, and jalapeños, and smashing the garlic cloves. Place the vegetables and garlic into a large jar.
In a separate bowl, mix white vinegar, water, lemon juice, kosher salt, and honey until fully dissolved, then pour the brine over the vegetables, ensuring they are fully submerged.
Seal the jar and refrigerate for at least 24 hours to develop flavor, though for best results, let the vegetables pickle for 2-3 days before serving.
Culinary Glossary
This section provides concise definitions of key ingredients and techniques to enhance understanding and improve cooking skills related to this recipe.
- Cold Pickling - Pickling method without heating the brine, best for quick refrigerator pickles.
- Refrigerator Pickles - Pickled vegetables stored in the fridge, meant to be consumed within a few weeks.
- Quick Pickled Vegetables - Vegetables pickled in a short amount of time using a cold brine, without heating.
- Pickling Brine - A mixture of vinegar, water, salt, and sugar used to pickle vegetables.
- Kosher Salt - A coarse-grained salt used for pickling due to its purity and texture.
- It is crucial in pickling because its pure, additive-free crystals dissolve evenly, helping to draw moisture from vegetables and maintain the perfect brine consistency for safe and flavorful preservation.
See the pickled vegetable pepper slaw recipe card for quantities.
Equipment
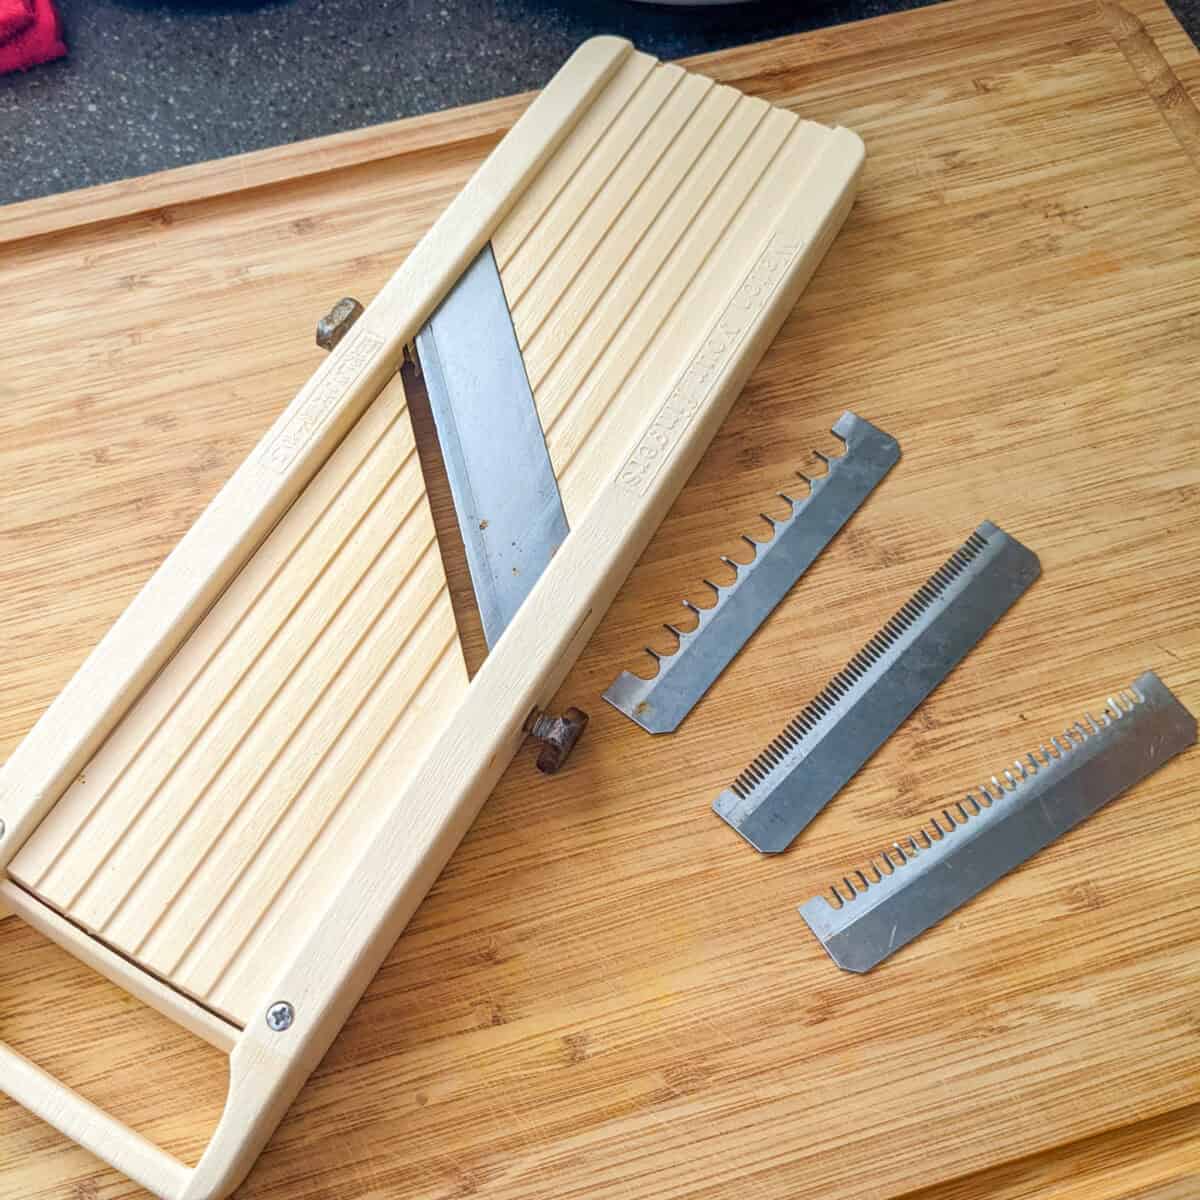
- Mandoline - To thinly slice or shred the vegetables. If your mandoline doesn't have teeth blades to make julienne/matchstick cuts. I suggest slicing it into 14-inch pieces, then stacking them and slicing them into strips. I've used my Benriner Japanese Classic Slicer for over 20 years; it's super convenient and tucks away in a drawer.
- Large Mixing Bowl - Used to combine all the shredded vegetables before placing them in the jar.
- Mason Jar - To store pickled vegetables to ensure long-lasting freshness. I recommend the Ball Regular Mouth 32-Ounces Mason Jars.
Kitchen Must-Haves Reviews
Find a collection of my reviews of kitchen equipment that I have purchased or recommend. Kitchen Must-Haves - Find other tools I use here.
My Review: I’ve had my Benriner Mandoline Slicer for over 20 years, and it’s still one of the most reliable tools in my kitchen. While I own the older model, the new version is nearly identical, featuring the same chef-trusted quality, sharp Japanese stainless steel blades, and simple, effective design. It’s been a huge help with meal prep, especially when I need consistent, thin slices fast. Benriner has always been the original go-to mandoline in professional kitchens, and for good reason—it just works. If you want to learn more about how to safely and efficiently use a Japanese mandoline, check out my full guide on the Japanese Mandoline here.
My Review: I love the clean, classic look of this Pyrex 3-piece glass mixing bowl set. It’s a staple in my kitchen. Pyrex is known for its durability, and these bowls definitely live up to that reputation. I use them for everything from mixing batters to storing leftovers, and the fact that they’re microwave-safe makes them super multifunctional. They’re also easy to clean and stack nicely in the cabinet. The only reason this isn’t a five-star for me is because I always have that little fear of breaking them when I’m using or storing them, even though they’re made to last.
My Review: I own over 20 of these Ball Wide Mouth Glass Mason Jars because they’re just that reliable. I use them for everything from storing spices in my cabinet to keeping my wet seasoning blends fresh, organizing meal prep, and even as drinking glasses. Ball’s been around for over 130 years, so it’s easy to trust their quality and consistency. The wide mouth makes them super easy to fill and clean, and the sturdy lids and bands seal tight every time. From canning to just keeping my kitchen organized, these jars never fail me. Fun fact: during World War II, Ball shifted production to make shells and machine parts, showing just how durable their products really are!
Substitutions
Dairy Free
- Yay! This recipe is dairy-free.
Gluten-Free
- Bonus! This recipe is also gluten-free.
Vegetarian
- Honey - Swap with maple syrup or agave nectar for a vegan option.
Convenience
- Honey - Substitute with regular, coconut, or brown sugar for a deeper flavor. Just know that coconut sugar is not as sweet as cane sugar, and you might have to use more than usual, but not too much, since it has a subtle coconut taste, which can affect the overall flavor of the pickled vegetables.
- Jalapenos - Use red pepper flakes or a different pepper you think will go well with your vegetable mixture.
- White Vinegar and Apple Cider Vinegar - Use only one or rice vinegar or white wine vinegar, which is a good substitute for white vinegar in pickling recipes. It has a milder, slightly fruity flavor compared to regular white vinegar. Plus, white wine vinegar can offer a subtle twist to the overall taste of your pickled vegetables.
- However, since it's less acidic than white vinegar, it might produce a slightly softer tang, so you can use it at a 1:1 ratio for most recipes without drastically altering the outcome.
- Or try red wine vinegar, which has a bold, tangy flavor with fruity and slightly sweet undertones, which can add a richer, deeper taste to pickled vegetables than other vinegars.
- The vinegars just depend on what you plan to use your pickles for. Just ensure that the overall vinegar-to-water ratio remains balanced to keep the pickling process safe and effective.
Change Heat Level - Modify the recipe's heat level to your liking and learn more about the Scoville Scale and Chili Pairings.
Variations
- Vegetables - Try pickling cauliflower, bell peppers (e.g., red, green, or yellow), cucumbers, green beans, parsnips, radishes, or hot peppers.
- For cold pickling, jalapeños or serrano peppers work best, providing a balanced heat and maintaining their crisp texture in the brine.
- The vegetables should be cut into uniform, bite-sized pieces or thin slices to ensure even brining and a consistent texture.
- Herbs and Spices - Add fresh herbs or whole spices like dill, mustard seeds, bay leaves, black peppercorns, or crushed red pepper chili flakes for extra flavor.
Have you ever had pickled watermelon rind? You peel the green skin and remove any of the red parts of the watermelon, slicing it into matchsticks.
Storage Instructions
- Refrigerator: Store your pickled vegetable pepper slaw in an airtight glass jar or container. Keep it in the fridge for up to 3 to 4 weeks. For best texture and flavor, wait at least 24 hours before eating. Flavors deepen after a couple of days.
- Freezing: Not recommended. Freezing will soften the vegetables and ruin the crisp texture of the final product.
- Storage Tips:
- Make sure all veggies stay fully submerged in the brine to prevent spoilage.
- Tap jars gently to release air bubbles before sealing.
- Leave a little space at the top of the jar to avoid overflow.
- Label with the date so you know when it was made.
5 Prepping Tips
Your Cooking Tips Resource Guide - Become a better home cook with tips to help you cook more efficiently on the Cook's Notebook tab. Also, Learn about prepping sweet peppers here.
- Use Kosher Salt Only - Stick with kosher salt; iodized salt can create a metallic taste and cloudy brine due to added anti-caking agents. It can also throw off the clean flavor of your pickled veggies.
- Keep the Brine Balanced - You can adjust sugar and vinegar levels slightly, but always maintain a 1:1 ratio of vinegar to water for food safety and effective pickling.
- Fully Submerge the Veggies - If your pickles turn soft, it's likely because the brine didn't completely cover them. Press veggies down and top off with more liquid if needed.
- Slice Evenly for Better Crunch - Use a mandoline or a sharp knife to slice vegetables uniformly; this ensures even pickling and preserves texture.
- Customize the Heat - Add extra jalapeños, chili flakes, or even Thai chilis if you want a fiery batch. For milder versions, remove seeds or swap in bell peppers.

Mix the vegetable slaw with tongs or gloves to massage the ingredients together. Plus, gloves make it easier to fill the jar with shredded vegetables.
Frequently Asked Questions
It's best to make a fresh batch of brine each time. Reusing brine can lead to a weaker flavor and may not be safe for preserving new vegetables.
Quick-pickled vegetables will last up to 3 to 4 weeks in the refrigerator when stored properly in an airtight container.
Yes, feel free to add more or less honey or sugar to suit your taste. Just don't reduce the vinegar too much to keep the brine safe.
This recipe works well with cucumbers, cauliflower, green beans, radishes, bell peppers, or even shredded cabbage.
Soft pickles are usually caused by vegetables not being fully submerged in the brine. Make sure everything is completely covered to maintain a crisp texture.
Side Dish Recipes
Looking for other side dish recipes like this? Try these:
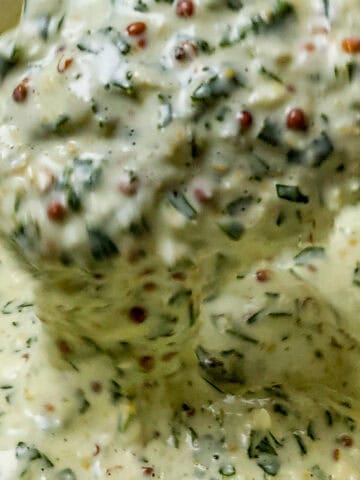
- 5-Minute Chunky Dijon Lemon Mustard Remoulade Sauce Recipe
- How to Cook Perfect Jasmine Rice in a Rice Cooker
- Fresh Cranberry Ginger Chutney | Quick and Easy
- A Quick Look at Haitian Flavor with Pikliz-Style Citrus Slaw

Vegetarian Recipes
Looking for other vegetarian recipes like this? Try these:
- Creamy Lemon Tahini Dressing with Fresh Lemon Zest
- Date Pecan Pomegranate Vinaigrette Recipe
- Spicy Jalapeño Chimichurri Sauce Recipe
- Homemade Caesar Dressing Recipe (Creamy & Classic)
📖 Recipe
Pickled Vegetables Pepper Slaw
Ingredients
Vegetables
- 1 small turnip
- 1 medium beet
- ¼ medium red cabbage
- 2 medium carrots
- ¼ medium red onion
- 2 medium jalapenos optional
- 2 large garlic cloves smashed
Brine
- 1 tablespoon kosher salt
- 3 tablespoon honey
- 1 lemon juiced
- ¼ cup apple cider vinegar 5% acidity
- ¼ cup white vinegar 5% acidity
- ½ cup orange juice no pulp; adds a mild sweetness and brightness.
- 1 dried bay leaf optional
Equipment
Instructions
- Save time in the kitchen: Read the instructions thoroughly, then gather and prep all your ingredients before cooking! Learn Prepping Tips.
- Prepare the Vegetables: Peel and thinly slice the turnip, beet, red cabbage, carrots, red onion, and jalapeños using a sharp knife or mandoline. Smash the garlic cloves.
- Layer the Vegetables - Toss all sliced vegetables, jalapeños, and garlic together, then pack them tightly into a large mason jar or divide between smaller jars.
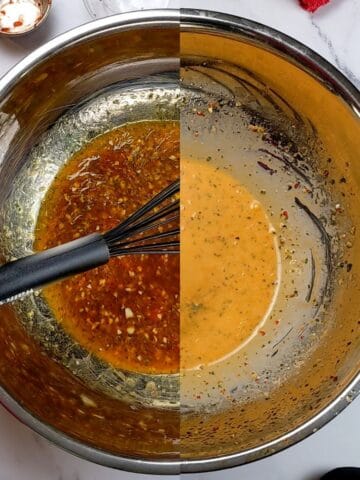
- Make the Brine: In a mixing bowl, combine white vinegar, apple cider vinegar, orange juice, lemon juice, kosher salt, and honey. Stir until salt and honey are fully dissolved.
- Pour the Brine - Carefully pour the brine over the vegetables until fully submerged. Tap the jar gently to release any air bubbles and top off with more brine if needed.
- Seal and Store - Seal the jar(s) and refrigerate for at least 24 hours before eating. For best flavor, let the vegetables pickle for 2-3 days.
Video
Notes
Serving Suggestions
- Massaged Kale Salad - Adds a crunchy, tangy punch. Check out my recipe here.
- Wraps - Try with my Meatball Wrap with Veggies.
- Grilled Meats - Perfect with grilled chicken, steak, or my Quick Beef Kebabs.
- Sandwiches - Great in shawarma wraps or pita sandwiches for extra zing.
Nutrition
Subscribe to my YouTube Channel.
SUBSCRIBE: 👈To my YouTube Channel to Get Notifications of New Videos.
Have a Comment or Question?
Pickling couldn't be easier! This no-heat pickling method is quick, versatile, and perfect for experimenting with different vegetables and flavors. I'd love to hear what combos you try-drop your experience in the comments and let's get pickling!
If you have a question or comment about this quick pickled veggies recipe, please post it below. You will definitely get a quick response. It also helps our other readers to stay informed. Thanks!

Leave a Reply