


This Haitian-style spatchcock turkey is roasted with bold spices, citrus, and herbs for a juicy, evenly cooked holiday centerpiece full of bright flavor. The spatchcock technique speeds up roasting time while creating rich drippings perfect for an easy homemade gravy.
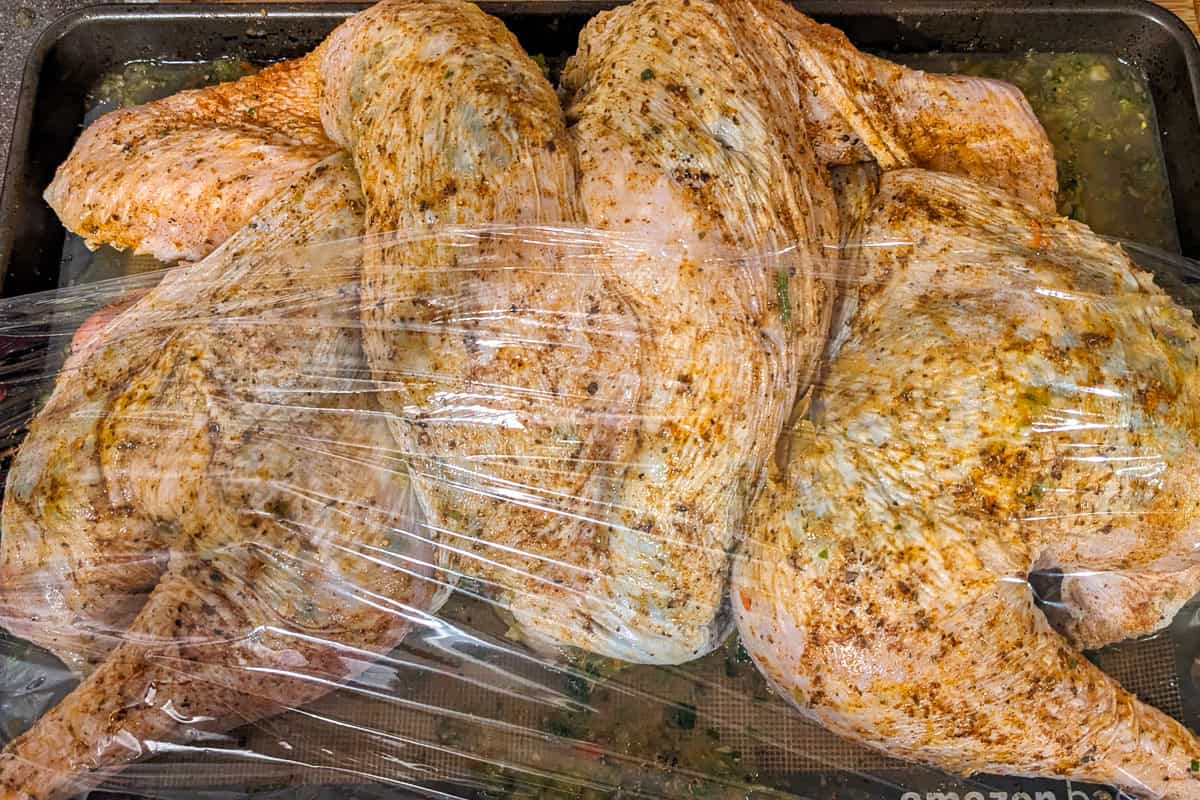
Table of Contents
Jump to:
- Chef Maika's Roasted Turkey Recipe
- Why Spatchcock the Turkey?
- Ingredients with Steps
- Culinary Glossary
- Instructions with Pictures
- Equipment
- Kitchen Must-Haves Reviews
- Storage Instructions
- Substitutions
- 5 Cooking Tips
- Frequently Asked Questions
- More Haitian Recipes
- Cooking Tips and Tutorials
- 📖 Recipe
- Have a Comment or Question?
Chef Maika's Roasted Turkey Recipe
Every Thanksgiving, I like to season my turkey in a way that feels true to my kitchen's bold aromatics, fresh citrus, and the savory depth of Haitian epis. This Haitian-style spatchcock Turkey is my version of a holiday roast.
It isn't an authentic Haitian recipe, but an inspired interpretation that highlights epis, bright lemon juice, and herbs to create a turkey that's juicy, flavorful, and simple to prepare.
Why Spatchcock the Turkey?
Spatchcocking the turkey on a sturdy cutting board helps the bird roast more evenly and much faster than a traditional whole turkey. Because the breast meat and dark meat lie flat, the heat circulates evenly, allowing the turkey to cook at high heat without drying out. You get beautifully browned skin and perfectly cooked breast meat in less time.
Flavorful Gravy
Another benefit of this method is that it naturally builds the base for a rich, flavorful gravy. By roasting the backbone and aromatics in a separate pan at the same time, you enhance the drippings with herbs, roasted notes, and a touch of sweetness, making it easy to create a silky gravy without relying on heavy thickeners like tomato paste unless you want the added depth.
Bold Seasonings
Citrus plays a big role in this recipe, too. A light rub of lemon juice (and even a little lemon zest if you'd like) brightens the meat before seasoning, helping the epis cling to the skin while enhancing the final flavor. Once the turkey is roasted and removed from the oven, allowing it to rest under aluminum foil gives the juices time to redistribute, ensuring every slice stays tender.

Check Out: My articles on Zesting and How to Use a Citrus Squeezer for Max Juice.
Benefits of Having Epis as a Staple
And if you keep a jar of epis in your fridge, this entire recipe becomes even easier. Epis is one of the most versatile flavor bases you can keep on hand. You can use it to marinate meat, season vegetables, build sauces, and add instant depth to rice dishes. It's the kind of all-purpose seasoning that takes the stress out of holiday cooking.

This recipe brings all of those elements together into a turkey that's aromatic, citrus-forward, and a little bit faster and more convenient than the traditional roast-perfect for any holiday celebration.
Why You'll Like It
- For Everyone: Beginner-friendly technique with reliable internal temperature cues for perfect doneness.
- Even Cooking: Spatchcocking shortens the roasting time and helps the turkey cook evenly.
- Robust Flavor: Bold Haitian-inspired flavors bring brightness and depth without overwhelming the dish.
- Epis, lemon juice, and herbs create a vibrant, savory seasoning base.
- Keeping epis in the fridge saves time for quick marinating, seasoning vegetables, or boosting rice and sauces.
- Beneficial Techniques: High-heat roasting gives you beautifully browned skin and juicy breast meat.
- The gravy practically makes itself thanks to flavorful roasted drippings and turkey trimmings.
- Moist Turkey: Resting the turkey under aluminum foil guarantees tender slices with no dryness.
Recommended Reads
- Spatchcock Turkey Backbone Gravy (Mirepoix & Haitian Spices)
- Stovetop Garlic Confit (Easy Butter-Olive Oil Method)
- Green Seasoning Recipe | Epis - Haitian Style
- How to Spatchcock a Chicken: Easy Step-by-Step Guide
- Easy Roasted Curry Spatchcocked Chicken and Vegetables
- How to Make Smothered Salmon Burgers | Salisbury Steak Style
- Roasted Calabrian Pepper Spatchcocked Chicken & Vegetables
Ingredients with Steps
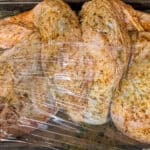
To make this Haitian-style spatchcock Turkey, start by placing the turkey on a sheet pan with a rack, tucking the wing tips underneath, and rubbing it with optional citrus before patting it dry.
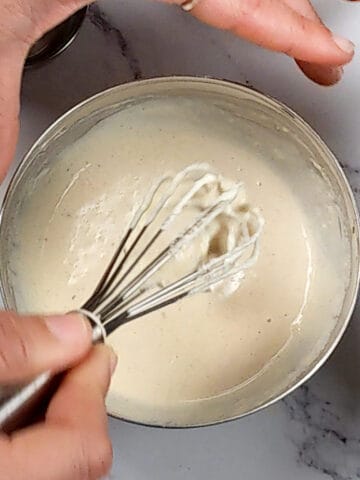
Mix a marinade of Haitian epis, garlic, rosemary, thyme, olive oil, butter, black pepper, paprika, lemon juice, and orange juice, then gently spread it only under the skin while seasoning the top with Creole seasoning for browning.
Roast the turkey at 400°F on the rack with broth in the pan, and roast the backbone, aromatics, and herbs in a separate pan to build flavor for the gravy. Cook until the internal temperatures reach 165°F in the breast and 175°F in the thighs, then let the turkey rest while saving the drippings to make your gravy.
Culinary Glossary
This section concisely defines key ingredients and techniques related to this post to enhance understanding and improve cooking skills.
Ingredients
- Epis: A Haitian seasoning blend made from herbs, aromatics, and peppers; used to marinate meats, flavor sauces, and season vegetables.
- Creole Seasoning: A spice blend with herbs, paprika, garlic, and pepper is used to add color and flavor to the skin during roasting.
Techniques
- High-Heat Roasting: Cooking at a higher oven temperature (such as 400°F) to promote browning and crisp skin while keeping the interior juicy.
- Spatchcocking: A technique where the backbone is removed so the turkey can be flattened for faster, more even roasting. Learn more about How to Spatchcock a Chicken: Easy Step-by-Step Guide for Juicy, Even Cooking.
- Render: The process of melting fat from turkey skin or trimmings as they roast, creating flavorful drippings for gravy.
- Drippings: The melted fat and juices collected from the roasting turkey, often used as the base for gravy.
- Internal Temperature: The temperature inside the thickest part of the meat, measured with a thermometer to ensure safe doneness.
- Citrus Rub: Rubbing meat with lemon or lime juice before seasoning to brighten flavor and help spices adhere.
- Aromatics: Flavor-enhancing vegetables and herbs such as onions, garlic, carrots, rosemary, and thyme, often roasted alongside meats.
- Resting Meat: Allowing cooked meat to sit before slicing so the juices redistribute, resulting in tender, moist slices.
Instructions with Pictures
Follow the instructions and cooking tips below using the step-by-step picture guide.
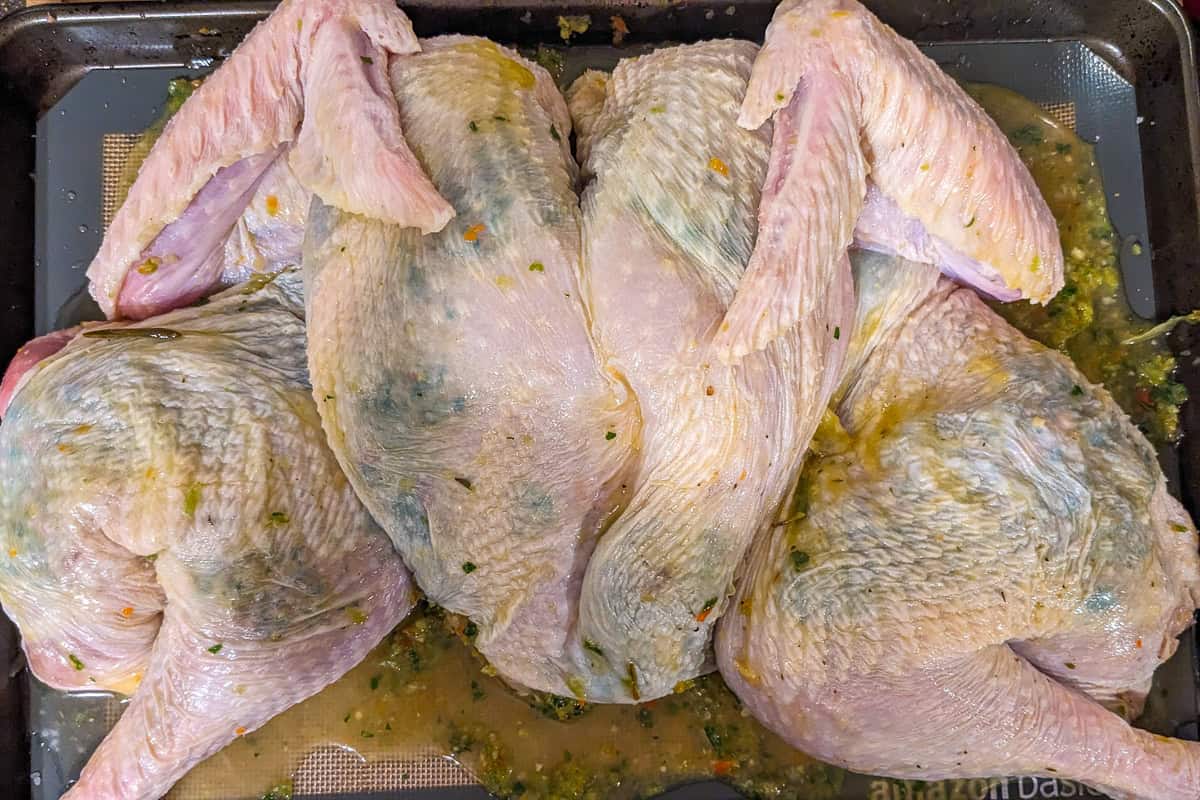
Lying the turkey flat will help with even cooking.
Notice how the wings are tucked in. This prevents burning. I will also suggest using foil to cover the bones of each leg.
Check out my Post on How to Spatchcock a Chicken: Easy Step-by-Step Guide for Juicy, Even Cooking. This can also be used for turkey.
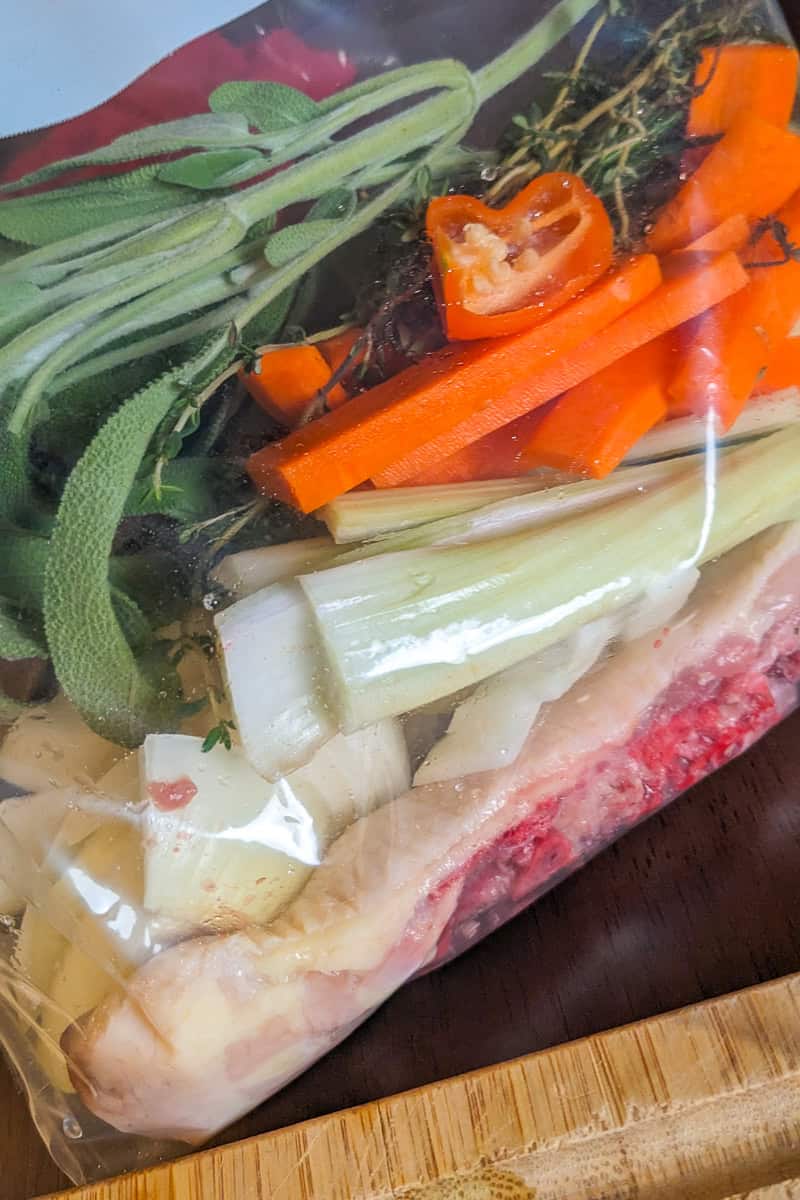
Since I prep my turkey a day in advance, I create a sealable bag full of ingredients for the gravy that includes the turkey's backbone, which was removed.
Equipment
Here's what you'll need to make this recipe with ease:
- Cutting board - for prepping the turkey and removing the backbone.
- Kitchen shears or a sharp chef's knife - essential for spatchcocking the turkey.
- Paper towels - to pat the turkey dry before seasoning.
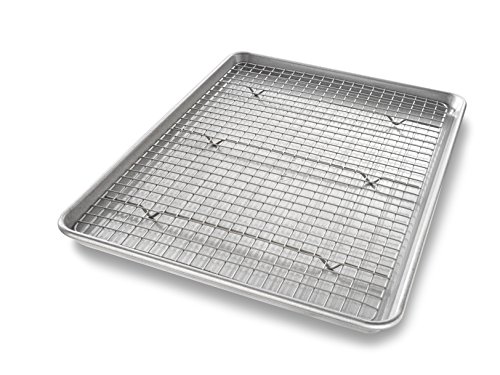
- Sheet pan with a wire rack - for even roasting and crisping the skin.
- Second sheet pan - for roasting the backbone and aromatics to build gravy flavor.
- Mixing bowl - for preparing the marinade.
- Basting brush or spoon - optional, but useful for spreading seasoning under the skin.
- Aluminum foil - for tenting the turkey while it rests.
- Instant-read thermometer - to ensure the turkey reaches a safe internal temperature.
- Heatproof container or fat separator - for collecting and straining pan drippings used in the gravy.
Kitchen Must-Haves Reviews
Find a collection of my reviews of kitchen equipment that I have purchased or recommend. Kitchen Must-Haves - Find other tools I use here.
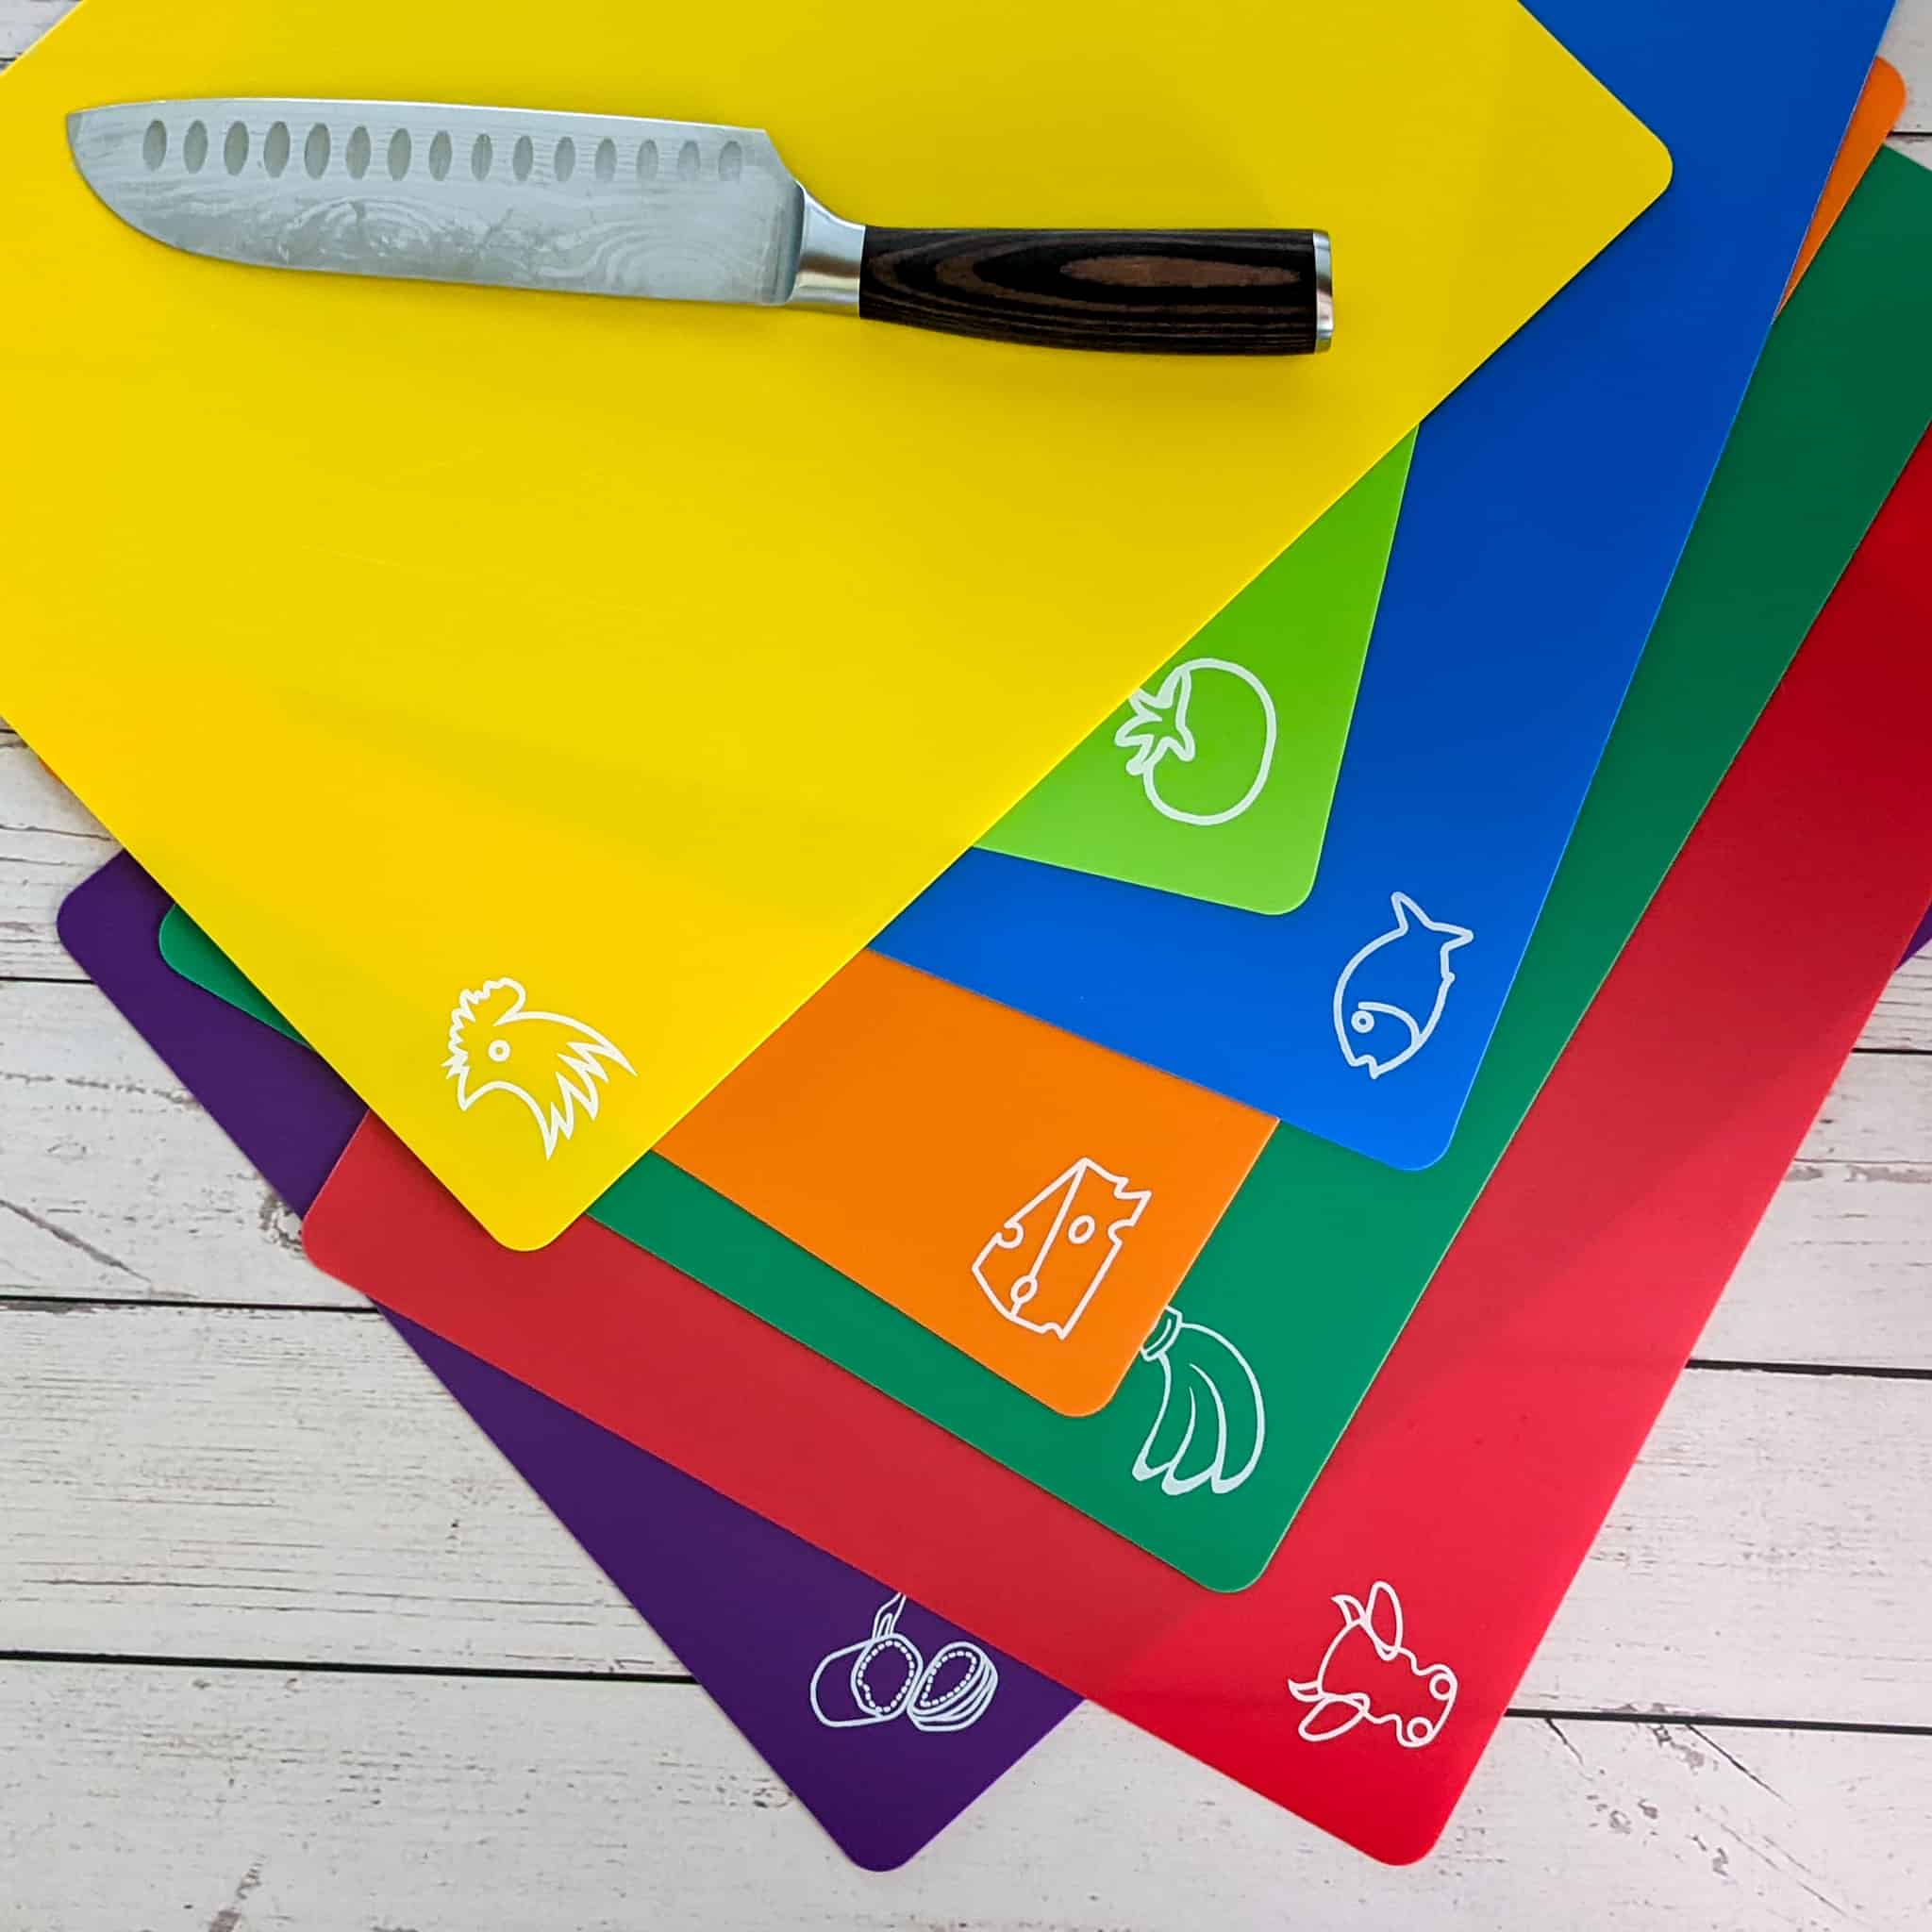
My Review: I’ve used these Fotouzy Cutting Board Mats for a long time, and while they’re flexible, dishwasher-safe, and great for preventing cross-contamination with their color coding, I now prefer solid plastic cutting boards. They’re BPA-free, non-porous, and wide enough to protect my wooden board, especially handy when zesting or transferring ingredients. That said, they don’t stay perfectly steady, even with a damp towel underneath, so I give them a 4 out of 5. But I still use it a lot for quick meat and veggie preps and place them right in the dishwasher.
My Review: The PAUDIN 8-inch Chef Knife is an absolute standout in both sharpness and craftsmanship. It stays incredibly sharp through regular use, making prep work effortless. The high-carbon stainless steel blade showcases PAUDIN’s attention to detail, while the ergonomic handle provides a comfortable grip for extended use. Despite its premium feel, this knife is impressively affordable, offering exceptional quality without the high price tag. That’s why I’ve recently switched all my knives to PAUDIN—they truly deliver on durability, beauty, and performance. If you want a reliable, well-crafted knife at a great value, this is the one to get!

My Review: The USA Pan Bakeware Half Sheet Baking Pan and Nonstick Cooling Rack Set is such a smart buy, it’s incredibly convenient to have both the pan and rack come together as a set. You never know when you’ll need the rack for roasting, cooling, or glazing, and having it perfectly fitted to the pan saves so much time and hassle. The pan itself is super sturdy with excellent heat distribution, and the nonstick rack makes cleanup a breeze. I’ve used it for everything from baking cookies to roasting vegetables and even draining fried foods. It’s one of those kitchen upgrades that just makes life easier.
My Review: I love the clean, classic look of this Pyrex 3-piece glass mixing bowl set. It’s a staple in my kitchen. Pyrex is known for its durability, and these bowls definitely live up to that reputation. I use them for everything from mixing batters to storing leftovers, and the fact that they’re microwave-safe makes them super multifunctional. They’re also easy to clean and stack nicely in the cabinet. The only reason this isn’t a five-star for me is because I always have that little fear of breaking them when I’m using or storing them, even though they’re made to last.
My Review: I finally used the ThermoWorks Square Dot®, and it's as great as my colleagues said. It's precise and easy to use, and America's Test Kitchen recommends it. ThermoWorks even provides helpful care and usage guides, so it earns a 5 out of 5 from me. The Square Dot® is perfect with dual temperature tracking and a clear display, making it easy to monitor both food and oven temperatures for accurate cooking.

Storage Instructions
Learn how to properly store leftovers so they stay fresh and flavorful. Learn more about Understanding Food Temperature Safety Zones: Cook, Store & Serve Safely.
Refrigerator (3-4 Days):
- Allow the turkey to cool for about 20-30 minutes after carving.
- Store the turkey in airtight containers or wrap tightly with foil.
- Keep dark meat and breast meat stored separately if possible, so reheating stays even.
- Save the gravy in a separate airtight container; it will thicken as it chills.
Freezer (Up to 3 Months):
- Freeze the gravy in small containers or silicone cubes so you can thaw just what you need.
- Slice the turkey into portions for easier thawing and reheating.
- Store in freezer-safe bags or containers, removing as much air as possible.
- Label with the date for easy tracking.
Substitutions
Find easy ingredient swaps to fit dietary needs or what you already have in your pantry.
Dairy-Free
- Unsalted Butter: You can substitute the butter with an equal amount of olive oil or avocado oil for a dairy-free option that still helps the skin brown beautifully.
Gluten-Free
- Yay! This recipe is already dairy-free.
Vegetarian
- Turkey: This recipe doesn't have a true vegetarian alternative, since the technique and flavors are built specifically around roasting a whole turkey.
Convenience
- Turkey: Replace with a whole chicken or spatchcocked chicken; reduce roasting time to about 45-60 minutes.
- Epis: Use a quick garlic, onion, olive oil, and herb paste if you don't have epis.
- Fresh Herbs (rosemary/thyme): Substitute with dried herbs using 1 teaspoon dried for every 1 tablespoon fresh.
- Citrus (lemon/orange juice): Use apple cider vinegar or white vinegar in half the amount.
- Paprika: Substitute with chili powder, smoked paprika, or a pinch of cayenne for color and warmth.
- Creole Seasoning: Replace with Cajun seasoning or seasoned salt, adjusting salt levels to taste.
- Olive Oil: Swap with avocado oil, canola oil, or vegetable oil in equal amounts.
- Chicken Broth: Use water mixed with salt, pepper, and dried herbs to mimic broth.
- Garlic Cloves: Substitute each clove with ½ teaspoon garlic powder. Or use my Stovetop Garlic Confit (Easy Butter-Olive Oil Method) recipe to season under the skin.
- Fresh Citrus Zest: Use 1 teaspoon bottled lemon juice for brightness when you don't have fresh zest.
Change Heat Level - Modify the recipe's heat level to your liking and learn more about the Scoville Scale and Chili Pairings.
5 Cooking Tips
Cook's Notebook is your Cooking Tips Resource Guide. Become a better home cook with tips to help you cook more efficiently.
- Even Browning: Keep the skin dry after using lemon or lime so the seasoning sticks and the skin browns evenly.
- Be Gentle: Loosen the skin gently with your fingers to spread the epis underneath without tearing it.
- Avoid Overcooking: Use an instant-read thermometer to check the internal temperature in the thickest part of the breast and thigh to avoid overcooking.
- Golden Brown: Roast at high heat to achieve golden, crisp skin while keeping the breast meat juicy.
- Keep Moist: Let the turkey rest under foil for at least 20 minutes to redistribute the juices before carving.
Frequently Asked Questions
Here is a list of common questions I have answered. If you have any questions, please write them in the comments below.
Yes. You can season the turkey under the skin and refrigerate it overnight, which actually improves the flavor.
Use an instant-read thermometer and check that the internal temperature reaches 165°F in the breast and 175°F in the thighs.
Yes. You can create a quick substitute by blending garlic, onion, herbs, olive oil, and a splash of citrus.
Absolutely. The same method works perfectly for a spatchcocked chicken, just reduce the cook time to 45-60 minutes.
No. The spatchcock method and high heat ensure even browning without basting.
More Haitian Recipes
Looking for other Haitian-inspired recipes like this? Try these:
- Instant Pot Collard Greens with Smoked Turkey
- How to Cook Perfect Jasmine Rice in a Rice Cooker
- Baked Haitian Macaroni and Cheese (Makawoni au Graten)
- Haitian American Thanksgiving Recipes & Prep Guide

Cooking Tips and Tutorials
If you found this tutorial helpful, you'll love my Cook's Notebook collection. From knife skills and flavor bases to time-saving tricks and essential equipment guides, this section is packed with chef-tested lessons to help you cook with confidence.
- Spring Seasonal Produce Guide: What to Cook Fresh This Season
- Best Food Audiobooks for Chefs & Home Cooks
- Winter Seasonal Produce Guide: What's In Season
- What Is HACCP and Why Every Home Cook Should Care About It

📖 Recipe
Haitian Style Spatchcock Turkey (Seasoned with Epis)
Ingredients
- 12 pounds whole turkey ≈12-14 lbs, patchcocked (backbone removed and flattened
- ½ cup Haitian epis seasoning
- 2 tablespoons Creole seasoning preferred salt-free
- 4 cloves garlic minced
- 2 tablespoons fresh rosemary chopped (or 1 teaspoon dried)
- 2 tablespoons fresh thyme leaves 1 teaspoon dried
- ¼ cup olive oil
- 2 tablespoons unsalted butter softened
- ½ teaspoon ground black pepper
- ½ teaspoon paprika Spanish (smoked) or Hungarian. (optional, for color)
- 1 lemon juiced
- 1 orange juiced
- Salt to taste optional, depending on Creole seasoning
- 1 cup low-sodium chicken broth
Served With
Equipment
- Kitchen Shears or Kitchen Knife
- Paper Towels for patting turkey dry
- Mixing Bowl small one to combine seasoning
- Aluminum Foil
- Alarm Baking Thermometer or Instant-Read Thermometer
Instructions
- Save Time in the Kitchen: Read the instructions thoroughly, then gather and prep all your ingredients before cooking! Learn Prepping Tips.
- Prepare the Turkey: Place the spatchcocked turkey on a large sheet pan fitted with a wire rack. Optional: lightly rub the turkey all over with fresh lime or lemon to help neutralize odors, then pat it completely dry with paper towels. Keeping the skin dry helps the seasoning stick and encourages browning. Tuck the wing tips underneath the breast area to prevent burning during roasting.
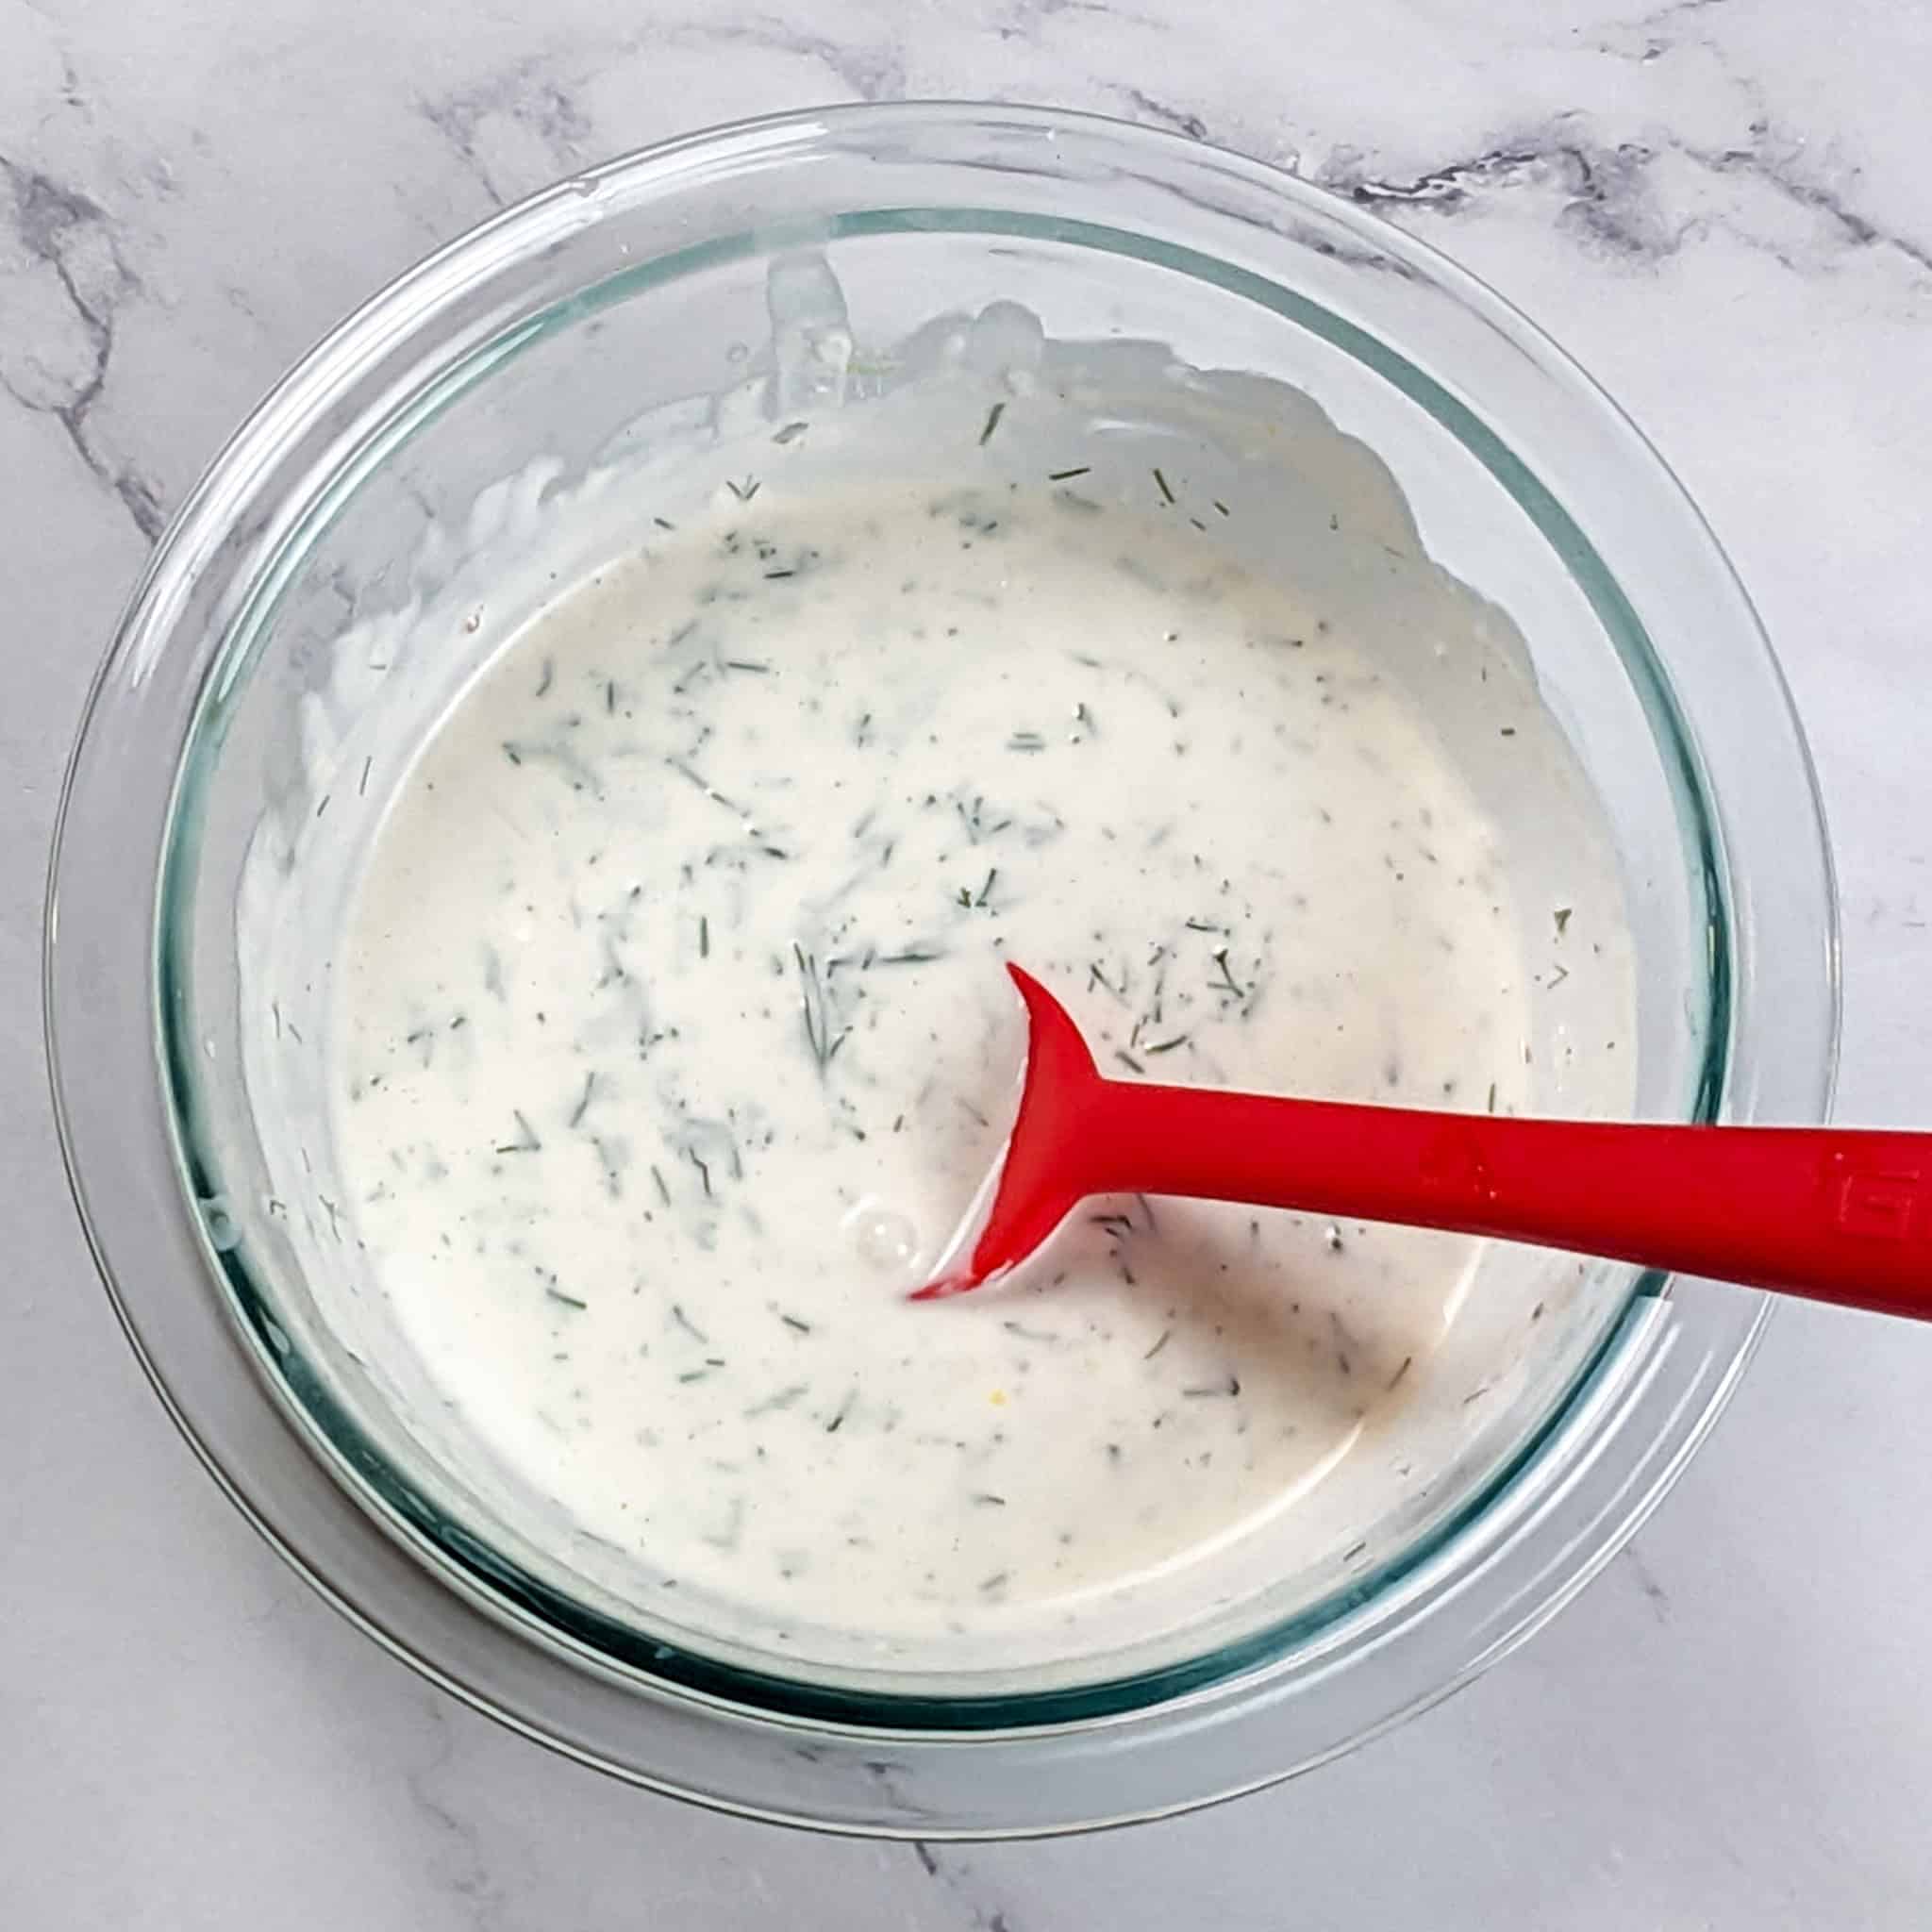
- Make the Marinade: In a bowl, mix together the Haitian epis, minced garlic, rosemary, thyme, olive oil, softened butter, black pepper, paprika (if using), and the lemon and orange juices until it forms a paste.
- Season the Turkey: Gently loosen the skin over the breasts and thighs, and spread the marinade only under the skin and inside the cavity area if desired. Lightly season the top of the skin with Creole seasoning to help with browning and color.
- Refrigerate the turkey to marinate, preferably overnight or for several hours. (Do not marinate at room temperature.)
- Preheat the Oven: Preheat the oven to 400 °F. Keep the turkey refrigerated until the oven is ready, then transfer it directly to the oven.
- Roast the Turkey: Place the turkey, still on the wire rack, into the oven. Pour chicken broth (or water) into the bottom of the pan to prevent drippings from burning.
- Optional but recommended: Place the backbone, any turkey trimmings, onions, garlic, and herbs on a separate sheet pan and roast alongside the turkey. These will deepen the flavor of the gravy.
- Roast for 1.5-2 hours, or until the thickest part of the breast reaches 165 °F and the thighs reach 175 °F. (No basting needed.)
- Rest and Save the Drippings: Remove the turkey from the oven and let it rest for 20 minutes before carving so the juices can settle. Pour or scrape the drippings from the roasting pan into a heatproof container. These will be used to make the gravy.
Video
Notes
- Visit: How to Spatchcock a Chicken: Easy Step-by-Step Guide for Juicy, Even Cooking
- For extra flavor, reserve the pan drippings and make a gravy by whisking them with flour and broth over medium heat. Find the Spatchcock Turkey Backbone Gravy (Mirepoix & Haitian Spices) here.
- If you don't have a roasting rack, use chopped onions, carrots, and celery to elevate the turkey in the pan. This also enhances the drippings for gravy.
- Dried rosemary can be strong, so if you prefer milder herb notes, use ½ teaspoon instead of the full teaspoon.
- Rub dried herbs between your fingers before adding them to release their oils.
Nutrition
Subscribe to the YouTube Channel
SUBSCRIBE: 👈To my YouTube Channel to Get Notifications of New Videos.


Chef Maika Frederic-Liebman
Chef and Educator
Haitian-American chef and educator Maika Frederic blends bold flavors with approachable recipes. With a background in professional kitchens, classrooms, and children's therapy, she brings a thoughtful, inclusive touch to every dish as a trained chef, former teacher, and technician. Through her platform, Just Maika Cooking, she shares diverse meals and practical tips to empower home cooks of all ages and levels.
Have a Comment or Question?
If you have a question or comment about this post, please post it below. You will definitely get a quick response. It also helps our other readers to stay informed. Thanks!
Leave a Reply